Remember that crisp morning last spring? I was finally tracking down that elusive Prothonotary Warbler I’d been chasing for weeks. I’d found him, perched on a low branch, but my photos were a blurry mess! Between the weight of my camera and lens, and the slight breeze, hand-holding just wasn’t cutting it. I knew right then, I needed a serious upgrade – something to give me rock-steady shots and let me truly appreciate those fleeting moments. It sent me on a deep dive into the world of tripods, and I quickly realized that not all tripods are created equal, especially when you’re specifically looking for the best tripods for birding.
Finding the right support system can be the difference between capturing stunning, frame-worthy images and a frustrating collection of blurry memories. So, if you’re tired of wobbly photos, aching arms, or missing that perfect shot because your equipment isn’t up to the task, you’re in the right place. This guide is designed to walk you through everything you need to know to choose the ideal tripod for your birding adventures, from understanding essential features to in-depth reviews of top-rated models. Get ready to elevate your bird photography game!
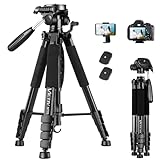
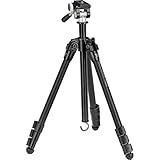
Before moving into the review of the best tripods for birding, let’s check out some of the relevant products from Amazon:


Last update on 2025-11-27 / #ad / Affiliate links / Images from Amazon Product Advertising API
Why Birders Need the Best Tripods: A Steady Hand Isn’t Always Enough
Ever been there? You’re trekking through a beautiful meadow, the sun is just cresting the horizon, and you hear it – the distinctive call of a rare warbler. You quickly raise your binoculars, trying to pinpoint the sound, and then you see it! But… your hands are shaking. The bird darts away, and all you have is a blurry memory. It’s a common story among birders, and it highlights why having the right equipment, particularly the best tripods for birding, can be a game-changer.
Think of a tripod as the steady hand you sometimes wish you had, especially when magnification levels increase. Birding optics, whether binoculars or spotting scopes, often feature high magnification. According to research, the average binocular used by birders has a magnification of 8x or 10x. At those levels, even slight movements are amplified, making it difficult to get a clear view. A good tripod will eliminate those shakes, letting you focus on the intricate details of your feathered friends.
Beyond just steadying your view, the best tripods for birding also offer unparalleled comfort and convenience during long observation sessions. Imagine spending hours tracking a migratory bird through a dense forest. Holding binoculars or a spotting scope that whole time? Exhausting! A tripod allows you to set up your optics, relax, and patiently wait for that perfect shot or simply enjoy the view without straining your arms and back.
Ultimately, choosing from the best tripods for birding comes down to maximizing your enjoyment and success in the field. It’s an investment in clearer views, more comfortable birding excursions, and ultimately, a deeper connection with the avian world. So, let’s dive in and explore what to look for in a tripod that will elevate your birding experience.
Best Tripods For Birding – Reviewed
Gitzo GT3543LS Systematic Series 3 Carbon Fiber Tripod
The Gitzo GT3543LS is a powerhouse for birders demanding uncompromising stability. Its carbon fiber build makes it surprisingly lightweight for its robust construction, a huge plus when you’re trekking through the woods all day. The systematic design allows you to swap out the center column for different accessories, like a leveling base for smooth panning, adding to its versatility.
The impressive load capacity ensures your valuable optics will be rock solid, even with a long telephoto lens attached. While it might represent a significant investment, its durability and performance make it a long-term companion for serious bird photography. Its smooth operation and quick setup make capturing that fleeting shot of a rare warbler a breeze.
Benro TMA37AL Series 3 Mach3 Aluminum Tripod
For birders looking for a blend of stability and affordability, the Benro TMA37AL is a solid choice. Its aluminum construction provides excellent rigidity, keeping your scope steady in windy conditions. The Mach3 series is known for its sturdy leg locks and smooth operation, making it quick and easy to set up, which is essential when a bird suddenly appears.
This tripod’s robust build can handle heavier optics without breaking the bank. While it might not be as lightweight as a carbon fiber option, its durability and reliable performance make it a dependable tool for birding in various environments. It’s a great option for those starting to get more serious about their birding photography and need something that will last.
Manfrotto 055XPROB Aluminum Tripod
The Manfrotto 055XPROB is a classic for a reason. Its versatile center column can be positioned horizontally, allowing for unique shooting angles, perfect for capturing birds low to the ground. The sturdy aluminum construction provides a stable platform for your optics, even with larger lenses, ensuring sharp images.
This tripod is a workhorse known for its reliability and ease of use. The quick-release leg locks make setup a breeze, and the built-in level helps you keep your shots straight. While it’s not the lightest option, its robust build and versatile features make it a popular choice among birders who prioritize stability and flexibility.
Peak Design Travel Tripod (Carbon Fiber)
Don’t let the name fool you; the Peak Design Travel Tripod is more than just a travel companion. Its innovative design packs down incredibly small, making it easy to carry on long hikes or when traveling internationally to see different species. Despite its compact size, it offers surprising stability for its weight.
The carbon fiber version offers even more weight savings, making it ideal for birders who prioritize portability. The quick-release plate system is incredibly intuitive, allowing you to quickly attach and detach your optics. This tripod is a perfect balance of portability, stability, and ease of use, making it a great choice for birders on the go.
Slik Pro 700 DX Tripod
If you are looking for a basic sturdy tripod that won’t break the bank the Slik Pro 700 DX is a good option. While it does not have any advanced features such as carbon fiber legs or fancy locks, it will be a reliable workhorse.
The Slik Pro 700 DX will perform admirably in most environments. Birders that do not want to spend a lot of money on a tripod would be very happy with this option. Its legs are easy to adjust, and its construction is very sturdy.
Unlock Stunning Bird Photos: Why You Need a Tripod for Birding
Imagine you’re finally tracking that elusive warbler through the dense canopy. You raise your binoculars, a flutter of yellow catches your eye, and you swing your camera into action. But the image on your screen is shaky, the details are blurred, and the fleeting moment is lost to a disappointing photo. This frustrating scenario is all too common for birders, and it highlights the crucial role a good tripod plays in capturing stunning avian images. It’s not just about steadying your camera; it’s about maximizing the potential of your equipment and capturing details you never thought possible.
Think about the times you’ve struggled to hold your binoculars or spotting scope steady for more than a few seconds, especially when zoomed in. The slightest movement translates into significant blur, hindering your ability to identify and appreciate the intricate patterns of a bird’s plumage. A tripod eliminates this problem, providing a rock-solid platform for extended observation. Using the best tripods for birding helps you focus on enjoying the experience, rather than fighting against shaky hands and fatigue.
Furthermore, many birding situations require slow shutter speeds, especially in low-light conditions or when using telephoto lenses. These slower speeds drastically increase the risk of camera shake. With a tripod, you can confidently use these settings, allowing more light to reach your camera’s sensor and capturing brighter, sharper images with greater detail. You’ll be amazed at the difference a steady shot makes, revealing subtle nuances in color and texture that would otherwise be lost.
Investing in one of the best tripods for birding is like unlocking a new level of photographic potential. It frees you from the constraints of handheld shooting, allowing you to capture breathtaking bird photos that truly reflect the beauty and wonder of the avian world. It allows you to capture crisp, clear photos of your favorite feathered friends that you will be able to cherish for years to come!
Understanding Tripod Heads: The Key to Smooth Bird Tracking
Choosing the right tripod head is like picking the perfect steering wheel for your car. It directly impacts how smoothly you can follow birds in flight. A jerky head will ruin your viewing experience and frustrate any attempts to capture sharp photos. Imagine trying to track a hummingbird darting around a flower with a stiff, resistant head – impossible! You’ll want a head that allows for fluid, controlled movements to easily keep your binoculars or spotting scope trained on your target.
There are a few main types of tripod heads favored by birders: pan-tilt heads, ball heads, and fluid heads. Pan-tilt heads offer separate controls for horizontal (panning) and vertical (tilting) movements, giving you precise control, but can be slower to adjust. Ball heads are known for their flexibility and speed, allowing you to quickly re-frame your shot, but might lack the smoothness of fluid heads. Fluid heads are specifically designed for smooth, cinematic panning and tilting, making them ideal for video and steady viewing of moving birds.
When considering a tripod head, pay attention to its load capacity. This refers to the maximum weight it can safely and effectively support. Exceeding the load capacity can lead to instability, damage to your equipment, and shaky images. It’s always better to err on the side of caution and choose a head with a higher load capacity than you think you’ll need, especially if you plan on using heavier spotting scopes or binoculars.
Finally, consider the locking mechanism. Is it easy to use, even with gloves on? Can you quickly lock and unlock the head without causing jerky movements? A good locking mechanism will keep your equipment securely in place and prevent accidental drops, a scenario nobody wants to experience while out in the field, especially in muddy or uneven terrain.
Leg Materials and Stability: What to Consider
The legs of your tripod are the foundation of your birding setup, so choosing the right material and design is crucial for stability. Imagine trying to photograph a perched owl on a windy day with flimsy legs – the resulting images would be blurry and unusable. The goal is to find legs that are both lightweight and strong, providing a stable platform for your binoculars or spotting scope.
Aluminum is a popular choice for tripod legs due to its affordability and durability. Aluminum tripods are generally less expensive than carbon fiber options and can withstand a good amount of wear and tear. However, aluminum is heavier than carbon fiber, which can be a drawback if you frequently hike long distances to reach your birding spots. Think of it as the reliable workhorse of tripod materials.
Carbon fiber tripods are favored for their lightweight nature and excellent vibration dampening properties. Carbon fiber absorbs vibrations better than aluminum, resulting in sharper images, especially in windy conditions. While more expensive than aluminum, the weight savings and performance benefits can be worth the investment for serious birders who prioritize portability and image quality.
Beyond material, consider the leg locking mechanism. Flip locks are generally faster to operate, while twist locks offer a more streamlined profile. Experiment with both types to see which you prefer. Also, pay attention to the leg sections. More leg sections allow for a more compact folded size, but can potentially compromise stability. A tripod with fewer, thicker leg sections will generally be more stable. Imagine trying to set up your tripod quickly as a rare warbler flits through the trees – a fast and reliable locking mechanism is key!
Essential Accessories: Enhancing Your Birding Tripod
While a good tripod and head are the core of your birding setup, several accessories can significantly enhance your experience. Think of them as the add-ons that take your birding from good to great. For example, a comfortable carrying strap can make a huge difference when you’re hiking several miles to reach a prime birding location.
A quick-release plate is a must-have accessory. It allows you to quickly and easily attach and detach your binoculars or spotting scope from the tripod head. Imagine fumbling with screws and knobs while a bald eagle soars overhead – a quick-release plate lets you get set up in seconds, ensuring you don’t miss the shot. Look for a plate that is compatible with your tripod head and features a secure locking mechanism.
Another helpful accessory is a bubble level. This small device helps you ensure that your tripod is perfectly level, which is essential for capturing panoramic images and preventing your spotting scope from drifting. A bubble level can be especially useful when birding on uneven terrain. Picture yourself trying to identify a distant shorebird on a sloping beach – a level tripod will prevent eye strain and improve your viewing experience.
Finally, consider investing in a tripod case or bag. This will protect your tripod during transport and storage, preventing scratches and damage. A good case will also make it easier to carry your tripod, especially if it features a shoulder strap or backpack-style design. Imagine tossing your expensive tripod into the trunk of your car without a case – it’s only a matter of time before it gets dinged up! A case is a small investment that can significantly extend the lifespan of your tripod.
Tripod Maintenance: Keeping Your Gear in Top Shape
Like any piece of equipment, your birding tripod requires regular maintenance to keep it performing at its best. Think of it as giving your car a regular tune-up – it ensures smooth operation and prevents costly repairs down the road. A little bit of care can significantly extend the life of your tripod and ensure that it remains a reliable companion on your birding adventures.
The most important maintenance task is cleaning your tripod after each use, especially if you’ve been birding in muddy or sandy conditions. Dirt and grit can get into the leg locks and other moving parts, causing them to become stiff and difficult to operate. Imagine trying to extend the legs of your tripod on a cold morning, only to find that they’re frozen solid with mud – not a fun experience!
To clean your tripod, simply wipe it down with a damp cloth. For stubborn dirt, you can use a mild soap and water solution. Be sure to dry the tripod thoroughly before storing it to prevent corrosion. Also, periodically check the leg locks and other moving parts for signs of wear and tear. Lubricate them with a small amount of silicone grease to keep them moving smoothly.
Finally, store your tripod in a dry, dust-free environment when not in use. A tripod case or bag can help protect it from the elements. By following these simple maintenance tips, you can keep your tripod in top shape and ensure that it’s always ready for your next birding adventure. Imagine having to replace your tripod after only a few years because you neglected to clean it – a little bit of maintenance can save you a lot of money in the long run.
Best Tripods For Birding: A Buyer’s Guide
Hey fellow bird enthusiasts! Choosing the right tripod can be a game-changer for your birding experience. Forget shaky images and tired arms – with the best tripods for birding, you’ll capture stunning shots and enjoy hours of comfortable viewing. This guide is here to help you navigate the world of tripods and find the perfect match for your needs and budget. Think of me as your friendly birding buddy, offering advice to help you make the best choice. Let’s dive in!
Stability: Your Rock-Solid Foundation
Let’s face it, the whole point of a tripod is stability. You need a foundation that won’t budge, especially when you’re using a long telephoto lens. A flimsy tripod will translate every little vibration into blurry images. Think of it like building a house; you wouldn’t want to build on sand, would you? A sturdy tripod will allow you to use slower shutter speeds in lower light conditions, giving you sharper images and capturing more detail. It also helps with video, ensuring smooth pans and tilts.
Imagine you’ve finally spotted that elusive Painted Bunting you’ve been searching for. You set up your flimsy tripod, and as you try to focus, the slightest breeze sends it wobbling. The bunting flies away, and you’re left with blurry, unusable photos. Don’t let that happen! Invest in a stable tripod, and you’ll be ready to capture those fleeting moments with crystal clarity. Prioritize a tripod made from sturdy materials like carbon fiber or aluminum, and pay attention to the leg locking mechanisms. Secure locks mean less slippage and a more stable platform.
Weight: Finding the Sweet Spot
Weight is a crucial factor to consider, especially if you plan on hiking to your birding locations. A heavy tripod might be incredibly stable, but lugging it around all day can quickly become a burden. On the other hand, a super lightweight tripod might compromise stability, defeating the purpose. Finding the right balance between weight and stability is key. Think about the type of birding you do most often. Do you mostly stay close to your car, or do you venture deep into the wilderness?
If you’re a dedicated hiker, a carbon fiber tripod might be worth the investment. Carbon fiber is incredibly strong and lightweight, making it ideal for long treks. But if you mostly bird from established locations, a slightly heavier aluminum tripod might be a more budget-friendly option. Consider the overall weight of your gear as well. A large, heavy lens will require a more robust tripod than a small, lightweight spotting scope. Remember, the best tripods for birding are the ones you’ll actually use!
Height: Comfort is Key
Nobody wants to hunch over or strain their neck while birding. Make sure the tripod you choose is tall enough to bring your camera or spotting scope to eye level without extending the center column too much. Extending the center column often reduces stability, so it’s best to avoid it if possible. Pay attention to the tripod’s maximum height and consider your own height as well.
Picture this: you’re at a beautiful wetland, eager to observe some wading birds. You set up your tripod, but it’s too short, forcing you to stoop uncomfortably for hours. Your back starts to ache, and you miss out on the joy of birding. Choosing a tripod with adjustable height will prevent these discomforts. A tripod with a center column that can be reversed is also helpful for getting low-angle shots of birds on the ground.
Leg Locks: Twist vs. Lever
Leg locks are what keep your tripod legs extended and secure. There are two main types: twist locks and lever locks. Twist locks require you to twist the leg sections to lock and unlock them, while lever locks use small levers that you flip open and closed. Both types have their pros and cons, and the best choice depends on your personal preference.
Twist locks are generally more compact and easier to clean, as there are fewer exposed parts. However, they can sometimes be more difficult to operate with gloves on. Lever locks are often faster to operate, especially in cold weather when you’re wearing gloves. But they can be more prone to damage and require more maintenance. Experiment with both types if possible to see which one you prefer. Consider how quickly you need to set up and take down your tripod in the field. For birding, speed and ease of use can be important factors when choosing the best tripods for birding.
Head Type: Smooth Movement Matters
The tripod head is what connects your camera or spotting scope to the tripod legs. Different head types are designed for different purposes. For birding, a fluid head or a ball head is typically the best choice. Fluid heads provide smooth, controlled movements, which are essential for tracking birds in flight. Ball heads are more versatile and allow for quick adjustments, but they might not be as smooth as fluid heads.
Imagine trying to track a fast-moving Peregrine Falcon with a jerky, unstable tripod head. It would be nearly impossible! A fluid head allows you to pan smoothly, keeping the bird in your viewfinder. Ball heads, on the other hand, are great for quickly adjusting the camera’s position when photographing perched birds. Some birders even use gimbal heads, which are designed to support heavy telephoto lenses and provide exceptional balance and smooth movement. Think about the types of birds you photograph most often and choose a head that suits your needs.
Budget: Finding the Best Value
Tripods can range in price from a few dollars to several hundred. It’s important to set a budget before you start shopping and to find the best value for your money. While it’s tempting to go for the cheapest option, remember that you often get what you pay for. A cheap tripod might save you money in the short term, but it could end up costing you more in the long run if it breaks down or fails to provide adequate stability.
Consider your budget and think about how often you’ll be using the tripod. If you’re a serious birder who uses a tripod regularly, it’s worth investing in a higher-quality model. If you’re just starting out, a mid-range tripod might be a good option. Look for tripods that offer a good balance of features, stability, and durability within your budget. Remember, the best tripods for birding aren’t necessarily the most expensive ones. It’s about finding the right tripod for your needs and budget.
Portability: Easy to Carry and Store
Finally, consider the portability of the tripod. Can you easily carry it in your backpack or attach it to the side? Does it fold down to a compact size for storage? A bulky, difficult-to-carry tripod will likely stay at home, which defeats the purpose of having it in the first place. Portability is especially important if you travel frequently or hike to remote birding locations.
Think about the size and weight of the tripod when it’s folded down. Some tripods have legs that fold upwards, making them more compact. Others come with a carrying case, which makes them easier to transport and protects them from damage. Consider the type of birding you do most often. If you’re a frequent traveler, a lightweight, compact tripod is essential. If you mostly bird from established locations, portability might not be as important. But even then, it’s nice to have a tripod that’s easy to move around and store when it’s not in use.
Frequently Asked Questions
What makes a tripod specifically good for birding?
Great question! Birding tripods really need to nail a few key things. First and foremost, stability is king. You’re often using long, heavy lenses to get those close-up shots, so a sturdy base that won’t wobble in the wind is essential. Beyond that, think about height. You’ll likely be scanning the skies or fields, so a tripod that can comfortably reach your eye level without being fully extended (which reduces stability) is ideal.
Portability is also a factor, especially if you’re hiking or traveling to your birding spots. Look for a tripod that’s lightweight enough to carry easily but still robust enough to handle your equipment. And finally, smooth panning and tilting are crucial for tracking those fast-moving birds, so a good tripod head designed for fluid movement is a must-have.
How important is the tripod head, and what type should I get?
The tripod head is absolutely crucial! It’s the connection point between your tripod legs and your camera/lens, and it’s what allows you to aim and track birds smoothly. A wobbly or jerky head will make it nearly impossible to get those sharp, in-focus shots, especially at high magnifications.
For birding, you’ll generally want to choose between a fluid head or a gimbal head. Fluid heads offer smooth panning and tilting, making them great for video and still photography of moving subjects. Gimbal heads, on the other hand, are designed to support very heavy lenses and allow for effortless, balanced movement, which is perfect for tracking birds in flight. Consider the weight of your gear and your shooting style when making your decision.
Should I choose carbon fiber or aluminum for my tripod legs?
Both carbon fiber and aluminum have their pros and cons when it comes to tripod legs. Aluminum is generally more budget-friendly and quite durable, making it a solid choice if you’re just starting out or on a tighter budget. However, it can be heavier than carbon fiber and tends to absorb more vibration.
Carbon fiber is lighter, stronger, and better at dampening vibrations, which can be a huge advantage when using long lenses. The downside is that it’s typically more expensive. Ultimately, the best choice depends on your budget, how often you’ll be carrying the tripod, and how critical vibration reduction is for your birding photography.
How much should I expect to spend on a good birding tripod?
That’s a valid question! The cost of a good birding tripod can vary widely depending on the materials, features, and brand. You can find decent beginner tripods for around $100-$200, but these might not be the most stable or durable options, especially for heavier lenses.
For a higher-quality tripod that will last for years and provide excellent stability and smooth movement, you should expect to spend somewhere between $300 and $800 or even more. Remember that you’ll likely need to factor in the cost of the tripod head separately, which can add another $100-$500 depending on the type and features. It’s an investment, but one that will significantly improve the quality of your birding photos.
How tall should my tripod be?
Ideally, your tripod should reach your eye level without needing to extend the center column fully. Extending the center column too much can decrease stability, which is the opposite of what we want! To figure out the right height, measure the distance from the ground to your eye when you’re standing comfortably.
Then, look for a tripod with a maximum height that’s close to that measurement. Also, think about the type of terrain you’ll be shooting on. If you’re often on uneven ground, a slightly taller tripod might be helpful to give you some extra flexibility. Don’t forget to factor in the height of your tripod head when considering the overall height!
What are some essential accessories to consider with my tripod?
Beyond the tripod and head, there are a few accessories that can make your birding experience even better. A good tripod carrying bag is a must-have for protecting your investment and making it easier to transport. Look for one that’s padded and has comfortable straps.
Also, consider getting a quick-release plate system for your camera or lens. This will allow you to quickly attach and detach your gear from the tripod, which is especially helpful when you need to move quickly to capture a fleeting shot. Some people also find it helpful to get leg warmers for their tripod, especially when shooting in cold weather.
How do I ensure my tripod is stable, especially in windy conditions?
Stability is key for sharp birding photos! First, make sure your tripod legs are fully extended and locked securely. Spreading the legs out wider will also create a more stable base. If you’re shooting on uneven terrain, adjust the leg lengths individually to level the tripod.
In windy conditions, there are a few extra steps you can take. If your tripod has a hook on the center column, hang your camera bag or a weight from it to add extra stability. You can also try lowering the tripod to reduce its profile and catch less wind. Finally, using a remote shutter release or the camera’s self-timer can help eliminate any camera shake caused by pressing the shutter button.
Final Thoughts
So there you have it – a comprehensive look at some of the best tripods for birding, plus a guide to help you choose the perfect one for your needs. Hopefully, you’re now feeling empowered and ready to take your birdwatching to the next level! Remember, the right tripod is an investment in sharper images, steadier views, and a more enjoyable experience out in the field. Don’t get bogged down in indecision; focus on what matters most to you – stability, weight, height, and budget.
Now, grab your binoculars, choose one of these amazing tripods, and get out there! The world of birds awaits, and with the right gear, you’ll be able to capture every detail with clarity and precision. Happy birding!