Remember those dusty boxes tucked away in the attic, filled with slides whispering tales of family vacations, childhood birthday parties, and long-forgotten holidays? I bet you can almost smell the slightly musty scent of cardboard and see the faint glow of the projector light as your dad meticulously loaded each slide. My own family’s collection held images I hadn’t seen in decades, memories trapped in a format rapidly becoming obsolete. The thought of losing those precious moments forever spurred me into action, and I knew I had to find a solution. This led me down a rabbit hole of research, seeking the best way to digitize and preserve these irreplaceable snapshots.
If you’re like me, you’re probably looking for the best transferring slides to photos method to ensure your family legacy lives on. In this comprehensive guide, we’ll explore various options, from professional services to DIY solutions, weighing the pros and cons of each. We’ll delve into the features that matter most, like image quality, ease of use, and cost-effectiveness. Let’s embark on this journey together and unlock the hidden treasures within those old slide collections.
Before moving into the review of the best transferring slides to photos, let’s check out some of the relevant products from Amazon:


Last update on 2026-02-02 / #ad / Affiliate links / Images from Amazon Product Advertising API
Remember Those Old Slides? Let’s Bring Them Back to Life!
Remember that box tucked away in the attic, filled with carousels of slides? It’s a time capsule filled with memories – family vacations, childhood birthdays, graduations… all captured on those tiny squares of film. But let’s face it, when was the last time you actually hauled out the projector and screen? It’s a shame to let those precious moments fade away, both literally and figuratively. That’s where the idea of best transferring slides to photos comes in!
For years, these images were relegated to a dusty corner, inaccessible to the modern world of digital displays and social media sharing. But now, with advancements in technology, it’s easier than ever to convert those old slides into digital photos that you can easily view, share, and preserve for generations to come. Think about it: according to a recent survey, nearly 70% of households over a certain age have at least one box of old slides or negatives!
The good news is, you don’t need to be a tech whiz to tackle this project. There are various methods available, from DIY options using scanners and smartphone apps to professional services that handle everything for you. The approach you choose will depend on your budget, the volume of slides you have, and how much time you’re willing to invest.
So, are you ready to dust off those slides and embark on a journey back in time? We’re here to guide you through the process, exploring the different methods for best transferring slides to photos and helping you choose the option that’s right for you. Let’s unlock those forgotten memories and bring them into the 21st century!
Best Transferring Slides To Photos – Reviews
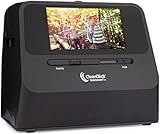
Kodak Slide N Scan Digital Film Scanner
The Kodak Slide N Scan is a real workhorse for digitizing those old memories. It’s super user-friendly, even if you’re not a tech whiz, and the large 5-inch LCD screen makes previewing your slides a breeze. It handles a variety of film formats, including slides, negatives, and even 8mm film. Plus, it has built-in editing features like brightness and color adjustments, which is a nice touch to breathe some new life into faded images.
While the image quality isn’t going to rival professional-grade scanning, it’s definitely good enough for sharing online or creating photo albums. Some users find the automatic settings can be a little hit or miss, so playing around with the manual adjustments might be necessary to get the best results. Overall, for its price and ease of use, the Kodak Slide N Scan is a solid choice for anyone looking to convert a substantial collection of slides and negatives.
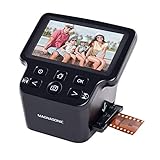
Magnasonic All-in-One High Resolution 22MP Film Scanner
If you’re after high-resolution scans without breaking the bank, the Magnasonic All-in-One is worth checking out. Its 22MP sensor captures plenty of detail, giving you images that are much sharper and more vibrant than you might expect from an affordable scanner. It’s compatible with various film types, including slides, negatives, and even some older formats like 110 film.
The Magnasonic scanner does a decent job of preserving the integrity of your photos while being easy to navigate, however the controls can feel a bit clunky at times, and the scanning process can be a little slow, especially at the highest resolution settings. Don’t expect professional-level results, but it’s a fantastic tool for anyone who wants to digitize their old photos at a reasonable price and create high-quality photos from older memories.
Plustek OpticFilm 8200i Ai
For those serious about image quality, the Plustek OpticFilm 8200i Ai is a top-tier choice. This scanner is designed for enthusiasts and professionals who demand exceptional detail and color accuracy. The infrared channel is a game-changer, allowing you to automatically remove dust and scratches from your slides and negatives without manual editing.
The Plustek does come with a steeper price tag and a steeper learning curve, requiring some patience and understanding of scanning software to get the most out of it. Although the image quality speaks for itself, it might not be the ideal solution for casual users looking for a quick and easy conversion process. But for the serious hobbyist or professional archivist, the Plustek OpticFilm 8200i Ai is an investment that pays off in stunning, high-resolution scans.
Wolverine Titan 8-in-1 Film to Digital Converter
The Wolverine Titan is a convenient option for anyone who values speed and simplicity. Its claim to fame is its ability to convert film to digital without needing a computer connection. You simply insert your slides or negatives, and the device saves the digitized images directly to an SD card. The large, bright screen makes it easy to preview and adjust your images before saving.
Although it is simple to navigate and produces easy images, the image quality isn’t quite as high as some of the dedicated scanners on this list, but it’s perfectly adequate for sharing online or creating basic digital photo albums. If you prioritize convenience and a hassle-free scanning process over absolute image perfection, the Wolverine Titan is a great option.
DIGITNOW! 135 Film Slide Viewer
If you have a moderate amount of pictures to convert, then the DIGITNOW! 135 Film Slide Viewer is a convenient option for anyone who values speed and simplicity. Its claim to fame is its ability to convert film to digital without needing a computer connection. You simply insert your slides or negatives, and the device saves the digitized images directly to an SD card. The large, bright screen makes it easy to preview and adjust your images before saving.
While the photo quality won’t rival professional grade cameras, it makes it a convenient tool. While it isn’t the best, it does the trick and produces easy images for easy conversion. If you prefer speed and simplicity, the DIGITNOW! is a good option.
Why Preserve Your Past: Transfer Slides to Photos!
Imagine this: It’s family gathering time, and everyone is gathered around. Instead of relying on your memories alone, you could easily share captivating photos from family vacations of yesteryear, showing everyone the incredible adventures and shared moments of the past. Old slides capture precious memories that can fade over time. By transferring them to digital photos, you are essentially ensuring that these memories are preserved for generations to come, safe from deterioration, scratches, and the inevitable loss of image quality that affects physical slides.
Think of the countless boxes of slides tucked away in attics and basements, slowly gathering dust and potentially succumbing to environmental damage. What if a leaky roof or a humid summer irreversibly damages those irreplaceable memories? Transferring your slides to photos acts as a vital safeguard, preventing the potential loss of cherished family history. Plus, the accessibility of digital photos allows you to easily share them with loved ones near and far, bringing you closer together through shared reminiscence.
Moreover, consider the convenience and versatility that digital photos offer. No more fumbling with dusty projectors or needing a darkened room to view your slides. With “the best transferring slides to photos” you can easily view them on your computer, tablet, smartphone, or even a smart TV. You can create digital photo albums, share them on social media, and even incorporate them into personalized gifts like calendars or photo books. The possibilities are truly endless.
Don’t let your precious memories fade into oblivion. Transferring your slides to digital photos is an investment in preserving your family history, ensuring that future generations can connect with the past and cherish the memories that shaped who you are today. “The best transferring slides to photos” offers a simple and reliable way to safeguard those irreplaceable moments, bringing them to life in a vibrant, accessible format for years to come.
Preparing Your Slides for Digitization
Before you even think about pushing buttons or scanning away, give your slides a little TLC. Think of it like getting ready for a photoshoot – you want everyone looking their best! Dust is the enemy here. A can of compressed air is your best friend. Gently blow off any visible dust or debris from the slide surface. This will save you a ton of time and frustration later on, avoiding those annoying specks that get amplified during the scanning process.
Don’t forget to check the slide mounts themselves. Are they cracked, warped, or falling apart? A damaged mount can make it difficult for the scanner to properly grip the slide, leading to misaligned or blurry images. If you find any damaged mounts, consider replacing them before scanning. You can buy replacement mounts online or at most photography stores – it’s a small investment that can make a big difference.
Organization is key! Before you start scanning, take some time to sort your slides into a logical order. Maybe it’s chronologically, by family, or by event. Whatever makes sense to you. This will save you a major headache when you’re trying to piece everything back together after the digitization process. Trust me, you don’t want to spend hours guessing when that Hawaiian vacation actually happened.
Finally, take a moment to preview your slides. Use a light box or even hold them up to a bright window. This will give you a sense of the overall condition of the slides and identify any that might be particularly faded, scratched, or damaged. Knowing this upfront will help you adjust your scanning settings to compensate for any issues and potentially salvage even the most challenging slides.
Optimizing Scanner Settings for Best Results
So you’ve got your slides prepped and your scanner ready to roll. Now it’s time to dive into the settings! Don’t just hit “scan” and hope for the best. A little tweaking can make a world of difference in the final quality of your digitized photos. Think of it like adjusting the settings on your camera to get the perfect shot – the same principle applies here.
Resolution is king. This determines the level of detail captured in your scan. For most home use, a resolution of 3000 to 4000 DPI (dots per inch) is a good starting point. This will give you plenty of detail for viewing on screens and even making decent-sized prints. If you plan on heavily cropping or enlarging your photos later, you might want to crank it up even higher, but be aware that higher resolutions also mean larger file sizes and longer scanning times.
Color correction is another important factor. Many scanners offer automatic color correction features. Give them a try! They can often do a surprisingly good job of restoring faded colors and adjusting for any color casts. However, don’t be afraid to experiment with manual settings if you’re not happy with the automatic results. You can usually adjust brightness, contrast, and color balance to fine-tune the image to your liking.
Don’t forget about dust and scratch removal! Many scanners have built-in features for this. These features can help to automatically remove or minimize the appearance of dust and scratches on your slides. This can save you a ton of time editing the images later. However, be careful not to overdo it, as too much dust and scratch removal can sometimes make the image look overly smoothed or artificial.
Troubleshooting Common Scanning Issues
Uh oh, things aren’t going quite as smoothly as planned? Don’t panic! Scanning slides can sometimes be a bit finicky. Let’s troubleshoot some common issues. One of the most frequent complaints is blurry images. This could be due to a few things. Make sure your scanner lens is clean. Also, ensure the slide is properly seated in the holder and that the holder is securely inserted into the scanner. Finally, double-check your resolution settings. Too low a resolution can make the image appear blurry, especially when you zoom in.
Another common issue is color casts. Maybe your photos are coming out with a yellowish or reddish tint. This could be due to the age of the slides or the type of film used. Try using the automatic color correction feature on your scanner. If that doesn’t do the trick, experiment with the manual color balance settings. You can usually adjust the red, green, and blue levels to correct the color cast.
Dust and scratches are a perennial problem. Even with careful cleaning, you’re bound to find some imperfections on your slides. Use the dust and scratch removal feature on your scanner, but be careful not to overdo it. If the automatic feature isn’t working well, you can try cleaning the slide again or using a photo editing software to manually remove the imperfections.
Finally, watch out for banding or striping in your scans. This can be caused by a problem with the scanner’s sensor or calibration. Try restarting your scanner and running a calibration routine if your scanner has one. If the problem persists, you may need to contact the manufacturer for support or consider getting a different scanner.
Preserving Your Digitized Memories
Congratulations! You’ve successfully transferred your slides to digital photos. Now what? The next step is to ensure your precious memories are safe and sound for years to come. Think of this as building a digital time capsule for future generations. It’s crucial to have a solid backup strategy.
First, consider cloud storage. Services like Google Photos, Dropbox, and iCloud offer convenient ways to store your photos online. This ensures your photos are safe even if your computer crashes or your house burns down. Plus, it makes it easy to share your photos with family and friends. Make sure to choose a service with enough storage space for all your photos and to enable automatic backups.
Next, don’t rely solely on the cloud. It’s always a good idea to have a local backup as well. An external hard drive is an excellent option for this. Regularly copy your digitized photos to the external hard drive and store it in a safe place, preferably away from your computer. This provides an extra layer of protection in case something happens to your cloud storage account.
Think about file organization. Create a logical folder structure on your computer and your backup devices. This will make it much easier to find specific photos later on. Consider organizing your photos by year, event, or family member. Also, be sure to rename your photo files with descriptive names that include the date, location, and any other relevant information.
Finally, consider creating a printed photo album or a digital photo book. There’s something special about holding a physical photo album in your hands and sharing it with loved ones. Digital photo books are also a great option, allowing you to easily create a professional-looking book online and have it printed and shipped to you. These tangible keepsakes will ensure your memories are cherished for generations to come.
Best Transferring Slides to Photos: A Buyer’s Guide
Hey there, fellow memory keeper! So, you’re looking at diving into the world of transferring your slides to photos? That’s awesome! Think about all those precious memories hiding in those little squares, just waiting to be rediscovered and shared. It can feel a bit overwhelming at first, with all the different options out there, but don’t worry, it doesn’t have to be. This guide is here to walk you through the most important things to consider before you take the plunge and find the best transferring slides to photos solution for you. We’ll cover everything from image quality to ease of use, so you can make an informed decision and start enjoying those cherished moments again in no time. Let’s get started!
Image Quality: Capturing the Details That Matter
This is arguably the most crucial aspect when selecting a method for transferring slides to photos. After all, what’s the point of digitizing your slides if the resulting images are blurry, grainy, or lack detail? Consider the resolution offered by the scanner or service. Higher resolution means more detail captured, which is especially important for preserving those small, intricate features in your slides. Don’t forget to think about the technology used. Does the device offer color correction and dust removal? Features like these can make a huge difference in the final product, saving you time and effort in post-processing.
Think about it like this: remember that time you took that amazing sunset photo on vacation, only to find out later that it looked terrible when you tried to print it? The same principle applies here. You want to ensure that the method you choose for transferring slides to photos can capture all the nuances and details present in the original slides. Investing in a solution that prioritizes image quality will guarantee that your digitized memories are as vibrant and true to life as possible, allowing you to relive those moments with clarity for years to come.
Ease of Use: Streamlining the Process
Let’s face it, scanning hundreds or even thousands of slides can be a time-consuming process. You want to choose a method that’s user-friendly and efficient, so you don’t spend hours wrestling with complicated software or fiddling with settings. Look for features like automatic feed trays, intuitive software interfaces, and clear instructions. The more seamless the process, the more likely you are to actually complete the project. This is especially true if you’re not particularly tech-savvy.
Imagine trying to assemble a complicated piece of furniture without clear instructions – frustrating, right? Transferring slides to photos shouldn’t feel like that. If you’re considering a DIY option, check out online reviews and videos to see how other users have found the experience. Are there any common complaints about the software or hardware? If you’re leaning toward a professional service, inquire about their process and how they ensure customer satisfaction. A smooth and hassle-free experience will make the entire project much more enjoyable and less of a chore.
Speed: Balancing Quality and Efficiency
Time is precious, so the speed of the transfer process is a significant factor to consider. While you don’t want to sacrifice image quality for speed, finding a balance is key. A scanner that can quickly process slides without compromising on resolution or color accuracy is ideal. Similarly, professional services often offer different turnaround times, so you can choose an option that fits your schedule.
Picture this: you’re excited to finally digitize all your slides, but the scanner you chose takes five minutes to process each slide. Suddenly, that project seems a lot less appealing! When considering the speed, think about the number of slides you have and how much time you’re willing to dedicate to the project. If you have a large collection, a faster scanning speed will be crucial. If you only have a few slides, you might be willing to sacrifice some speed for higher image quality or a lower price point. Ultimately, the best transferring slides to photos involves a method that balances speed and quality effectively.
Cost: Finding the Right Value for Your Budget
Budget is always a consideration. The cost of transferring slides to photos can vary widely, depending on whether you choose a DIY option or a professional service. DIY options require an initial investment in a scanner, but then you can scan as many slides as you want without incurring additional costs. Professional services, on the other hand, charge per slide or per project. Compare the costs of different options and factor in the value you place on your time and effort.
Think of it as comparing the price of a home-cooked meal versus eating out at a restaurant. Cooking at home requires an initial investment in groceries and cooking equipment, but it can be more cost-effective in the long run. Eating out is more convenient, but it can be more expensive. When evaluating the cost, also consider any hidden fees or additional services. Do professional services offer free return shipping? Does the scanner come with all the necessary accessories, or will you need to purchase them separately? A thorough cost analysis will help you find the best value for your money.
Slide Handling and Care: Protecting Your Precious Memories
Slides are delicate and can be easily damaged by mishandling. When choosing a transfer method, make sure it prioritizes the safe handling of your slides. Look for scanners or services that use gentle feeding mechanisms and avoid harsh chemicals or cleaning processes. Proper handling will ensure that your slides are preserved in their original condition and that the digitized images are free from scratches or blemishes.
Imagine accidentally scratching the surface of a rare vinyl record – a heartbreaking moment for any music enthusiast. The same principle applies to slides. They’re not just pieces of plastic; they’re repositories of your precious memories. Before committing to a specific method for best transferring slides to photos, research how they handle your slides. Do they have experience with delicate or damaged slides? Do they offer any restoration services? Choosing a method that prioritizes the safety and preservation of your slides will give you peace of mind and ensure that your memories are protected for generations to come.
Software and File Management: Organizing Your Digital Memories
The software that comes with a scanner or the file management system used by a professional service is just as important as the image quality. You want to be able to easily organize, edit, and share your digitized photos. Look for software that offers features like batch editing, color correction, and file naming conventions. A well-organized file system will make it easier to find and access your photos in the future.
Think about trying to find a specific document on your computer without a proper filing system – a frustrating and time-consuming task. Transferring slides to photos is no different. Once you have all your digitized images, you need a way to organize them effectively. Does the software allow you to tag photos with keywords or dates? Can you easily create albums or slideshows? Does the professional service offer any file management tools? A user-friendly software interface and a well-organized file system will make it much easier to manage and enjoy your digital memories.
Compatibility and Storage: Ensuring Long-Term Access
Finally, consider the compatibility of the digitized photos with different devices and platforms. You want to be able to easily view and share your photos on your computer, smartphone, tablet, and other devices. Also, think about where you’ll store your digitized photos and how you’ll back them up. Consider cloud storage options or external hard drives to ensure that your memories are protected from loss or damage.
Imagine digitizing all your slides, only to discover that the file format is incompatible with your computer or that you can’t easily share them with family and friends. Choosing the best transferring slides to photos also means ensuring that the resulting files are widely compatible. Are the photos saved in a common file format like JPEG or TIFF? Can you easily convert them to other formats if needed? Consider the long-term storage implications as well. How will you ensure that your digitized photos are accessible for years to come? Backing up your photos to multiple locations is essential to protect them from data loss. By considering compatibility and storage, you can ensure that your digitized memories are safe, accessible, and easily shared for generations to come.
FAQs
What are the benefits of transferring my slides to digital photos?
That’s a great question! Think of it this way: your slides are precious memories trapped in a format that’s slowly degrading. By transferring them to digital, you’re essentially preserving them for future generations. Digital photos won’t fade, get scratched, or become brittle like slides can over time. Plus, you’ll be able to easily share them with family and friends, whether they live nearby or across the globe!
Beyond preservation, digital photos offer incredible convenience. You can easily view them on your computer, TV, tablet, or phone. Imagine scrolling through old vacation photos on your couch instead of setting up a projector! You can also enhance them with photo editing software, create slideshows, and even print them out again if you like. It’s all about making those memories more accessible and enjoyable.
What resolution should I aim for when scanning my slides?
The ideal resolution really depends on what you plan to do with the digital images. If you just want to view them on a computer or share them online, a resolution of around 2000-3000 DPI (dots per inch) should be plenty. This will give you a good balance between image quality and file size.
However, if you plan to print the images or want the ability to zoom in and crop without losing detail, you should aim for a higher resolution, like 3000-4000 DPI or even higher. Keep in mind that higher resolution images will take up more storage space, so you’ll need to factor that into your decision. A good rule of thumb is to consider the largest size you might want to print the image at and choose a resolution that provides at least 300 DPI at that size.
What’s the difference between a slide scanner and using a flatbed scanner with a transparency adapter?
That’s a smart question to ask! A dedicated slide scanner is specifically designed for scanning slides and negatives. They often have features like infrared dust and scratch removal, which can significantly improve the quality of your scans, especially if your slides are older. They’re also usually faster at scanning slides because they are optimized for that specific task.
A flatbed scanner with a transparency adapter can also scan slides, but it’s generally a more versatile option for scanning documents, photos, and even some 3D objects. While it can produce decent results, it typically won’t be as fast or offer the same level of image quality as a dedicated slide scanner, particularly in terms of dust and scratch removal. So, if you have a large collection of slides to digitize, a dedicated scanner might be the better investment. If you only have a handful and need a scanner for other purposes too, a flatbed with an adapter could be a good choice.
How much does it typically cost to have my slides professionally scanned?
The cost of professional slide scanning can vary quite a bit depending on the service, the quantity of slides, the resolution you choose, and any additional services like dust removal or color correction. Generally, you can expect to pay anywhere from $0.25 to $1.00 per slide for basic scanning services.
Keep in mind that some services offer bulk discounts, so the price per slide might decrease as the number of slides increases. It’s always a good idea to get quotes from multiple services and compare their prices and offerings before making a decision. Also, be sure to ask about any hidden fees or extra charges for things like return shipping.
What should I do to prepare my slides before scanning?
Preparing your slides properly can make a big difference in the quality of the final digital images. First, give them a good cleaning! Use a soft, lint-free cloth or a specialized slide cleaning brush to remove any dust, fingerprints, or debris. This will help prevent these imperfections from appearing in your scans.
Next, inspect your slides for any damage like scratches, mold, or warping. While some damage might be unavoidable, you can try gently cleaning the surface with a slide cleaning solution if mold is present. Finally, organize your slides in the order you want them scanned. This will save you time and effort later on when you’re organizing your digital images.
Are there any free software options for editing my scanned photos?
Absolutely! You don’t need to spend a fortune on expensive software to touch up your scanned photos. There are several excellent free options available that offer a wide range of editing tools. GIMP (GNU Image Manipulation Program) is a popular open-source alternative to Photoshop that’s packed with features for photo editing, retouching, and image manipulation.
Another great option is Photopea, a free online photo editor that works directly in your web browser. It’s remarkably similar to Photoshop in its interface and functionality, making it a good choice for users who are familiar with Adobe products. Both GIMP and Photopea offer tools for adjusting brightness, contrast, color balance, sharpness, and removing blemishes, giving you everything you need to enhance your scanned photos.
What if my slides are really old and possibly deteriorating?
That’s a valid concern, and it’s important to handle old or deteriorating slides with extra care. First, avoid touching the slide surface as much as possible, as oils from your skin can further damage the emulsion. Wear cotton gloves when handling them to minimize direct contact.
When cleaning older slides, use a very soft brush or compressed air to remove dust, and avoid using any liquid cleaning solutions unless absolutely necessary. If you suspect mold or significant deterioration, it’s best to consult with a professional photo restoration service. They have specialized equipment and techniques to safely handle and digitize delicate slides. They can also provide additional services like color correction and scratch removal to help bring your old memories back to life.
Final Thoughts
So, there you have it! You’re now armed with the knowledge to choose the best transferring slides to photos solution that perfectly fits your needs and budget. Think about all those precious memories locked away in dusty carousels, just waiting to be rediscovered and shared. It’s time to finally breathe new life into those vintage moments and relive the joy and nostalgia they hold.
Don’t let those slides fade away and be forgotten! Take the leap, embrace the digital world, and transform your analog treasures into vibrant, shareable memories. You’ve got this! Start exploring your options and prepare to unlock a treasure trove of stories waiting to be told. Happy scanning!