Remember that night as a kid, sprawled out on a blanket in your backyard, craning your neck to catch a glimpse of a shooting star? Maybe you even pointed out constellations to your family, feeling a sense of wonder at the vastness above. The dream of seeing even more detail, of actually observing the rings of Saturn or the craters on the moon, might have flickered through your mind then. Well, that dream doesn’t have to stay a dream! For aspiring astronomers on a budget, the universe is more accessible than ever. There are some incredible options out there, and we’re here to help you navigate the field.
This guide is dedicated to helping you find the best telescopes for beginners under $200. We know the jargon can be confusing and the choices overwhelming, so we’ve sifted through the options and compiled a list of top contenders. We’ll provide honest reviews, highlight key features, and offer a straightforward buying guide so you can confidently choose a telescope that sparks your passion for astronomy without breaking the bank. Let’s get you exploring the cosmos!
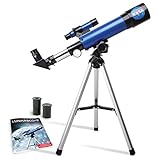
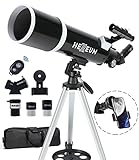
Before moving into the review of the best telescopes for beginners under $200, let’s check out some of the relevant products from Amazon:


Last update on 2026-01-28 / #ad / Affiliate links / Images from Amazon Product Advertising API
Reaching for the Stars: Your First Telescope Adventure
Ever looked up at the night sky and felt a sense of wonder? You’re not alone! For centuries, people have been fascinated by the cosmos, and today, it’s easier than ever to explore it yourself. The good news is, you don’t need to break the bank to get started. In fact, you can find some amazing best telescopes for beginners under $200 that will open up a whole new world of celestial observation. Think about it: the rings of Saturn, the craters of the Moon, distant galaxies – all within reach!
Choosing your first telescope can feel a bit overwhelming, but don’t worry, it’s simpler than you might think. We’re going to guide you through the essentials, helping you understand what to look for without getting bogged down in technical jargon. Did you know that amateur astronomy is experiencing a resurgence? According to a recent study, telescope sales have increased by 15% in the last year alone, suggesting more and more people are looking to explore the universe from their own backyards.
Think of your first telescope as an investment in a lifelong hobby. It’s a portal to understanding our place in the universe and appreciating the sheer scale of it all. While the best telescopes for beginners under $200 won’t give you Hubble-quality images, they offer a fantastic entry point, allowing you to learn the basics of stargazing and develop your observing skills. You’ll be amazed at what you can see!
This guide is designed to help you navigate the world of budget-friendly telescopes, highlighting the features that matter most for beginners and offering some top recommendations. We’ll explore reflector and refractor telescopes, discuss aperture and magnification, and provide tips for choosing the right telescope for your needs and viewing conditions. Get ready to embark on an exciting journey of discovery!
Best Telescopes For Beginners Under $200 – Reviews
Celestron PowerSeeker 127EQ
This classic telescope is often recommended to budding astronomers, and for good reason! The PowerSeeker 127EQ offers a decent aperture for the price, meaning it can gather a good amount of light, allowing you to see fainter objects like nebulae and galaxies (though don’t expect Hubble-quality images!). The equatorial mount, while a bit fiddly to learn initially, allows for smooth tracking of celestial objects as they move across the night sky, providing a more enjoyable viewing experience.
However, keep in mind that this telescope isn’t without its limitations. The included accessories, particularly the eyepieces, are often considered to be of lower quality, and upgrading them would be a wise investment down the line. Also, while the equatorial mount is helpful, it can be a bit wobbly, especially at higher magnifications. Despite these drawbacks, it remains a solid entry-level option for those eager to explore the cosmos without breaking the bank.
Orion StarBlast 4.5 Astro Reflector Telescope
Looking for something simple and easy to use right out of the box? The Orion StarBlast 4.5 is a great choice! This tabletop reflector is incredibly portable and requires minimal setup, making it perfect for spontaneous stargazing sessions. Its wide field of view is fantastic for observing larger celestial objects like star clusters and nebulae, and the images are surprisingly bright and clear for a telescope of this size.
While it excels at wide-field views, the StarBlast 4.5 might not be the best option for observing planets at high magnification. The included eyepieces are decent, but you might want to consider upgrading them later to get even sharper images. Overall, its user-friendly design and portability make it a winner for beginners and those who value convenience.
Meade Instruments Infinity 70mm Refractor Telescope
The Meade Instruments Infinity 70mm is a classic refractor telescope that offers a great balance of portability, ease of use, and affordability. Its 70mm aperture gathers enough light to provide decent views of the moon, planets, and brighter deep-sky objects. The included altazimuth mount is simple to operate, allowing for easy up-and-down and left-to-right movement, perfect for scanning the night sky.
While it won’t deliver the same level of detail as larger telescopes, the Infinity 70mm is an excellent choice for beginners who are just starting their astronomical journey. The lightweight design makes it easy to transport to different viewing locations, and the included accessories are a good starting point for learning about different eyepieces and magnifications. Just remember to keep your expectations realistic – this is a beginner telescope, not a Hubble replacement!
Astromaster 70AZ Telescope
The Celestron AstroMaster 70AZ is a fantastic choice for beginners due to its ease of setup and user-friendly design. The altazimuth mount allows for simple up-and-down and side-to-side movement, making it a breeze to navigate the night sky. With its 70mm aperture, you’ll be able to get clear views of the moon’s craters, Saturn’s rings, and Jupiter’s moons, sparking a lifelong interest in astronomy.
While the AstroMaster 70AZ is a great introductory telescope, it’s important to remember that it has its limitations. The included eyepieces are adequate but upgrading them will significantly improve image quality. Also, the tripod can be a bit shaky, especially at higher magnifications. But overall, it’s a solid telescope that provides a great starting point for exploring the universe.
Gskyer 70mm Aperture 400mm AZ Telescope
The Gskyer 70mm telescope is a budget-friendly option that’s surprisingly capable for its price. The 70mm aperture is sufficient for viewing the moon in detail, as well as some of the brighter planets like Jupiter and Saturn. Its altazimuth mount is easy to assemble and use, making it a great choice for beginners who want a telescope that’s ready to go right out of the box. Plus, it often comes with a smartphone adapter, allowing you to easily capture and share your astronomical observations!
However, don’t expect professional-grade images with this telescope. Like many budget options, the included accessories might not be the highest quality, and the tripod can be a little flimsy. While it might not be the most powerful telescope on the market, the Gskyer 70mm provides a fun and accessible way to explore the night sky, especially for younger aspiring astronomers.
Reaching for the Stars: Why a Beginner Telescope Under $200 Is Your Gateway to the Cosmos
Ever gazed up at the night sky, mesmerized by the countless stars, and wished you could see more? Perhaps you’ve pointed out constellations to your children, sparking their curiosity about planets and galaxies. That’s where a beginner telescope under $200 comes in! It’s the perfect, budget-friendly way to transform those fleeting glimpses into breathtaking, detailed observations. It’s like unlocking a secret world hidden in plain sight, a world brimming with wonders beyond our daily experience.
Think of it as an investment in wonder. Instead of just reading about the rings of Saturn or the craters on the moon, you can actually see them. Imagine the excitement of sharing these views with your family and friends, creating lasting memories under the starlit sky. And don’t worry about complex setups and confusing instructions; these telescopes are designed for ease of use, so you can quickly go from opening the box to exploring the universe.
More than just a toy, a beginner telescope under $200 is an educational tool that fosters curiosity and a love of science. It encourages critical thinking, problem-solving, and a deeper understanding of our place in the vast cosmos. It’s a tangible way to connect with the universe and inspire the next generation of scientists, astronauts, and dreamers.
Ultimately, a telescope under $200 removes the financial barrier to entry for astronomy. It allows anyone, regardless of their budget, to explore the wonders of the night sky and embark on a journey of discovery. It’s an invitation to look up, to wonder, and to connect with something far greater than ourselves. So, take that first step, reach for the stars, and unlock the universe with a beginner telescope that won’t break the bank!
Understanding Telescope Types for Beginners
Okay, so you’re diving into the world of telescopes! That’s awesome. One of the first things you’ll encounter is different types of telescopes. Refractors, reflectors, and catadioptrics… it can sound like a foreign language. But don’t worry, it’s not as intimidating as it seems. Let’s break it down in a way that’s easy to remember.
Imagine you want to take a picture. You could use a magnifying glass (like a refractor telescope), a mirror (like a reflector telescope), or a combination of both. Refractors use lenses to bend light and create an image. They’re great for bright, clear images and are generally pretty low-maintenance. Think of them as the classic telescope design.
Reflectors, on the other hand, use mirrors to gather and focus light. They’re typically more affordable for the same aperture (the size of the light-gathering lens or mirror) than refractors. This means you can see fainter objects with a reflector for the same budget. Reflectors do require occasional collimation, which is just a fancy word for aligning the mirrors.
Catadioptric telescopes are a hybrid, using both lenses and mirrors. They offer a good balance of portability and performance, often in a compact design. Think of them as the Swiss Army knife of telescopes – versatile and convenient. For beginners under $200, you’ll primarily be looking at smaller refractors and reflectors, so understanding the basic differences is key to making a smart choice.
Essential Telescope Features to Consider
Now that you have a basic understanding of the different telescope types, let’s talk about features. Aperture, focal length, and magnification are crucial when choosing a beginner telescope. Focusing on these key features will help you get the most out of your stargazing sessions without breaking the bank.
Aperture is king! Think of it as the telescope’s eye. The larger the aperture, the more light it gathers, and the fainter objects you can see. In a dark sky, a larger aperture will show you more detail in galaxies and nebulae. Even under light-polluted skies, a bigger aperture will give you brighter images.
Focal length determines the magnification of the telescope when paired with different eyepieces. A longer focal length provides higher magnification with the same eyepiece. Magnification is often overemphasized, but it’s important to remember that higher magnification isn’t always better. High magnification can lead to dimmer and less detailed images, especially if your telescope isn’t gathering enough light.
Mount type is another important consideration. Alt-azimuth mounts move up-down and left-right, like a camera tripod. Equatorial mounts, on the other hand, are designed to track the movement of stars as the Earth rotates. For beginners, an alt-azimuth mount is generally easier to use and set up, allowing you to quickly point the telescope at different celestial objects.
Setting Up Your Beginner Telescope for Success
So you’ve picked out your telescope, it’s arrived in a box, and now… what? Setting up a telescope can seem daunting, but it’s actually quite straightforward. Take it slow, follow the instructions carefully, and you’ll be observing the night sky in no time. Having a successful first setup ensures a positive stargazing experience.
First, find a good location. A dark location away from city lights is ideal. But even if you live in a suburban area, you can still enjoy stargazing from your backyard or a nearby park. Avoid areas with bright streetlights or security lights. Remember, the darker the sky, the more you’ll see.
Next, assemble the telescope according to the manufacturer’s instructions. Double-check that all screws and bolts are securely tightened. A wobbly telescope will make it difficult to focus and track objects. Many telescopes under $200 come with simple, easy-to-assemble mounts.
Finally, collimate your telescope if necessary. This mainly applies to reflector telescopes. Collimation is the process of aligning the mirrors to ensure the best possible image quality. There are plenty of online tutorials and videos that can guide you through the process. Even a slightly out-of-alignment reflector can produce blurry images.
Tips for Maximizing Your Stargazing Experience
Now that your telescope is set up and ready to go, let’s talk about how to get the most out of your stargazing experience. A few simple tips and tricks can make a big difference in what you see and how much you enjoy your time under the stars. Prepare for your observations as the conditions greatly influence what you see.
Start with low magnification. This will give you a wider field of view and make it easier to find objects. Once you’ve located an object, you can gradually increase the magnification to see more detail. Remember, higher magnification isn’t always better. A stable image at moderate magnification is far more rewarding than a shaky, blurry image at high magnification.
Use a star chart or astronomy app. These tools will help you identify constellations, planets, and other celestial objects. There are many free apps available for smartphones and tablets that can overlay the night sky with labels and information. Having a digital map of the stars can transform a random glimpse into an informed exploration.
Dress warmly! Even on a summer night, temperatures can drop significantly after sunset. Layering your clothing will help you stay comfortable and enjoy your stargazing session for longer. Consider bringing a thermos of hot chocolate or coffee to keep you warm. There’s nothing worse than cutting a stargazing session short because you’re too cold.
Best Telescopes For Beginners Under $200: A Friendly Buying Guide
So, you’re looking up at the night sky and dreaming of seeing planets, galaxies, and nebulas? Awesome! Getting your first telescope is a super exciting step, and it’s totally possible to find a great one without breaking the bank. This guide will help you navigate the world of best telescopes for beginners under $200, ensuring you pick one that will give you amazing views and spark a lifelong love of astronomy. Let’s dive in!
Aperture: Size Matters (and Determines What You Can See!)
Think of your telescope’s aperture as its “eye.” It’s the diameter of the main lens or mirror that collects light. The larger the aperture, the more light it gathers, and the fainter and more detailed the objects you’ll be able to see. Imagine trying to see in a dimly lit room – the bigger your pupils, the more light you can capture, right? It’s the same principle with telescopes. Within our budget, maximizing aperture should be a top priority.
Aperture is arguably the most important factor in determining the capabilities of a telescope. With a larger aperture, you’ll be able to observe fainter objects like nebulae and galaxies, as well as see more detail on brighter objects like the moon and planets. While a telescope with fancy features might seem appealing, it’s useless if it can’t gather enough light to show you anything worthwhile! Don’t be fooled by high magnification claims; magnification without sufficient light gathering is just blowing up a blurry image. Focus on aperture first!
Type of Telescope: Refractor vs. Reflector (and Which One’s Right for You)
Telescopes mainly come in two flavors: refractors and reflectors. Refractors use lenses to focus light, like a spyglass. They are typically more durable and require less maintenance. Reflectors, on the other hand, use mirrors. They generally offer larger apertures for the same price as a refractor, making them a great choice for budget-conscious stargazers.
For the best telescopes for beginners under $200, reflectors tend to offer better bang for your buck. Reflectors offer the biggest “light bucket” possible within your budget, allowing for viewing of fainter deep-sky objects. However, reflectors can sometimes require a bit more care, as the mirrors might need occasional collimation (alignment). Don’t worry, it’s not as scary as it sounds! There are plenty of tutorials online, and it’s a good skill to learn if you’re serious about astronomy. Reflectors are definitely worthy of your consideration.
Magnification: Don’t Be Fooled by the Numbers
Many beginners make the mistake of focusing solely on magnification. While it’s true that magnification makes objects appear larger, it’s not the be-all and end-all. Think of it like zooming in too much on a digital photo – eventually, it just gets blurry and pixelated. In fact, there’s a limit to how much useful magnification a telescope can provide, and it’s determined by its aperture.
High magnification isn’t necessarily better, and in fact, excessive magnification can degrade the image quality. The rule of thumb is that the maximum useful magnification is about 50x per inch of aperture. So, a telescope with a 3-inch aperture has a maximum useful magnification of around 150x. Focusing on image clarity and brightness provided by aperture is more important than chasing high magnification numbers. Often times you will find telescopes that claim to have magnifications that are impossibly high, don’t be fooled!
Mount Type: Stability is Key!
A wobbly telescope is a frustrating telescope. The mount is what holds your telescope steady, and a stable mount is crucial for getting clear, sharp views. There are two main types of mounts: alt-azimuth and equatorial. Alt-azimuth mounts are simple to use and move the telescope up/down and left/right. Equatorial mounts are designed to compensate for Earth’s rotation, making it easier to track objects as they move across the sky.
For beginners, a simple alt-azimuth mount is often the best choice. They are easy to set up and use, and they’re generally more affordable. Just remember to look for one that’s sturdy and well-built. A flimsy mount will shake and wobble, making it difficult to focus and enjoy your observations. Also consider how easy it is to move and adjust the telescope with the mount; a smooth motion is much better than a jerky one.
Included Accessories: What Comes in the Box?
Check what accessories are included with the telescope. Eyepieces are essential, as they determine the magnification you get. A finder scope helps you locate objects in the sky. Some telescopes may also come with a Barlow lens, which doubles or triples the magnification of your eyepieces (but remember what we said about magnification!).
Having a range of eyepieces is beneficial because it allows you to experiment with different magnifications. A lower-power eyepiece is useful for finding objects and getting a wide field of view, while a higher-power eyepiece is good for observing details on planets and the moon. A decent finder scope will greatly reduce the frustration of pointing the telescope, especially if you are new to astronomy. Don’t underestimate the importance of these seemingly small extras!
Ease of Use: Getting Started Shouldn’t Be a Chore
The best telescopes for beginners are easy to set up and use. You don’t want to spend hours wrestling with complicated instructions or struggling to align the telescope. Look for models that have clear, concise instructions and intuitive controls. Consider how easy it is to assemble, disassemble, and transport the telescope.
It’s no fun to receive a complex telescope and spend days trying to figure out how to get it to work. A user-friendly telescope is more likely to get used, and that’s what matters most! Read reviews to see what other users say about the ease of use of the telescope. A telescope that is easy to set up is one that you are far more likely to use, leading to greater enjoyment and satisfaction from the hobby.
Reviews and Recommendations: Hear What Others Have to Say
Before you make a purchase, take some time to read reviews from other users. See what they have to say about the telescope’s performance, ease of use, and durability. Pay attention to both positive and negative reviews, and try to get a balanced perspective. Online astronomy communities and forums can also be great resources for getting recommendations and advice.
Reading reviews from experienced users can provide valuable insights that you won’t find in the product description. Look for common themes in the reviews, such as whether the telescope provides clear images, is easy to set up, or has any known flaws. Remember that everyone’s experience is different, but reading a variety of reviews can help you make an informed decision. Be sure to consult a variety of sources, and not just rely on the sales pages of retailers.
Frequently Asked Questions
What type of telescope is best for a beginner on a budget?
For beginners dipping their toes into astronomy without breaking the bank, reflector telescopes and refractor telescopes tend to be the best choices. Reflector telescopes, which use mirrors to gather light, generally offer a larger aperture (the light-gathering ability) for the price. This means you can see fainter objects and more detail than with a smaller aperture refractor. They’re fantastic for viewing deep-sky objects like nebulae and galaxies.
Refractor telescopes, on the other hand, use lenses. While they might be a bit more expensive for the same aperture, they are typically easier to maintain since the optics are sealed within the tube. They also tend to produce sharper images, which is great for planetary observation. Ultimately, the best type depends on what you want to see most, but both reflectors and refractors offer excellent beginner options under $200.
How much magnification do I need in a beginner telescope?
It’s a common misconception that more magnification equals a better telescope. Actually, magnification is just one factor, and too much can make the image blurry and dim. A useful rule of thumb is that the maximum usable magnification is about 50x per inch of aperture (the diameter of the main lens or mirror). So, a telescope with a 3-inch aperture could theoretically handle up to 150x magnification.
However, atmospheric conditions and the quality of the optics play a big role. More often than not, you’ll find that lower magnifications provide sharper, brighter, and more enjoyable views. Instead of chasing high magnification, focus on getting a telescope with a decent aperture and good quality optics for the price. Clear, stable images at lower magnifications are far more satisfying than blurry images at high magnification.
What should I expect to see with a telescope under $200?
With a telescope under $200, you can expect to see quite a bit! You’ll be able to observe the Moon in amazing detail, with its craters, mountains, and plains clearly visible. You’ll also be able to see the planets in our solar system. Jupiter’s cloud bands and its four largest moons (the Galilean moons) are a regular sight, and Saturn’s rings are definitely within reach. Mars will show some surface detail when it’s closest to Earth.
Beyond our solar system, you can explore some of the brighter deep-sky objects. Nebulae like the Orion Nebula and the Lagoon Nebula will appear as faint, fuzzy patches of light. Some brighter star clusters like the Pleiades will also be visible. Keep in mind that these deep-sky objects will likely appear as shades of gray or very faint colors, as our eyes aren’t very sensitive to color in low light.
What are some important accessories I might need?
Besides the telescope itself, a few accessories can significantly enhance your viewing experience. A good set of eyepieces with varying focal lengths is essential for adjusting the magnification. Many telescopes come with basic eyepieces, but upgrading to better quality ones can improve image sharpness and clarity.
A finderscope, which is a small scope mounted on the main telescope, helps you locate objects in the night sky. A sturdy tripod is also crucial for stable viewing, especially at higher magnifications. A star chart or astronomy app can be incredibly helpful for learning the constellations and finding objects to observe. Finally, a red flashlight is a must-have for preserving your night vision while reading star charts or adjusting the telescope.
How easy are these telescopes to set up and use?
Most telescopes in the under $200 price range are designed with beginners in mind, so they’re generally quite straightforward to set up. They usually come with clear instructions and require minimal tools for assembly. Typically, it involves attaching the telescope tube to the mount and then attaching the mount to the tripod.
Using the telescope is also relatively easy, but it might take a little practice to get the hang of it. Finding objects in the night sky can be a bit tricky at first, but using the finderscope and a star chart can help. Don’t be discouraged if you don’t find everything right away – it’s all part of the learning process! There are tons of online resources and tutorials that can guide you along the way.
What is aperture and why is it important?
Aperture refers to the diameter of the main lens or mirror of the telescope, and it’s one of the most important specifications to consider when choosing a telescope. The aperture determines how much light the telescope can gather. The larger the aperture, the more light it collects, and the brighter and more detailed your views will be.
A larger aperture allows you to see fainter objects in the night sky, such as galaxies, nebulae, and star clusters. It also improves the resolution, which means you can see finer details on planets and the Moon. For beginners, a larger aperture can make a significant difference in what you’re able to observe. So, when comparing telescopes, prioritize those with the largest aperture within your budget.
What if I live in a city with light pollution? Can I still see anything?
Even if you live in a city with significant light pollution, you can still see plenty with a telescope! While light pollution does make it harder to observe faint deep-sky objects, brighter objects like the Moon, planets, and some brighter star clusters are still easily visible. A telescope helps to magnify these objects and bring them into sharper focus.
To minimize the effects of light pollution, try to observe from the darkest location you can find, even if it’s just a park a little outside the city center. Using a light pollution filter can also help by blocking out some of the unwanted artificial light. Most importantly, don’t let light pollution discourage you from enjoying the night sky. There’s always something to see, even in urban environments!
The Bottom Line
So, there you have it! Your journey into the cosmos doesn’t have to break the bank. We’ve explored some truly fantastic options for the best telescopes for beginners under $200, telescopes that prove you don’t need a fortune to unlock the wonders of the universe. Remember, the most important thing isn’t having the most expensive equipment, but having the curiosity and passion to explore. Each of these telescopes offers a unique path to discovery, and the perfect one for you is out there, waiting to reveal its secrets.
Now, it’s time to take the plunge! Don’t let the vastness of space intimidate you. This is just the beginning of an incredible adventure, and with a little research and a lot of enthusiasm, you’ll be navigating the night sky like a pro in no time. Pick the telescope that sparks your interest, trust your gut, and get ready to be amazed. The universe is waiting to be explored – happy stargazing!