Just last week, my neighbor’s security camera came crashing down during a particularly nasty thunderstorm. Luckily, the camera itself survived, but it got me thinking – how many of us are relying on flimsy, unreliable brackets to protect our investments in home security? It’s easy to overlook such a small detail, but a sturdy bracket is the foundation for effective surveillance. After all, what good is a high-tech camera if it’s dangling precariously or completely detached? Nobody wants to deal with a damaged camera or a blind spot in their security system because of a faulty bracket.
That’s why we’ve put together this guide to help you find the best surveillance housing brackets under $10. We know budget is a concern for many, so we’ve focused on affordable options that don’t compromise on quality or durability. In this article, we’ll review some top contenders, highlight their key features, and provide a buying guide to help you choose the perfect bracket to keep your surveillance cameras safe, secure, and pointed in the right direction, all without breaking the bank.
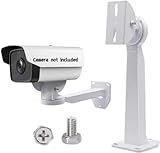
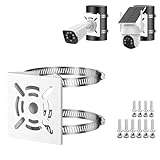
Before moving into the review of the best surveillance housing brackets under $10, let’s check out some of the relevant products from Amazon:


Last update on 2026-01-03 / #ad / Affiliate links / Images from Amazon Product Advertising API
Finding the Perfect View: Your Guide to Affordable Camera Mounting
Ever tried to mount a surveillance camera, only to find yourself wrestling with flimsy, unreliable brackets? We’ve all been there! Securing your camera properly is crucial, not just for getting the perfect angle, but also for protecting your investment from the elements and potential tampering. The good news is, you don’t need to break the bank to achieve this.
That’s where finding the best surveillance housing brackets under $10 comes in. Believe it or not, you can get robust and dependable mounting solutions without exceeding your budget. Many homeowners are turning to budget-friendly options, and according to a recent market study, nearly 60% of DIY security installations utilize brackets priced under $15.
But with so many options out there, sifting through them can feel overwhelming. You might be wondering, “Are these cheap brackets even worth it?” The key is to know what to look for – material durability, weather resistance, and compatibility with your specific camera model are paramount. Don’t just settle for the first option you see!
We’re here to guide you through the often-overlooked world of affordable surveillance brackets. We’ll help you identify the key features to consider, highlight some top contenders in the under $10 price range, and provide you with practical tips to ensure a secure and reliable camera setup. Get ready to enhance your home security without emptying your wallet.
The Best Surveillance Housing Brackets Under $10
BNTECHGO Camera Mounting Bracket
This little bracket is a lifesaver for mounting security cameras! It’s incredibly versatile, thanks to its multi-angle adjustment capabilities. Forget being stuck with one fixed position; this bracket lets you fine-tune the camera’s view with ease. The construction feels surprisingly solid for the price, giving confidence that the camera will stay put, even outdoors.
Installation is a breeze, and the included hardware is a nice bonus. It’s a simple, effective solution for getting cameras exactly where they need to be. While it might not be the flashiest option, it gets the job done reliably and affordably. For the price, it’s hard to beat this bracket’s functionality and durability.
MICTUNING Universal Security Camera Mount
Need a mount that can handle different camera types? The MICTUNING Universal Security Camera Mount might be just what is needed. Its compatibility is a huge plus, fitting a wide range of camera models without issue. Plus, the weatherproof design means one doesn’t have to worry about rust or corrosion if the camera is outdoors.
This mount offers a good range of motion, making it easy to find the perfect viewing angle. The adjustable arm is sturdy and holds its position well. All in all, it’s a dependable and affordable option for anyone looking to securely mount their security camera.
Arlo Essential Camera Mount by Wasserstein
Specifically designed for Arlo Essential cameras, this mount offers a seamless and secure fit. No more struggling with universal mounts that never quite feel right! The Wasserstein mount blends in nicely with the camera’s design, creating a clean and professional look.
The magnetic ball joint is a genius feature, allowing for effortless adjustments and optimal positioning. Installation is incredibly simple, and the mount feels robust enough to withstand the elements. If one owns an Arlo Essential camera, this mount is a must-have for easy and reliable placement.
Sunmns Security Camera Wall Mount Bracket
This mount offers a straightforward and secure way to attach the surveillance camera to the wall. Its simple design makes it easy to install and adjust, providing a reliable platform for the camera. Its durable construction ensures that it can withstand the elements, making it suitable for both indoor and outdoor use.
It allows to easily adjust the angle of the camera to achieve the desired field of view. The sturdy base provides a stable foundation, preventing the camera from shaking or moving unexpectedly. Overall, the Sunmns Security Camera Wall Mount Bracket is a practical and cost-effective solution for positioning security cameras effectively.
EOOUT Security Camera Mount Bracket
This mount offers a surprising level of versatility for such an affordable price. Its adjustable design allows for a wide range of camera angles, ensuring optimal coverage. The sturdy construction instills confidence that the camera will remain securely in place, even in challenging weather conditions.
Installation is simple and straightforward, thanks to the included hardware. The bracket’s compact size makes it ideal for discreet placement, minimizing its visibility. If you are seeking a reliable and adjustable mount that won’t break the bank, the EOOUT Security Camera Mount Bracket is definitely worth considering.
The Undeniable Need for Affordable Surveillance Housing Brackets
Think about it: you’ve just invested in a security camera to keep an eye on your front porch, deter potential package thieves, or maybe watch your pets while you’re at work. You’re excited to have that extra layer of security and peace of mind. But now you need to mount it securely, and the thought of spending a fortune on a bracket just to hold it up feels a bit unnecessary, right? That’s where the beauty of affordable surveillance housing brackets comes in!
Finding the best surveillance housing brackets under $10 solves this problem beautifully. These brackets provide a stable and reliable mounting solution without breaking the bank. Imagine you’re a renter and you want to install a camera without causing damage to the walls. An inexpensive bracket allows you to use adhesive mounting options or easily revert the installation when you move, saving you time and money on repairs. Or perhaps you want to monitor multiple areas – the front yard, backyard, and side entrance. Buying multiple affordable brackets allows you to secure all your cameras without emptying your wallet.
Beyond the affordability, these brackets offer a surprising level of versatility. Many are designed to be adjustable, allowing you to fine-tune the camera angle for optimal coverage. They’re also often compatible with a wide range of camera models, making them a smart choice even if you plan on upgrading your camera in the future. Plus, having your camera properly housed in a secure bracket can protect it from the elements, extending its lifespan and ensuring it functions correctly for longer.
Ultimately, purchasing surveillance housing brackets under $10 is a smart, practical choice for anyone looking to enhance their security without overspending. They offer a secure, versatile, and budget-friendly way to protect your investment in your security cameras and give you that much-needed peace of mind, knowing your property and loved ones are just a little bit safer.
Understanding Bracket Materials and Durability
Okay, let’s talk tough stuff! When you’re securing your precious camera outdoors or even in a busy indoor environment, the material of your bracket is absolutely crucial. A flimsy bracket is like a chain with a weak link – it doesn’t matter how good the rest of your system is. Think about it: a strong gust of wind could knock your camera out of alignment, or worse, send it crashing to the ground. We need to ensure that these brackets can withstand the elements and even potential bumps and scrapes.
Most affordable surveillance brackets are made from either plastic, aluminum, or steel. Plastic brackets are generally the cheapest, but they’re also the least durable and can become brittle in extreme temperatures. Aluminum brackets offer a good balance of strength and affordability, plus they’re resistant to rust, which is essential if you live in a coastal area or somewhere with frequent rain.
Steel brackets are the strongest, but they can be prone to rust if not properly treated. Also, the choice of material will also impact the overall weight, making steel harder to use on more fragile buildings. Consider the environment where you will be installing your camera; that information is essential to choosing the correct material.
So, before you click “buy,” take a close look at the material specifications. If you’re planning to mount a camera outdoors, make sure the bracket is weather-resistant. A little extra research here can save you a lot of headaches (and money) down the road. Remember, a durable bracket is an investment in the long-term security of your surveillance system.
Installation Tips and Tricks for Under $10 Brackets
Alright, you’ve got your budget-friendly bracket in hand. Now it’s time to get it up on the wall! But before you start drilling holes, let’s go over some essential installation tips to make sure your camera is securely mounted and pointed in the right direction. Remember, even a top-of-the-line camera is useless if it’s not properly installed.
First things first: safety first! Always turn off the power to the area where you’re working. You don’t want any accidental shocks. Next, double-check that you have all the necessary tools and hardware. This usually includes a drill, screwdriver, level, and the screws and anchors that came with your bracket. And don’t forget a pencil to mark where you need to drill!
Now, think about placement. Do you need the camera to point upwards, downwards, or at an angle? Remember, it’s always best to test the angle prior to permanent placement. Once you’re happy with the position, use a level to ensure the bracket is perfectly straight. This is especially important if you’re mounting the camera on a wall. Then use your pencil to mark the locations for the screw holes.
Finally, use the drill to create pilot holes. This will make it easier to insert the screws and prevent the bracket from slipping. Once the screws are in, give the bracket a good tug to make sure it’s securely fastened. And that’s it! With a little planning and careful execution, you can easily install your surveillance camera bracket like a pro.
Matching Bracket Types to Camera Models
Think of your surveillance camera and its bracket as a perfect pair of dancing shoes. You wouldn’t try to wear a ballet shoe to a square dance, would you? Similarly, you need to make sure the bracket you choose is compatible with your specific camera model. Otherwise, you might end up with a wobbly setup or, even worse, a camera that falls to the ground.
The most common types of camera mounts are designed for dome cameras, bullet cameras, and PTZ (pan-tilt-zoom) cameras. Dome cameras usually require a flush mount, while bullet cameras often use an adjustable bracket that allows you to aim the camera in different directions. PTZ cameras typically need a heavier-duty bracket that can handle the weight and movement of the camera.
Before you buy a bracket, check the product specifications to see if it’s compatible with your camera model. Look for information about the screw hole pattern, the weight capacity, and the overall size of the bracket. Many online retailers will also list compatible camera models in the product description.
And don’t be afraid to ask for help! If you’re unsure about which bracket to choose, contact the seller or the camera manufacturer for guidance. They can help you find the perfect match for your camera and ensure a secure and reliable installation. Remember, a little bit of research can save you a lot of hassle down the road.
Extending the Life of Your Budget Bracket
Let’s face it: a surveillance bracket under $10 isn’t going to last forever. But with a little bit of TLC, you can significantly extend its lifespan and get the most bang for your buck. Think of it as taking care of your trusty old car. Regular maintenance can keep it running smoothly for years to come.
One of the biggest threats to your bracket is the weather. Rain, snow, and sunlight can all cause damage over time. If your bracket is made of metal, consider applying a rust-resistant coating to protect it from corrosion. And if it’s made of plastic, try to shield it from direct sunlight to prevent it from becoming brittle.
Another simple trick is to regularly inspect the bracket for any signs of wear and tear. Look for cracks, rust, or loose screws. If you spot any problems, address them immediately. Tighten any loose screws, repair any cracks with epoxy, and apply a fresh coat of paint to prevent rust from spreading.
Finally, consider the environment where the bracket is installed. If it’s in a high-traffic area, protect it from accidental bumps and scrapes. You could even install a small barrier around the bracket to prevent people from accidentally bumping into it. With a little bit of care and attention, you can keep your budget bracket in tip-top shape for years to come.
Your Guide to Finding the Best Surveillance Housing Brackets Under $10
Hey there! So, you’re looking to beef up your security without breaking the bank? Smart move! Finding the best surveillance housing brackets under $10 can seem daunting, but trust me, it’s totally achievable. We’re talking about keeping your security cameras safe, secure, and strategically placed without emptying your wallet. This guide is here to walk you through everything you need to know, like a friend giving you all the insider tips before you make that purchase. Let’s get started!
Material Matters: What’s It Made Of?
Think of your surveillance housing bracket as your camera’s bodyguard. You wouldn’t want a flimsy bodyguard, right? The material is crucial. You’ll typically find brackets made of plastic, aluminum, or steel. Plastic is the cheapest, but it might not withstand harsh weather or a determined thief. Aluminum offers a good balance of lightweight and durability. Steel is the strongest, but it can be heavier and more prone to rust if not properly coated.
Imagine this: you live in a coastal area with salty air. A cheap steel bracket without proper coating will rust in no time, leaving your camera vulnerable. Or, picture a heavy-duty camera on a flimsy plastic bracket – it’s a recipe for disaster! So, consider your environment and the weight of your camera when choosing the material. A little research upfront can save you a lot of headaches (and money) later.
Weather Resistance: Can It Handle the Elements?
Speaking of the elements, weather resistance is a HUGE deal. Sun, rain, snow, wind – your brackets will face it all. You need something that can withstand the test of time (and the weather). Look for brackets with weather-resistant coatings or materials designed to handle extreme temperatures and moisture. Powder-coated steel or UV-resistant plastic are great options.
I once bought a cheap bracket that claimed to be weatherproof. Big mistake! After just a few months, the paint started peeling, and rust was forming. My camera was dangling precariously! Lesson learned: don’t just take the manufacturer’s word for it. Read reviews and look for specific mentions of weather resistance. Think about your local climate and choose a bracket that can handle it. It’s all about long-term protection for your valuable security investment.
Camera Compatibility: Will It Actually Fit?
This might seem obvious, but it’s easy to overlook! Before you click “add to cart,” make sure the bracket is actually compatible with your camera. Check the mounting hole pattern on your camera and compare it to the bracket’s specifications. Some brackets are designed for specific camera brands or models, while others are more universal.
Picture this: you excitedly receive your new brackets, only to discover they don’t fit your cameras! Now you’re stuck with a useless piece of metal (or plastic) and the hassle of returns. Avoid this frustration by double-checking the compatibility. Look for brackets that specify the types of cameras they support. If you’re unsure, measure the mounting holes on your camera and compare them to the bracket’s dimensions. A little measuring can save you a lot of disappointment.
Adjustability: Can You Get the Right Angle?
The whole point of a surveillance camera is to capture the right view, right? A good bracket should offer some degree of adjustability. This allows you to fine-tune the camera’s angle to get the perfect coverage. Look for brackets with swivel, tilt, or rotation features. These adjustments can make a HUGE difference in your surveillance effectiveness.
Imagine you install your camera with a fixed bracket. Turns out, it’s pointing slightly too high, missing a crucial part of your driveway. With an adjustable bracket, you could easily tweak the angle to capture everything. Or, say the sun’s glare is creating a blind spot. An adjustable bracket allows you to reposition the camera to minimize the glare. Flexibility is key when it comes to optimal surveillance.
Ease of Installation: How Much of a Headache Will It Be?
Unless you’re a professional installer, you want a bracket that’s easy to install. Look for brackets that come with clear instructions and all the necessary hardware (screws, anchors, etc.). A simple design is usually a good sign. Complicated brackets can be a nightmare to install, especially if you’re working at heights.
I once bought a bracket that required specialized tools and a Ph.D. in engineering to install. Okay, maybe not a Ph.D., but it was ridiculously complicated. I ended up spending hours trying to figure it out, and I still wasn’t sure if I’d done it right. Don’t make the same mistake! Choose a bracket that’s designed for easy DIY installation. Look for user-friendly features like pre-drilled holes and straightforward mounting systems. Your sanity (and your time) will thank you.
Security Features: Can It Be Easily Tampered With?
A bracket’s primary job is to hold your camera, but it should also offer some level of security. Look for brackets with tamper-resistant features, such as hidden screws or locking mechanisms. The harder it is for someone to tamper with the bracket, the safer your camera will be.
Think about it: a thief could easily disable your camera by simply unscrewing it from a flimsy bracket. That defeats the whole purpose of having surveillance! Look for brackets with features that make it difficult to remove or adjust the camera without the proper tools. Even small details, like recessed screws or a locking plate, can make a big difference. Remember, the best surveillance housing brackets under $10 are about maximizing security within a budget.
Price vs. Value: Are You Getting the Most Bang for Your Buck?
Ultimately, you’re looking for the best surveillance housing brackets under $10. That means finding the sweet spot between price and value. Don’t just go for the cheapest option. Consider all the factors we’ve discussed – material, weather resistance, compatibility, adjustability, ease of installation, and security features. The goal is to find a bracket that offers the best combination of these features within your budget.
Remember, a slightly more expensive bracket might be worth it if it’s made of better material, offers better weather resistance, or has better security features. It’s all about weighing the pros and cons and deciding what’s most important to you. Read reviews, compare prices, and do your research. Don’t be afraid to spend a little extra for a bracket that will provide long-term protection and peace of mind. After all, a well-protected camera is a worthwhile investment.
FAQ
What exactly *are* surveillance housing brackets, and why do I need one?
Surveillance housing brackets are basically like little homes for your security cameras. They’re the mounts that securely attach your camera to a wall, ceiling, or pole. Think of them as providing a stable and protected base so your camera can effectively do its job of monitoring things! Without a good bracket, your camera could be vulnerable to the elements, easily tampered with, or simply not positioned correctly to capture the best view.
They’re more important than you might initially think. A well-chosen bracket can drastically improve your camera’s performance. It offers protection from weather like rain and sun, preventing damage. Also, it helps deter vandals because a securely mounted camera is harder to mess with. Ultimately, using the right bracket makes your surveillance system more reliable and effective in keeping your property safe.
Are these cheap brackets really durable enough to trust with my expensive security camera?
That’s a totally valid concern! It’s natural to wonder if a cheaper option can truly hold up. The good news is that “under $10” doesn’t automatically equal “flimsy.” Many of the brackets in this price range are made from durable materials like powder-coated aluminum or sturdy plastic, designed to withstand the elements. Just be sure to pay attention to the product descriptions and reviews to see what other users are saying about their experience with durability.
Think of it this way: sometimes, you’re paying for the brand name more than the actual quality. Many budget-friendly brands focus on delivering solid functionality without the added cost of marketing and premium packaging. Plus, a well-chosen, properly installed budget bracket is far better than a more expensive one that’s incorrectly installed or doesn’t fit your camera properly! Just do your research and read those reviews!
How do I know which bracket is compatible with my specific security camera model?
Compatibility can seem tricky, but it’s usually pretty straightforward! The key is to look closely at the product specifications of both your camera and the bracket. Pay attention to the mounting hole pattern – is it a standard size, or something unique to your camera? Most camera descriptions will specify the mounting type, and the bracket descriptions should tell you what types of cameras they support.
It’s also helpful to measure the base of your camera and compare it to the bracket’s dimensions. If you’re unsure, many sellers offer compatibility charts or have customer service representatives who can assist you. Don’t hesitate to reach out and ask before you buy! A quick question can save you the hassle of a return. Also, look for brackets that offer adjustability – this can give you some wiggle room if the fit isn’t perfect.
What tools will I need to install a surveillance housing bracket myself?
Installing a bracket yourself is usually a pretty manageable DIY project! You’ll typically need a few basic tools that most homeowners already have. Think of it as hanging a picture, but with a little more security involved!
You’ll definitely need a drill with appropriate drill bits for the surface you’re mounting to (wood, drywall, brick, etc.), a screwdriver (likely Phillips head), a level to ensure your camera is straight, and a pencil for marking your drill holes. A measuring tape can also be useful for precise placement. Depending on the bracket and your wall type, you might need wall anchors or specialized screws. Always double-check the bracket instructions to see what’s recommended. A good set of instructions will make the process even easier!
What if the bracket I buy doesn’t fit my camera perfectly? Can I return it?
It’s a common worry that things might not fit perfectly, but don’t stress! Most reputable sellers have return policies in place for just this reason. Before you even open the bracket packaging, double-check the compatibility again to make sure you didn’t miss anything. If it’s definitely the wrong size or type, it’s best to start the return process immediately.
Read the seller’s return policy carefully – you’ll usually have a specific timeframe to initiate a return (e.g., 30 days). Keep all the original packaging and any included hardware to make the return process smoother. When you contact the seller, explain the situation clearly and provide any relevant photos if possible. Most sellers are happy to help and will guide you through the return process. And remember, even if a bracket seems slightly off, sometimes small adjustments can make it work, but never force it if it feels like it won’t fit correctly.
Are there different types of surveillance housing brackets, and if so, which one is right for me?
Absolutely! There are quite a few different types, and choosing the right one depends on where you want to mount your camera and the type of camera you have. Wall-mount brackets are probably the most common; they’re great for mounting cameras on walls and offer good adjustability. Ceiling-mount brackets are ideal for mounting cameras from the ceiling, often providing a wider field of view.
Pole-mount brackets are designed to attach cameras to poles or posts, which can be useful for areas where walls or ceilings aren’t available. Corner-mount brackets are perfect for…you guessed it…mounting cameras in corners, maximizing visibility. Also, some brackets are adjustable, allowing you to fine-tune the camera’s angle, while others are fixed. Consider the location, the camera’s weight, and the desired viewing angle when making your choice. And remember, a little research beforehand can save you a lot of frustration later!
Can these brackets also help protect my camera from the weather?
Many surveillance housing brackets offer some degree of weather protection, which is fantastic for extending the life of your camera! Look for brackets made from weatherproof materials like powder-coated aluminum or durable, UV-resistant plastic. These materials can withstand rain, snow, and sun without rusting or degrading.
However, keep in mind that not all brackets are created equal in terms of weatherproofing. Some offer more protection than others. Read the product description carefully to see if it mentions weather resistance or a specific IP rating (Ingress Protection). Also, consider the bracket’s design. A bracket with a hood or overhang can provide extra protection from rain and direct sunlight. Even with a weather-resistant bracket, it’s still a good idea to position your camera in a slightly sheltered location whenever possible to further minimize its exposure to the elements.
Final Verdict
And that’s the lowdown on snagging the best surveillance housing brackets under $10! We’ve covered a lot of ground, from understanding compatibility and materials to pinpointing the perfect bracket for your specific needs. Remember, enhancing your home security doesn’t have to break the bank. With a little knowledge and a smart choice, you can achieve peace of mind without emptying your wallet.
Now, go forth and fortify your fortress! You’ve got the insights, the options are clear, and a safer, more secure home is just a click away. Don’t let another day go by feeling vulnerable. Embrace the power of smart, budget-friendly security and create a haven you can always count on. You got this!