Remember that wobbly bookshelf you tried to assemble last weekend? Or perhaps that picture frame that stubbornly refused to hang straight? We’ve all been there, struggling with makeshift tools and wishing we had something…better. I remember attempting to build a birdhouse with an old, rusty screwdriver and nearly losing a finger in the process. That’s when I realized the transformative power of a good drill, specifically a cordless one. But with so many options on the market, knowing where to begin can feel overwhelming. That’s why we’ve created this guide to help you find the best starter cordless drills.
Whether you’re a brand-new homeowner, a student setting up your first apartment, or simply tired of relying on hand tools for every small project, this guide is for you. We’ll walk you through the key features to consider, debunk common myths, and present our top picks for beginner-friendly cordless drills. Say goodbye to frustrating DIY experiences and hello to confident, successful projects with the perfect cordless drill in your hand. Let’s get started!
Before moving into the review of the best starter cordless drills, let’s check out some of the relevant products from Amazon:


Last update on 2025-11-24 / #ad / Affiliate links / Images from Amazon Product Advertising API
So, You’re Ready to Unleash Your Inner DIYer? Let’s Talk Drills!
Ever feel that itch to finally hang those pictures, build that bookshelf from IKEA (without the frustration!), or tackle some other small home project? Yeah, we’ve all been there. The first step to transforming from a DIY dreamer to a DIY doer is having the right tools. And at the top of that list, practically indispensable, is a good cordless drill. Forget wrestling with cords and outlets – a cordless drill offers freedom and convenience. But with so many options out there, finding the best starter cordless drills can feel a little overwhelming.
That’s where we come in! Think of us as your friendly neighborhood tool whisperers. We’ve navigated the labyrinth of voltages, battery types, and torque settings, so you don’t have to. Did you know that, according to a recent survey, nearly 70% of homeowners perform their own minor home repairs? With the right drill, you can confidently join those ranks. We’ll cut through the jargon and focus on what really matters for a beginner.
We’re not talking about industrial-strength drills used on construction sites. We’re talking about the perfect balance of power, ease of use, and price. These drills are designed to be comfortable in your hand and unintimidating to operate. Whether you’re driving screws into drywall or drilling pilot holes in wood, our recommendations are tailored for light to medium-duty tasks that most homeowners encounter regularly.
So, grab a cup of coffee, settle in, and let’s explore the world of cordless drills together. We’ll help you find the best starter cordless drills to conquer those DIY projects and impress your friends (and yourself!) with your newfound skills. Get ready to say goodbye to wobbly shelves and hello to perfectly hung artwork!
Best Starter Cordless Drills – Reviews
DEWALT 20V MAX Cordless Drill/Driver Kit
The DEWALT 20V MAX is a workhorse disguised as a starter drill. It’s incredibly reliable and powerful enough for most home improvement projects, from hanging pictures to assembling furniture. The drill is well-balanced and comfortable to hold, even during extended use. The variable speed trigger gives you excellent control, preventing stripped screws and damaged surfaces.
While it might be a tad pricier than some other starter options, the DEWALT’s durability and performance make it a worthwhile investment. The included battery and charger are a definite plus, getting you up and running right out of the box. The LED light is a nice touch, illuminating your workspace in dim conditions.
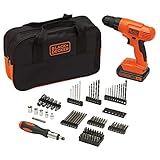
BLACK+DECKER 20V MAX Cordless Drill/Driver
If budget is a major concern, the BLACK+DECKER 20V MAX is a fantastic choice. It provides excellent value for money, delivering decent power and functionality without breaking the bank. It’s lightweight and easy to handle, making it perfect for DIY beginners and smaller projects. It will easily handle everyday tasks like tightening loose screws or making pilot holes.
Of course, it doesn’t pack the same punch as some of the higher-end models, but for occasional use around the house, it’s more than capable. The compact design makes it easy to store, and the battery life is respectable. It’s a great entry-level option for anyone just starting to build their tool collection.
Milwaukee M12 FUEL Drill Driver Kit
The Milwaukee M12 FUEL is a compact powerhouse that punches way above its weight class. This drill is surprisingly strong for its size, offering impressive torque and speed for a variety of drilling and driving tasks. The ergonomic design and lightweight construction make it comfortable to use for extended periods, even in tight spaces.
While it might be a slightly higher investment than some other starter drills, the Milwaukee M12 FUEL offers professional-grade performance in a compact package. The FUEL technology maximizes battery life and motor efficiency, ensuring you can get the job done without constant recharging. This drill is a great choice for those who want a high-quality tool that will last for years to come.
Makita FD07R1 12V max CXT Lithium-Ion Cordless Driver-Drill Kit
The Makita FD07R1 is a compact and lightweight drill that’s perfect for tackling smaller projects and working in tight spaces. The 12V max CXT battery platform provides ample power for driving screws and drilling holes in wood and plastic. The ergonomic handle and well-balanced design make it comfortable to use, even for extended periods.
This drill is a great option for those who need a reliable and easy-to-use tool for light-duty tasks around the house. The two-speed transmission allows you to adjust the speed to match the application, preventing stripped screws and ensuring optimal performance. The included carrying case makes it easy to transport and store the drill and its accessories.
Ryobi P277 One+ 18V Cordless Drill/Driver
The Ryobi P277 is a versatile and affordable drill that’s compatible with the Ryobi One+ battery system, meaning you can use the same battery with a wide range of other Ryobi tools. This drill offers decent power and performance for a variety of DIY projects, from assembling furniture to hanging shelves. The 24-position clutch allows you to adjust the torque to prevent overdriving screws.
The Ryobi P277 is a great option for those who are already invested in the Ryobi One+ ecosystem or who are looking for an affordable and versatile drill for general use. The included battery and charger make it a complete package, and the drill’s durable construction ensures it will withstand years of use. The magnetic tray is a convenient addition for holding screws and other small parts.
Why Do People Need to Buy Starter Cordless Drills?
Ever tried hanging a picture frame, assembling flat-pack furniture, or fixing a loose cabinet hinge with just a screwdriver? It can be a frustrating, time-consuming, and often knuckle-busting experience. That’s where a starter cordless drill comes in. Imagine effortlessly zipping screws into place, making light work of DIY projects, and feeling the satisfaction of a job well done, all thanks to a single, versatile tool. A starter cordless drill opens up a world of possibilities around the house, making even small repairs feel manageable and empowering.
The “best starter cordless drills” are designed for ease of use, even for those completely new to power tools. They’re lightweight, have comfortable grips, and often come with features like variable speed and clutch settings that prevent over-tightening screws. Think about finally getting around to organizing your garage, building that bookshelf you’ve been dreaming of, or simply adding a touch of personal flair to your living space with custom shelving. A cordless drill turns these aspirations into achievable realities.
Beyond convenience, a cordless drill offers a significant safety advantage. No more tangled cords or fumbling for an extension lead. The freedom to move around without being tethered to a power outlet makes working in awkward spaces, like under the sink or in the attic, much safer and more efficient. Plus, many starter kits include essential drill bits and accessories, providing everything you need to tackle a wide range of projects right out of the box.
Investing in a starter cordless drill isn’t just about buying a tool; it’s about investing in your ability to maintain and improve your home with confidence. It’s about saving time and frustration, gaining a sense of accomplishment, and unlocking your inner DIY enthusiast. So, ditch the screwdriver struggles and embrace the power and convenience of a cordless drill – you’ll wonder how you ever lived without it!
Cordless Drill Safety: Avoiding Common Mistakes
Alright, let’s talk safety. Cordless drills are fantastic, but like any power tool, they demand respect. Ignoring safety protocols can lead to serious injuries, so understanding the basics is crucial, especially for beginners. Think of it like driving a car; you wouldn’t jump behind the wheel without knowing the rules of the road, right? Power tools are no different.
One common mistake? Forgetting eye protection. Sawdust, metal shavings, even small splinters can easily fly up and damage your eyes. Invest in a good pair of safety glasses and wear them religiously. Trust me, a momentary lapse in judgment isn’t worth jeopardizing your vision. It’s like wearing a helmet while biking; it might seem unnecessary until you need it.
Another biggie is using the wrong drill bit for the job. Trying to force a wood drill bit through metal is a recipe for disaster. You’ll likely ruin the bit, potentially damage the drill, and increase the risk of kickback. Always double-check the bit’s intended material and use appropriate speeds and pressure. Think of it like trying to use a butter knife to cut through steak; it’s just not the right tool for the job.
Finally, don’t underestimate the importance of securing your workpiece. A piece of wood wobbling around while you’re trying to drill into it is a recipe for inaccurate holes and potential injury. Use clamps, a vise, or even a non-slip mat to keep everything firmly in place. Imagine trying to write on a wobbly table; it’s much harder to get a clean, precise result. Secure your work, and you’ll have much better (and safer!) outcomes.
Understanding Drill Speeds and Torque
So, you’ve got your shiny new cordless drill – awesome! But what about all those numbers and settings? Specifically, understanding speed (RPM) and torque is crucial for getting the most out of your drill and avoiding frustration. Think of speed as how fast the drill bit spins, and torque as the amount of twisting force it applies.
Lower speeds (RPM) are generally better for driving screws, especially into delicate materials like drywall or soft wood. Too much speed and you risk stripping the screw head or splitting the material. Imagine trying to scramble an egg with a blender on high – it would be a mess! Slow and steady wins the race here.
Higher speeds are typically used for drilling holes. A faster spinning bit helps remove material more efficiently, especially when drilling through harder materials like metal or tile. But again, matching the speed to the material is key. Drilling through thin metal requires a slower speed than drilling through wood to prevent overheating and damaging the bit. It’s like choosing the right gear on a bicycle for climbing a hill; the right gear makes all the difference.
Torque, on the other hand, is what prevents the drill from stalling when it encounters resistance. More torque means the drill can power through tougher materials and drive larger screws. If you’re struggling to drive a screw deep into a hard wood, increasing the torque setting can often solve the problem. Consider it like using a longer wrench to loosen a stubborn bolt; the extra leverage provides the necessary force.
Finally, remember to experiment with different speed and torque settings to find what works best for each task. Every drill is slightly different, and every material reacts differently. Don’t be afraid to practice on scrap pieces to get a feel for how your drill performs. It’s like learning to cook; you might burn a few things at first, but eventually, you’ll master the art.
Maintaining Your Cordless Drill for Longevity
Okay, you’ve invested in a cordless drill – now let’s make sure it lasts. Proper maintenance isn’t just about keeping it clean; it’s about ensuring optimal performance and preventing costly repairs down the road. Think of it like a car; regular oil changes and tune-ups will keep it running smoothly for years.
One of the most important aspects of maintenance is battery care. Avoid completely draining the battery before recharging, as this can shorten its lifespan. Instead, try to recharge it when it’s around 20-30% full. Also, store your batteries in a cool, dry place away from direct sunlight or extreme temperatures. Leaving a battery in a hot car can significantly degrade its performance. It’s like leaving a chocolate bar in the sun; it won’t be quite the same afterwards.
Regular cleaning is also essential. Dust, sawdust, and debris can accumulate in the motor housing and around the chuck, hindering performance and potentially causing damage. Use a soft brush or compressed air to remove any buildup. Avoid using water or solvents, as these can damage the electrical components. Imagine trying to vacuum your carpet with a clogged filter; it simply won’t work as efficiently.
Finally, take care of your drill bits. Dull bits not only make your work harder, but they can also put extra strain on the drill motor. Sharpen your bits regularly or replace them when they become excessively worn. Also, store them properly to prevent damage and corrosion. A dull drill bit is like a dull knife in the kitchen; it’s more dangerous and less effective.
Beyond the Basics: Drill Accessories to Enhance Your Projects
So, you’ve mastered the basics of your cordless drill – awesome! But the world of drilling doesn’t end there. A whole universe of accessories exists that can take your projects to the next level. Think of it like adding spices to a dish; the right accessories can transform a simple task into something truly impressive.
One essential accessory is a good set of drill bits. Beyond the standard twist drill bits, consider investing in spade bits for drilling large holes in wood, hole saws for creating perfect circles, and masonry bits for drilling into concrete or brick. Each type of bit is designed for a specific purpose, and using the right bit can make a huge difference in the quality and speed of your work. It’s like having the right ingredients for a recipe; you can’t make a cake without flour!
Another game-changing accessory is a screw guide. These handy tools help you drive screws straight and prevent them from slipping or stripping. They’re especially useful when working with soft woods or when driving screws at an angle. Think of it like using training wheels on a bike; they provide extra stability until you’re confident enough to ride on your own.
For repetitive tasks, consider investing in a drill stand. These stands allow you to mount your drill securely and create precise, consistent holes. They’re perfect for projects like building shelves or creating custom jigs. It’s like having a dedicated workspace for a specific task; it makes the process more efficient and accurate.
Finally, don’t forget about the humble impact driver. While technically a separate tool, an impact driver is a fantastic complement to a cordless drill. Impact drivers deliver high torque in short bursts, making them ideal for driving long screws or loosening stubborn fasteners. If you find yourself frequently struggling with screws, an impact driver might be just what you need. It’s like having a secret weapon in your toolbox!
Your Friendly Guide to Finding the Best Starter Cordless Drills
Hey there, future DIY enthusiast! Ready to dive into the world of home improvement and finally hang that picture, assemble that furniture, or tackle that small project you’ve been putting off? A cordless drill is your new best friend, and choosing the right one can make all the difference between a frustrating afternoon and a feeling of “I can do anything!” This guide will walk you through everything you need to know to find the best starter cordless drills for your needs, without getting bogged down in technical jargon. Let’s get drilling!
Battery Voltage and Power: More Isn’t Always Better
Okay, let’s talk power. You’ll see voltage ratings like 12V, 18V, or even 20V advertised. A higher voltage generally means more power, but for a beginner, you don’t necessarily need the beastliest drill on the market. Think about the types of projects you’ll be tackling. Are you mostly going to be driving screws into drywall or soft wood? A lower voltage drill (12V or 18V) might be perfectly sufficient and will likely be lighter and more manageable.
Imagine trying to drive a tiny nail with a sledgehammer – overkill, right? The same principle applies here. A super powerful drill for light-duty tasks can be unwieldy and make it harder to control, potentially leading to stripped screws or damaged materials. For most starter projects, prioritize control and comfort over raw power. Besides, the best starter cordless drills are often more affordable in the lower voltage range, leaving you with more cash for other essential tools!
Battery Type and Run Time: Nickel-Cadmium vs. Lithium-Ion
This is a crucial one! Remember the old days of rechargeable batteries that seemed to die after only a few minutes of use? Thankfully, battery technology has come a long way. For the best starter cordless drills, you’ll generally find two battery types: Nickel-Cadmium (NiCd) and Lithium-Ion (Li-ion).
While NiCd batteries used to be common, they’re largely being phased out in favor of Li-ion. Li-ion batteries are lighter, hold their charge longer (even when not in use), and don’t suffer from “memory effect” (where the battery life diminishes if you don’t fully discharge it before recharging). NiCd batteries can be more affordable initially, but the advantages of Li-ion far outweigh the cost savings in the long run. Plus, Li-ion batteries often charge much faster!
Chuck Size and Type: Keyed vs. Keyless
The “chuck” is the part of the drill that holds the drill bit or screwdriver bit. You’ll find two main types: keyed and keyless. A keyed chuck requires a special key to tighten and loosen the bit. A keyless chuck allows you to tighten and loosen the bit by hand.
For the best starter cordless drills, a keyless chuck is almost always the better choice. It’s much more convenient, especially when you’re switching between drill bits and screwdriver bits frequently. No more fumbling around for a tiny key! Chuck size refers to the maximum shank diameter of the bit it can hold. Common sizes are 3/8 inch and 1/2 inch. For most beginner projects, a 3/8 inch chuck will be perfectly adequate.
Speed and Torque: Getting the Right Balance
Speed (measured in RPM – Revolutions Per Minute) and torque (the rotational force of the drill) are important factors to consider. Higher speed is generally better for drilling, while higher torque is better for driving screws.
Many cordless drills have variable speed settings, allowing you to adjust the speed to suit the task at hand. This is a valuable feature, especially for beginners. Too much speed when driving screws can easily strip the screw head, while too little speed when drilling can make the task take forever. Look for a drill with a wide range of speed settings and a decent torque setting for versatile use. The best starter cordless drills often have a clutch setting that prevents you from over-tightening screws.
Size and Weight: Comfort is Key
This is often overlooked, but it’s essential, especially if you’re new to using power tools. A heavy, bulky drill can be tiring to use, especially for extended periods.
Imagine trying to hold a heavy weight above your head for 30 minutes. Not fun, right? The same applies to a cordless drill. Look for a drill that feels comfortable in your hand and isn’t too heavy. Ergonomic design, with a comfortable grip, is also important. The best starter cordless drills should feel like an extension of your hand, not a burden. You want to enjoy your DIY projects, not dread them!
Features: Bells and Whistles vs. Practicality
Cordless drills can come with a variety of features, some useful, others less so. Things like built-in LED lights to illuminate your work area, bubble levels, and magnetic bit holders can be helpful.
However, don’t get too caught up in fancy features you might not use. A basic drill with the essential features, like variable speed, a keyless chuck, and a decent battery, is often a better choice than a feature-rich drill that costs a fortune. While an LED light can be handy in dimly lit spaces, it shouldn’t be the deciding factor. Focus on the core performance and build quality of the drill itself. The best starter cordless drills prioritize functionality and durability over gimmicks.
Price and Value: Finding the Sweet Spot
Finally, let’s talk money. Cordless drills can range in price from very affordable to quite expensive. For a beginner, you don’t need to break the bank to get a decent drill.
Set a budget and stick to it. Consider what you’ll be using the drill for and choose a model that meets your needs without exceeding your budget. Read reviews and compare prices from different retailers. The best starter cordless drills offer a good balance of performance, features, and price. Remember, a more expensive drill isn’t always better. Look for a reputable brand with a good warranty and positive customer reviews. You want a drill that will last and provide reliable performance for years to come.
FAQ
What makes a cordless drill a good “starter” option?
A “starter” cordless drill is really all about finding the sweet spot between price, power, and ease of use. You’re not looking for a professional-grade workhorse right off the bat; instead, you want something reliable and capable enough to handle most basic DIY tasks around the house without breaking the bank. Think about hanging pictures, assembling furniture, tightening loose screws, or tackling light drilling projects – that’s where a good starter drill shines.
The best starter drills are typically lightweight and comfortable to hold, featuring intuitive controls that won’t intimidate beginners. They should also come with a reasonable battery life so you’re not constantly running out of juice mid-project. Ultimately, it’s about getting a solid foundation that builds confidence and provides the tools needed to learn the ropes of DIY.
What kind of projects can I realistically tackle with a starter cordless drill?
Honestly, you’d be surprised at how many projects a good starter drill can handle! Think along the lines of basic home repairs and improvements. Assembling flat-pack furniture, hanging shelves or curtain rods, installing light fixtures, and tightening up wobbly furniture are all well within its capabilities. You can also easily use it for drilling pilot holes or driving screws for small woodworking projects.
However, it’s important to be realistic about its limitations. A starter drill isn’t really meant for heavy-duty tasks like drilling through concrete, driving extra-long screws into hardwood, or tackling large construction projects. Pushing it beyond its capabilities can lead to frustration and even damage the tool. So, focus on the smaller projects, and as your skills (and project ambitions!) grow, you can always upgrade to a more powerful model.
How important is the battery voltage for a beginner drill?
Battery voltage is a key factor to consider, but don’t get too hung up on having the absolute highest number right away. Generally, for starter drills, you’ll see voltages around 12V or 18/20V. A 12V drill is usually lighter and more compact, which makes it easier to handle for smaller tasks and prolonged use. They are great for tasks like assembling furniture and light drilling.
An 18/20V drill will offer more power, allowing you to tackle slightly tougher tasks like drilling larger holes or driving longer screws. However, they are typically heavier. For a beginner, either voltage range can be perfectly suitable, it really depends on the type of projects you foresee yourself doing. If you are only doing very small home projects, a 12V may be enough, but if you think you will want to do more, you may want to start with the 18/20V.
What are some common mistakes beginners make when using a cordless drill?
One very common mistake is not using the correct drill bit or screwdriver bit for the job. Using the wrong bit can lead to stripped screws, damaged surfaces, and even broken bits. Always double-check that the bit you’re using is the right size and type for the screw or material you’re working with. It can seem simple, but it’s essential!
Another mistake is applying too much pressure or not enough. Pushing too hard can strain the motor and potentially damage the drill or your workpiece. Not applying enough pressure can lead to slipping and stripping screw heads. Find the sweet spot by letting the drill do the work, applying steady and controlled pressure. Remember, practice makes perfect!
What accessories should I consider getting with my starter cordless drill?
Beyond the drill itself, there are a few key accessories that will make your life a whole lot easier. First off, a good selection of drill bits is a must. Look for a set that includes various sizes of both twist drill bits (for drilling holes in wood and metal) and screwdriver bits (for driving screws). A set that is organized well is also very useful.
Also, consider getting a magnetic bit holder or extension. This will allow you to easily switch between bits and reach into tight spaces. Finally, safety glasses are non-negotiable. Protecting your eyes from flying debris should always be a top priority, no matter how small the project!
How important is the chuck size on a starter cordless drill?
The chuck size refers to the maximum diameter drill bit that the drill can hold. Most starter cordless drills will have a 3/8-inch or 1/2-inch chuck. While a 1/2-inch chuck can technically accommodate larger bits, for most beginner projects, a 3/8-inch chuck will be perfectly adequate.
A 3/8-inch chuck is also typically found on lighter and more compact drills, which can be an advantage for beginners. Unless you specifically know that you’ll be needing to use larger drill bits on a regular basis, don’t let chuck size be a major deciding factor. Focus more on factors like power, weight, and ease of use.
How do I maintain my cordless drill to ensure it lasts longer?
Proper maintenance is key to extending the life of your cordless drill! First and foremost, always store your drill and batteries in a cool, dry place. Extreme temperatures can damage the batteries and internal components. Also, it is a good idea to store your drill and batteries separately, as storing batteries on the tool may drain them over time.
Keep the drill clean by wiping it down after each use. Use a soft cloth to remove any dust or debris. Check for loose screws or parts and tighten them as needed. And always follow the manufacturer’s instructions for charging and storing the batteries. By taking these simple steps, you can keep your drill in good working order for years to come!
Final Words
So there you have it! We’ve explored some fantastic options for the best starter cordless drills, each with its own strengths and personality. Hopefully, this guide has demystified the world of power tools and given you a clearer picture of what to look for. Remember, the perfect drill for you depends on your specific needs and the kinds of projects you envision tackling. Don’t overthink it – the most important thing is to choose a reliable drill that you feel comfortable using and that fits your budget.
Now it’s time to take the plunge and invest in your very own best starter cordless drill! Imagine all the possibilities – building shelves, fixing furniture, crafting unique décor, and so much more. With the right tool in hand, you’ll be amazed at what you can accomplish. Go ahead, unleash your inner DIYer and start creating! We’re excited to see what you build!