That moment when you point a telescope at the night sky for the first time and see the craters on the Moon, or perhaps the rings of Saturn, is truly unforgettable. Maybe you’re looking to ignite a new passion in yourself or a loved one, or perhaps you’re just curious about what lies beyond our atmosphere without breaking the bank. The vastness of space beckons, and the good news is, you don’t need to spend a fortune to start exploring it. Understanding the different types of telescopes and what makes them work can feel a bit daunting, especially when you’re just starting out.
This is precisely why we’ve put together this comprehensive guide. We understand that finding the right equipment, especially when you’re on a budget, can be a challenge. That’s why we’ve meticulously reviewed and tested various options to bring you the best reflector telescopes under $200. We’ll walk you through what to look for, explain the key features, and highlight some fantastic choices that will get you gazing at celestial wonders in no time, making your journey into amateur astronomy both accessible and incredibly rewarding.
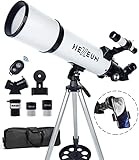
Before moving into the review of the best reflector telescopes under $200, let’s check out some of the relevant products from Amazon:


Last update on 2026-02-17 / #ad / Affiliate links / Images from Amazon Product Advertising API
Your Gateway to the Cosmos: Finding the Best Reflector Telescopes Under $200
Ever found yourself gazing up at the night sky, utterly captivated by the twinkling expanse? Maybe you’ve seen images from the Hubble or James Webb Space Telescope and thought, “Wow, I wish I could see something like that!” Well, the good news is, you absolutely can! For aspiring astronomers and curious stargazers, diving into the universe doesn’t require a second mortgage. In fact, you can get a fantastic introduction to the wonders of the cosmos with some of the best reflector telescopes under $200. These instruments are perfect for beginners, offering a clear and bright view of planets, the Moon, and even some brighter deep-sky objects.
Think of it this way: the universe is putting on a spectacular show every single night, and you don’t need a VIP pass to enjoy it. A good reflector telescope, even a budget-friendly one, acts as your personal ticket. It gathers light, much like your eye does, but far more efficiently. For instance, even a modest 70mm aperture telescope can gather roughly 10,000 times more light than your naked eye! With one of the best reflector telescopes under $200, you can expect to see the rings of Saturn, the craters on the Moon in stunning detail, and the moons of Jupiter dancing around their giant planet.
The beauty of reflector telescopes, particularly Newtonian reflectors which are very common in this price range, is their simplicity and effectiveness. They use mirrors to collect and focus light, which generally offers more aperture (the diameter of the main mirror) for your money compared to refractors. This larger aperture is crucial for seeing fainter objects and finer details. Many of these entry-level models boast apertures between 70mm and 130mm, a sweet spot for a truly rewarding viewing experience without breaking the bank.
So, whether you’re looking to ignite a lifelong passion for astronomy in yourself or a young aspiring scientist, finding the best reflector telescopes under $200 is a wonderful starting point. We’ll guide you through what to look for, what to expect, and help you choose the perfect instrument to begin your incredible journey of cosmic discovery. Get ready to be amazed by what lies beyond our own blue planet!
Best Reflector Telescopes Under $200 – Reviewed
Celestron StarSense Explorer LT 114AZ
So, you’re looking to dip your toes into the vast ocean of the cosmos without breaking the bank? The Celestron StarSense Explorer LT 114AZ might just be your ticket. This Newtonian reflector packs a 114mm aperture, which means it can gather a decent amount of light, bringing brighter deep-sky objects like nebulae and galaxies into view, not to mention some stunning lunar details. The real magic, though, is the StarSense technology. It uses your smartphone and a clever docking station to automatically align your telescope with the night sky. Seriously, no more fiddling with confusing finderscopes!
This telescope is all about making your stargazing experience as smooth as butter. Once your phone is docked and the app has identified the stars, it guides you directly to your target with on-screen arrows. It’s like having a personal celestial tour guide right there with you. The included eyepieces are a good starting point, and while you’ll likely want to upgrade down the line for even better views, this setup is fantastic for beginners who want to start exploring without feeling overwhelmed. It’s a sturdy little scope that’s surprisingly portable, making it a great choice for backyard stargazing or even a quick trip to a darker location.
Orion SpaceProbe 130ST Equatorial Reflector Telescope
Alright, let’s talk about the Orion SpaceProbe 130ST Equatorial. This is a bit of a step up, offering a 130mm aperture, which means even more light-gathering power than the 114mm options. What does that translate to? Crisper views of those famous celestial sights, like the rings of Saturn, Jupiter’s cloud bands, and even some of the more elusive deep-sky wonders. The “ST” stands for Short Tube, which is a fancy way of saying it’s a bit more compact and manageable, making it easier to set up and move around. Plus, that Newtonian design is tried and true for delivering bright, sharp images.
The real kicker here is the equatorial mount. Now, this might sound a bit technical, but an equatorial mount is designed to track celestial objects as they move across the sky. Once properly aligned, you can lock onto an object and it will stay centered in your eyepiece with just a simple adjustment of one knob. This is a game-changer for observing planets and the Moon, as they won’t drift out of view as quickly. For under $200, getting an equatorial mount is a pretty sweet deal, and it really elevates the whole stargazing experience for those serious about getting more out of their observations.
GPO Spectra 114AZ 114mm f/4.4 Newtonian Reflector Telescope
Looking for a reflector telescope that’s not afraid to deliver big on performance without a big price tag? The GPO Spectra 114AZ might be just the ticket. This Newtonian reflector boasts a 114mm aperture, which means it’s capable of pulling in enough light to reveal the stunning details of the Moon’s craters, the subtle glow of nebulae, and even the brighter galaxies. The f/4.4 focal ratio signifies a faster optical system, which often translates to brighter images and a wider field of view, making it easier to spot faint objects and enjoy sprawling star fields.
What makes the GPO Spectra 114AZ a contender is its no-nonsense approach to astronomy. It comes with a straightforward alt-azimuth mount, making it simple to point and track celestial objects across the sky. This ease of use is perfect for newcomers who want to spend less time fussing with equipment and more time gazing at the stars. While it might not have all the bells and whistles of some pricier models, it delivers a solid optical experience that’s more than capable of sparking a lifelong passion for the cosmos. It’s a great way to get your feet wet with serious observing without emptying your wallet.
Sky-Watcher Heritage 130P Tabletop Dobsonian Telescope
The Sky-Watcher Heritage 130P is a bit of a rebel in the telescope world, and that’s a good thing! This tabletop Dobsonian is designed to be incredibly user-friendly and portable. It features a 130mm parabolic mirror, which is excellent for delivering sharp, high-contrast images. That larger aperture means you’re going to see more detail on the Moon and planets, and it’s also a fantastic gateway to observing fainter deep-sky objects. The Dobsonian mount is known for its simplicity and stability, allowing you to effortlessly glide the telescope to your desired target.
The “tabletop” aspect is a major selling point for the Heritage 130P. Instead of a clunky tripod, it sits on its own base, making it super easy to set up on a patio table, a balcony railing, or even just a sturdy flat surface. This portability is a huge advantage for those who might not have a dedicated backyard observatory or who travel to darker skies. It also includes a couple of decent eyepieces to get you started right out of the box. For its price, the optical quality and ease of use are hard to beat, making it a popular choice for beginners and experienced astronomers alike who appreciate a compact, capable instrument.
Astromaster 70AZ Refractor Telescope
If you’re looking for a telescope that’s incredibly easy to use and offers a bright, clear view, you might want to consider the Astromaster 70AZ. While it’s a refractor and not a reflector, it’s worth mentioning in this price bracket for its accessibility and excellent lunar and planetary performance. The 70mm aperture is good for observing the Moon’s craters in impressive detail, as well as spotting Jupiter’s four largest moons and even catching a glimpse of Saturn’s rings. The refractor design means no mirrors to align, making setup a breeze, which is always a win for beginners.
The Astromaster 70AZ comes with a sturdy alt-azimuth mount and a pre-assembled tripod, so you can be up and observing in minutes. It’s a fantastic choice for casual stargazing or even daytime nature viewing. The included eyepieces provide a good starting magnification range, and the erect image optics are a nice touch if you plan on using it for terrestrial observation as well. It might not gather as much light as larger reflector telescopes, but for its price and ease of use, it’s a solid performer that’s sure to ignite your curiosity about the universe.
Discovering the Cosmos: Why Reflector Telescopes Under $200 Are Your Gateway to the Stars
Have you ever looked up at the night sky, teeming with glittering stars and the faint glow of distant galaxies, and felt a pang of curiosity, a desire to see it all with more clarity? Many of us have, and the good news is, you don’t need to break the bank to embark on this incredible journey of discovery. Reflector telescopes under $200 offer an astonishingly accessible and powerful way to connect with the universe. Imagine a clear summer evening, the kids are mesmerized by the moon, and with a simple reflector, you can reveal the craters and mountains on its surface, transforming a casual glance into a breathtaking learning experience.
These affordable instruments are perfect for sparking wonder in young minds and reigniting a sense of awe in adults. Think of the joy of showing a child Saturn’s rings for the first time, a sight that can truly ignite a lifelong passion for astronomy. Or picture yourself unwinding after a long day, stepping outside, and effortlessly locating constellations you’ve only ever read about. The “best reflector telescopes under $200” provide that tangible connection, allowing you to witness celestial events like meteor showers or even the faint smudge of the Andromeda galaxy with surprising detail, all from the comfort of your own backyard.
What makes reflector telescopes particularly appealing in this price range is their ingenious design. They use mirrors to gather and focus light, which generally means you get a larger aperture (the diameter of the main mirror) for your money compared to refractors. This larger aperture translates directly into brighter, more detailed views of faint objects. So, while you might not be bagging professional-grade astrophotography shots, you’ll be amazed at how much detail you can discern in nebulae and star clusters, making those budget-friendly purchases incredibly rewarding.
Ultimately, buying a reflector telescope under $200 is an investment in curiosity, education, and sheer, unadulterated wonder. It’s a chance to step outside your everyday life and gaze upon sights that have captivated humanity for millennia. Whether you’re a budding astronomer, a parent looking to inspire your children, or simply someone who appreciates the beauty of the night sky, these telescopes prove that the universe’s grandeur is within reach for everyone. Don’t let the perceived cost of astronomy deter you; your cosmic adventure is waiting, just a telescope away.
Understanding Reflector Telescope Components
When venturing into the world of reflector telescopes, especially those in the budget-friendly category, understanding the core components is crucial for making an informed purchase. At the heart of any reflector is its primary mirror, which is responsible for gathering light. The larger the primary mirror, the more light it can collect, leading to brighter and more detailed images, especially of fainter celestial objects like nebulae and galaxies. Reflector telescopes typically use parabolic mirrors to minimize optical aberrations.
The secondary mirror, often a flat or slightly elliptical mirror, is positioned at an angle within the telescope tube to redirect the light collected by the primary mirror to the eyepiece. Its size and placement are critical for not obstructing too much light. The focuser is the mechanism that moves the eyepiece in and out to achieve sharp focus. Common types include rack-and-pinion and Crayford focuser mechanisms, with Crayford generally offering smoother and more precise adjustments, though this might be less common in the ultra-budget segment.
Understanding these basic parts will help you evaluate the quality and potential of a reflector telescope. Even under $200, you’ll find variations in mirror quality, focuser smoothness, and mount stability. Knowing what to look for will allow you to distinguish between a telescope that will provide fleeting glimpses of the moon and one that can unlock the wonders of the planets and brighter deep-sky objects.
Choosing the Right Aperture and Focal Length
The aperture, or the diameter of the primary mirror, is arguably the most important specification for a reflector telescope. For under $200, you’ll likely be looking at apertures ranging from 70mm to 130mm. A larger aperture will provide better light-gathering capabilities, allowing you to see fainter objects and more detail on brighter ones. For beginners, a 114mm or 130mm aperture is often recommended as a sweet spot, offering a good balance of performance and portability.
Focal length plays a significant role in determining the telescope’s magnification and field of view. Focal length is measured in millimeters, and when divided by the eyepiece’s focal length, it gives you the magnification. A longer focal length generally results in higher magnification and a narrower field of view, which is useful for observing planets and the moon. Conversely, a shorter focal length offers a wider field of view, ideal for scanning star fields and larger deep-sky objects.
When comparing telescopes, pay attention to the focal ratio (f-number), which is calculated by dividing the focal length by the aperture. A lower f-number (e.g., f/4 or f/5) indicates a “fast” telescope, which is good for wide-field views and astrophotography, but can be more prone to optical aberrations. A higher f-number (e.g., f/8 or f/10) is considered “slower” and provides higher magnification and a narrower field of view, often resulting in sharper images, especially with simpler optics.
Evaluating Mounts and Stability
The mount is the foundation of your telescope, and its stability is paramount for enjoyable observing. Even the best optics will produce blurry images if the mount is shaky. For reflector telescopes under $200, you’ll primarily encounter two types of mounts: Altazimuth (Alt-Az) and Equatorial (EQ). Alt-Az mounts move up-down and left-right, making them intuitive for terrestrial viewing and simple to use for beginners. However, they can be more challenging to track celestial objects as they move across the sky.
Equatorial mounts, on the other hand, are designed to track celestial objects with greater ease. One axis of an EQ mount is aligned with the Earth’s rotational axis, allowing a single motor drive to follow the apparent motion of the stars. While this offers superior tracking for deep-sky observation and astrophotography, EQ mounts can be more complex to set up and polar align. For budget reflectors, you’ll often find simpler, less robust EQ mounts that may still require manual adjustments.
When assessing a mount, look for features like slow-motion controls, which allow for fine adjustments to aim the telescope. The overall construction of the mount and tripod is also important. A sturdy tripod with adjustable legs will provide a more stable platform than a flimsy one. Consider the weight capacity of the mount as well; a mount that is too light for the telescope’s weight and size will lead to vibrations and a less satisfactory viewing experience.
Essential Accessories and Future Upgrades
While the telescope itself is the primary investment, a few essential accessories can significantly enhance your stargazing experience. Most budget reflector telescopes come with a couple of basic eyepieces, but these often offer limited magnification or optical quality. Investing in a good set of eyepieces with different focal lengths (e.g., a low-power wide-field eyepiece for scanning and a medium-power eyepiece for planetary viewing) can unlock much sharper and more detailed views.
Other useful accessories include a Barlow lens, which effectively doubles the magnification of any eyepiece you use, and a red-dot finder or a finderscope with crosshairs, which makes it easier to locate celestial objects. A light pollution filter can also be beneficial if you live in an area with significant light pollution, helping to bring out fainter details in nebulae. A good astronomy book or star atlas will also be invaluable for learning the night sky.
As you grow with your telescope, you might also consider future upgrades. These could include a more stable mount, a better focuser for more precise adjustments, or even a larger primary mirror if your current telescope’s tube can accommodate it. For those interested in astrophotography, a dedicated astrophotography camera and a tracking mount are typically necessary but are usually beyond the scope of a sub-$200 telescope. However, even with basic equipment, you can capture impressive images of the moon and brighter planets.
Your Guide to the Best Reflector Telescopes Under $200
Hey there, fellow stargazers! So, you’ve caught the astronomy bug, huh? That’s fantastic! There’s something truly magical about looking up at the night sky and seeing planets, nebulae, and star clusters with your own eyes. And the good news is, you don’t need to break the bank to get started. In fact, there are some incredible reflector telescopes out there that offer a surprisingly deep view of the cosmos, all while keeping your wallet happy. I’m here to help you navigate the world of affordable optics and find the best reflector telescopes under $200 that will ignite your passion for the universe. Think of me as your friendly guide, sharing the wisdom I’ve picked up on my own stargazing adventures. We’ll cover all the important stuff, from what makes a reflector tick to how to choose the right one for you, so you can start your celestial journey with confidence and wonder.
Understanding the Basics: What Makes a Reflector a Reflector?
So, let’s talk about what we’re even looking for here. When we say “reflector telescope,” we’re talking about a specific type of instrument that uses mirrors, not lenses, to gather and focus light. Imagine a shiny, curved mirror at the back of the tube. This mirror acts like a giant eye, collecting faint light from distant objects and bouncing it forward to another, smaller mirror. This smaller mirror then directs the light into your eyepiece, where the magic happens. It’s a clever system that allows for larger apertures (the size of the main mirror) for a given price point compared to refractor telescopes, which is super important when you’re on a budget.
Why is this important for you? Well, larger apertures mean you can collect more light. More light translates to brighter images and the ability to see fainter objects. For those of us looking for the best reflector telescopes under $200, this is a HUGE advantage. You’re getting more “bang for your buck” in terms of light-gathering power, which means you’ll be able to see more detail on the Moon, spot the rings of Saturn, and even catch glimpses of Jupiter’s moons. It’s all about maximizing what you can see without spending a fortune.
Aperture: The King of the Castle (and Your Night Sky!)
When it comes to telescopes, aperture is king. Seriously, it’s the single most important specification you’ll encounter. Aperture refers to the diameter of the main mirror (or lens, in refractors). Think of it like the pupil of your eye – the bigger it is, the more light it can let in. For reflector telescopes under $200, you’ll typically be looking at apertures ranging from around 70mm up to about 130mm (or 2.75 to 5.1 inches). Even a few extra millimeters can make a noticeable difference in the brightness and detail you can observe.
So, why is this so crucial for beginners? A larger aperture will allow you to see fainter objects and more detail on brighter ones. For instance, a telescope with a 114mm aperture will show you a lot more than one with a 70mm aperture. You’ll be able to resolve more craters on the Moon, see the Cassini Division in Saturn’s rings more clearly, and potentially even glimpse some of the brighter deep-sky objects like the Andromeda Galaxy or the Orion Nebula. When you’re searching for the best reflector telescopes under $200, prioritize the largest aperture you can find within your budget.
Focal Length and Focal Ratio: How Magnification Works
Next up, let’s chat about focal length. This is essentially the distance from the main mirror to the point where it focuses light. Focal length, combined with the focal length of your eyepiece, determines the magnification of your telescope. A longer focal length generally means higher potential magnification. But here’s the catch: higher magnification isn’t always better. Too much magnification on a small aperture can result in dim, blurry images. It’s a bit like trying to zoom in too far on a low-resolution photo.
This is where focal ratio comes in, often represented as “f/” followed by a number (e.g., f/5, f/8). It’s calculated by dividing the focal length by the aperture. A lower focal ratio (like f/5) means a “faster” telescope, which produces wider fields of view and is great for observing faint, large objects like nebulae. A higher focal ratio (like f/8) means a “slower” telescope, which provides higher magnification and is better suited for observing planets and the Moon. For versatile viewing with the best reflector telescopes under $200, something in the f/6 to f/8 range often strikes a good balance.
Mount Type: Keeping Things Steady and Stable
Okay, let’s talk about the thing your telescope sits on – the mount. This is surprisingly important, especially when you’re starting out. A wobbly mount will make it incredibly difficult to keep your target in view, especially at higher magnifications. You’ll be fighting vibrations every time you breathe, let alone try to point accurately. You’ll generally encounter two main types of mounts in this price range: Alt-Azimuth and Equatorial.
Alt-Azimuth mounts move up and down (altitude) and left and right (azimuth). They are generally simpler to set up and use, making them a great choice for beginners. You just push the telescope in the direction you want to look. Equatorial mounts, on the other hand, are designed to track celestial objects as the Earth rotates. They have an axis aligned with the Earth’s pole, allowing for smoother tracking. While equatorial mounts are technically better for astrophotography, for casual visual observing with the best reflector telescopes under $200, a stable Alt-Azimuth mount is perfectly adequate and often easier to learn. Look for sturdy construction and smooth movement.
Eyepieces: Your Window to the Universe (and How to Choose Them)
The eyepieces are what you look through, and they are just as important as the telescope itself! They are what determine the magnification and the field of view. Most beginner telescopes come with one or two eyepieces, but often these are of moderate quality. You’ll want to understand how to use them and what to look for if you decide to upgrade later. Remember, magnification is determined by dividing the telescope’s focal length by the eyepiece’s focal length. So, a 25mm eyepiece on a 1000mm focal length telescope will give you 40x magnification (1000 / 25 = 40).
When you’re buying the best reflector telescopes under $200, you might get a low-power (e.g., 25mm) and a high-power (e.g., 10mm) eyepiece. The low-power eyepiece is great for finding objects and for viewing larger, fainter celestial sights because it offers a wider field of view. The high-power eyepiece is for zooming in on details, like planetary features. Don’t fall into the trap of thinking the highest magnification is always the best. Often, a medium magnification will give you a sharper, more detailed view. If a telescope comes with multiple eyepieces, check their focal lengths to understand the magnification range you’ll get.
Ease of Use and Portability: Getting Out There to Observe
Let’s be honest, the most amazing telescope in the world is useless if it’s too cumbersome to set up or take out under the stars. When you’re browsing for the best reflector telescopes under $200, consider how easy it will be to get from your living room to your backyard or even a darker observing site. Some telescopes are relatively compact and can be set up in minutes, while others might require a bit more time and effort. Think about whether you’ll be transporting it frequently or if it will mostly stay in one spot.
A telescope that’s easy to assemble and point will encourage you to use it more often. This is crucial for building your observing skills and enjoying the hobby. Many of the best reflector telescopes under $200 are designed with portability in mind. Look for features like quick-release mount systems or lightweight optical tubes. If you’re living in an apartment with limited space or plan on heading to darker skies away from city lights, a more portable option will definitely enhance your stargazing experience.
Brand Reputation and Reviews: What Others Are Saying
Finally, and this is a big one, don’t underestimate the power of research and what other stargazers are saying. When you’re looking for the best reflector telescopes under $200, it’s wise to see which brands are consistently recommended for their quality and value in this price range. Look for reviews from reputable astronomy websites, forums, and even user reviews on retail sites. Pay attention to comments about the build quality, optical performance, and customer support.
Checking out reviews can often reveal potential pitfalls or highlight specific strengths of a particular model. For instance, one telescope might have a fantastic mirror but a slightly flimsy mount, while another might have a slightly less impressive optical tube but a very stable and user-friendly mount. Reading about other people’s experiences will help you make a more informed decision and increase your chances of finding a truly great beginner telescope that will provide years of celestial exploration.
FAQs
What is a reflector telescope and why is it a good choice for beginners on a budget?
Reflector telescopes, often called Newtonian telescopes, use mirrors to gather and focus light, unlike refractor telescopes that use lenses. This design is fantastic for beginners because it generally offers more “bang for your buck.” For the same price, you’re likely to get a reflector telescope with a much larger aperture (the diameter of the main mirror), which means it can gather more light and show you fainter, more distant objects.
Plus, reflectors are typically less prone to chromatic aberration, which is that annoying purple fringing you might see around bright objects in some refractor telescopes. This makes for a cleaner, sharper image, especially when you’re just starting out and trying to get a good view of planets and the Moon. They’re also usually more compact and easier to handle than comparable refractors.
How do I choose the right aperture size for a reflector telescope under $200?
When you’re looking at reflector telescopes under $200, you’ll often see aperture sizes ranging from around 70mm up to 130mm (or 2.8 to 5 inches). For beginners, a good starting point is typically around 76mm to 114mm (3 to 4.5 inches). This size is a sweet spot, giving you enough light-gathering power to see craters on the Moon, the rings of Saturn, and even some of the brighter deep-sky objects like the Orion Nebula.
Going larger, like 130mm, will certainly give you even better views and allow you to see fainter objects, but it might push you towards the higher end of your budget or require a slightly more robust mount to keep things steady. Don’t be afraid to start with a slightly smaller aperture; the key is to get a decent quality telescope that you’ll actually use, rather than a giant one that’s too cumbersome.
What are the essential accessories I’ll need with a reflector telescope, and are they usually included?
Most reflector telescopes under $200 will come with a couple of basic eyepieces, which is great for getting started. You’ll typically get one or two different magnification eyepieces, allowing you to zoom in a bit. Many will also include a finder scope, which is a small, low-power scope that attaches to the main telescope and helps you aim it at your target.
However, to really enhance your viewing experience, you’ll likely want to consider adding a few more eyepieces over time. Different magnifications are crucial for observing different types of celestial objects, and a good quality Barlow lens can effectively double the magnification of your existing eyepieces. A moon filter can also be a game-changer for lunar observations, reducing glare and allowing you to see more detail.
How important is the mount for a reflector telescope, and what should I look for?
The mount is actually super important, even more so than the telescope tube itself in some ways! Think of it as the foundation of your stargazing. A wobbly or unstable mount will make it incredibly frustrating to keep anything in focus, especially at higher magnifications. For reflector telescopes under $200, you’ll most commonly find Dobsonian mounts or basic equatorial mounts.
Dobsonian mounts are fantastic for beginners because they are very stable, easy to set up and use, and typically allow for larger aperture telescopes within this price range. They move smoothly up and down and side to side. Equatorial mounts, while good for tracking objects as they move across the sky, can be a bit trickier to learn how to align and use properly. For ease of use and stability, a Dobsonian mount is often the preferred choice for your first reflector.
What kind of objects can I realistically expect to see with a reflector telescope under $200?
With a decent reflector telescope in this price range, you can have a truly rewarding stargazing experience! You’ll be able to clearly see the craters and maria on the Moon, making for some incredibly detailed lunar views. Planets like Jupiter, with its prominent cloud bands and its four largest moons, and Saturn, with its iconic rings, are definitely within reach.
Beyond our solar system, you’ll be able to spot some brighter deep-sky objects. Think of the Orion Nebula, a stellar nursery where new stars are born, or the Andromeda Galaxy, our nearest major galactic neighbor. You can also observe star clusters like the Pleiades, which appear as a beautiful sprinkle of stars. While you won’t see the faint colors or immense detail you might see in Hubble images, these celestial wonders are absolutely visible and awe-inspiring.
Are reflector telescopes difficult to set up and use for someone who has never used a telescope before?
Not at all! Reflector telescopes, especially those with Dobsonian mounts, are designed with ease of use in mind. The setup is usually pretty straightforward – you’ll typically attach the telescope tube to the mount, insert an eyepiece, and find your target. The movements are intuitive, allowing you to point and track celestial objects with relative ease, even if you’re a complete novice.
Many of these telescopes come with detailed instructions, and there are also tons of helpful videos and online resources available to guide you. The learning curve is gentle, and you’ll quickly get the hang of it. The most challenging part is often just finding your way around the night sky, but even that becomes part of the fun and discovery!
What’s the difference between a Dobsonian and an equatorial mount for reflector telescopes, and which is better for beginners?
A Dobsonian mount is a type of altazimuth mount, meaning it moves on two axes: altitude (up and down) and azimuth (left and right). They are typically made of wood or sturdy plastic and are known for their stability and simplicity. Dobsonian mounts are incredibly user-friendly; you just push the telescope in the direction you want to look, and it stays put. They are particularly well-suited for larger aperture reflector telescopes because they can easily support the weight and provide a stable platform.
An equatorial mount, on the other hand, is designed to track the apparent movement of stars and planets across the sky. It’s aligned with the Earth’s axis of rotation, so with a little adjustment, it can follow an object automatically. While this is very useful for astrophotography or observing faint objects over longer periods, it requires more initial setup and alignment. For beginners looking for a straightforward and stable experience, especially for visual observing, a Dobsonian mount is generally the better and easier choice.
Conclusion
So, you’ve navigated the cosmic marketplace and explored the exciting world of the best reflector telescopes under $200. Now, the universe is waiting. Don’t let the numbers on a price tag limit your sense of wonder. Remember, that crisp, clear view of the moon’s craters, the faint shimmer of distant star clusters, or even the ringed beauty of Saturn, is absolutely within your reach. Trust the insights you’ve gained, embrace the possibilities, and take that leap into the cosmos. Your adventure into stargazing begins now.
Think of this not just as a purchase, but as an investment in curiosity, in learning, and in moments that will simply take your breath away. You’ve got the knowledge, the options are laid out, and the sky is ready to reveal its secrets. Go ahead, pick the reflector telescope that speaks to your stargazer’s soul, and prepare to be amazed. The universe has so much to show you, and you’re about to have a front-row seat.