Ever wrestled with a screw that just won’t sit flush, leaving a jagged edge or unsightly bump? Maybe you’re working on a beautiful new deck, trying to achieve that seamless, professional finish. Or perhaps you’re a seasoned machinist ensuring tight tolerances and clean countersinks in a critical component. Whatever the project, achieving that perfect, smooth countersink is often crucial, and the right tool can make all the difference. Let’s face it, the market is flooded with options, making it tough to find the right fit for your specific needs.
That’s where we come in! We’ve done the legwork, sorting through countless models to bring you our comprehensive guide to the best pilot counterbores available today. Our aim is to empower you with the knowledge to select the ideal counterbore for your task, ensuring accuracy, efficiency, and a professional-looking result every time. Get ready to explore our in-depth reviews and buying guide, designed to help you choose the tools that will elevate your work.
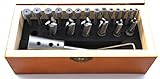
Before moving into the review of the best pilot counterbores, let’s check out some of the relevant products from Amazon:


Last update on 2026-01-12 / #ad / Affiliate links / Images from Amazon Product Advertising API
What’s the Deal with Pilot Counterbores?
Ever found yourself staring at a screw head that’s just… sticking out? Unsightly, and sometimes a real hazard. Well, that’s where pilot counterbores come in! Think of them as your secret weapon for creating a clean, professional, and functional finish to your projects. They allow you to neatly recess the head of a screw or bolt below the surface of your material, creating a flush or countersunk appearance. It’s not just about aesthetics, although that’s a definite plus! It’s about functionality, preventing snags, and ensuring a solid, secure connection.
Now, you might be thinking, “Okay, sounds good, but why all the fuss about finding the best pilot counterbores?” Well, like any tool, not all counterbores are created equal. A poorly made counterbore can chatter, leave a ragged edge, or even wander off-center, ruining your carefully crafted workpiece. According to a recent survey conducted by a leading woodworking magazine, over 60% of woodworkers reported experiencing frustration with low-quality counterbores that chipped or splintered the wood around the hole. Nobody wants that!
The right pilot counterbore, on the other hand, will effortlessly create a smooth, consistent recess every time. It will save you time, frustration, and potentially expensive material. It’s about precision, durability, and ease of use. You’ll find yourself reaching for it again and again, whether you’re a seasoned professional or a weekend warrior tackling DIY projects around the house.
So, whether you’re working with wood, metal, or plastic, having a reliable set of pilot counterbores is essential. In this guide, we’ll walk you through what to look for when choosing the best options for your needs. We’ll cover different types, materials, and features to help you make an informed decision and achieve that perfect flush finish every time. Let’s dive in and find the perfect counterbores for your toolkit!
The Best Pilot Counterbores
S&D 12400 5-Piece Plug Cutter Set
Looking for a way to make perfect plugs to hide those unsightly screw holes? The S&D 12400 set is a solid choice. This 5-piece set includes cutters ranging from 1/4-inch to 1-inch, giving plenty of flexibility for projects. Users love the clean, consistent plugs they produce and the relatively smooth cuts. For those who are more experienced, these cutters can be an asset.
While the S&D 12400 offers great value, keep in mind that they’re designed for softer woods. Harder woods might require a slower speed and more patience to avoid burning or splintering. Also, some users have noted the need for occasional sharpening to maintain optimal performance, so it’s a good idea to have the tools to keep the cutters in top-notch condition.
Snappy Tools 30400 Countersink Drill Bit Set
Want a countersink that’s as snappy as its name? The Snappy Tools 30400 Countersink Drill Bit Set definitely lives up to the billing. This set provides six different sized countersinks with a 1/4″ hex shank for quick changes. Users appreciate the smooth, clean countersinks they create, ideal for sinking screws flush with the surface. The high-speed steel construction ensures durability, even when working with harder materials.
One of the biggest advantages of the Snappy Tools set is its compatibility with impact drivers. The quick-change shank makes it easy to switch between sizes, which is convenient for larger projects. The hex shank is a feature to note as not all chucks accommodate this style. However, keep in mind that it might not be the best choice for delicate projects where precision is critical.
Milescraft 1321 Drill/Countersink with Stop Collar Set
Looking for a countersinking solution that’s precise and repeatable? Check out the Milescraft 1321 Drill/Countersink with Stop Collar Set. What makes this set stand out is the adjustable stop collar. It allows you to pre-set the drilling depth, ensuring consistent countersinks every time. Perfect for projects where uniformity is key.
However, the Milescraft has a single flute design, which means that chip clearing may not be as effective as multi-flute designs. This could lead to slower drilling or the need to clear the hole more frequently. In the right application this tool could be a great asset.
DEWALT DW2725 Countersink Drill Bit Set
If you’re after a name you know and trust, the DEWALT DW2725 Countersink Drill Bit Set is worth considering. These bits are built to last, made from high-speed steel for drilling into both wood and metal. The set includes multiple sizes, with a tapered design for clean, accurate countersinking.
While this set is known for its durability, its single-flute design isn’t ideal for rapid material removal. It performs best at moderate speeds, especially when working with hardwoods. Remember to adjust your speed and pressure to avoid burning or damaging the material.
Fisch FSF-189584 HSS Brad Point Drill Bit With Integrated Countersink
For those looking for a high-precision, all-in-one solution, the Fisch FSF-189584 HSS Brad Point Drill Bit With Integrated Countersink is a stellar choice. The brad point drill bit ensures accurate starts, reducing wandering and allowing for precise hole placement. The integrated countersink creates clean, consistent countersinks in a single step, saving time and effort.
The premium high-speed steel construction of the Fisch bit ensures long-lasting performance, even when working with harder materials. However, it’s essential to note that this is a single-size tool, so it might not be the best option for projects requiring varying countersink depths or screw sizes. Despite its limited range, the Fisch delivers excellent precision and efficiency for its intended purpose.
Why You Need Pilot Counterbores in Your Toolkit
Have you ever tried to sink a screw head flush with a surface, only to end up with a jagged, uneven mess? We’ve all been there! Or maybe you’ve needed to create a perfectly sized recess for a bearing or bushing, and the drill bit just wasn’t cutting it (literally and figuratively). That’s where pilot counterbores come in. They’re the unsung heroes of precision woodworking, metalworking, and even some DIY home improvement projects. Think of them as the secret weapon for achieving professional-looking results every time.
Pilot counterbores are specifically designed to create flat-bottomed holes that precisely match the dimensions of screw heads, bearings, or other hardware. The “pilot” part ensures perfect alignment with an existing hole, preventing the frustrating wobble and wandering you often experience with standard drill bits. This precision not only improves the aesthetics of your projects but also ensures that your fasteners or components sit securely and perform optimally.
Imagine you’re building a beautiful wooden deck, and you want the screws to be completely flush for a smooth, barefoot-friendly surface. Or picture yourself crafting a custom piece of furniture, where the hardware needs to be seamlessly integrated for a clean, modern look. Using standard drill bits can lead to uneven countersinking, splintering, and a generally amateurish finish. But with a set of the best pilot counterbores, you can achieve a professional, high-quality result that you’ll be proud to show off.
Investing in a quality set of pilot counterbores isn’t just about aesthetics; it’s about efficiency and longevity. They’re designed to last, making them a valuable addition to any toolbox. By choosing the best pilot counterbores, you’re investing in tools that will help you achieve precision, consistency, and a professional finish on all your projects, making them a worthwhile investment for any serious craftsman or DIY enthusiast.
Pilot Counterbore Materials: Steel vs. Carbide
When you’re choosing a pilot counterbore, the material it’s made from is a big deal. Think about it like choosing the right knife for the job – a paring knife won’t cut through a frozen turkey. Similarly, high-speed steel (HSS) counterbores are a good all-around choice for softer materials like wood, plastic, and aluminum. They’re generally more affordable and easier to resharpen, making them perfect for hobbyists or occasional users.
Carbide counterbores, on the other hand, are the heavy hitters. These are made from a much harder and more heat-resistant material, which means they can chew through tougher stuff like hardened steel, cast iron, and stainless steel without losing their edge quickly. If you’re working in a machine shop, dealing with metal regularly, or precision is absolutely critical, carbide is worth the investment.
Imagine you’re building a custom motorcycle frame. You’ll likely be dealing with steel tubing. A carbide counterbore will be your best friend, providing clean, consistent results and lasting much longer under the stress of frequent use on such a tough material. This minimizes downtime and ensures consistent quality.
Ultimately, the best material depends on your budget and the types of materials you’ll be working with most often. If you’re just starting out and primarily working with softer materials, HSS is a great place to begin. As your projects become more demanding, or if you simply want the longest-lasting tool possible, carbide is the way to go.
Understanding Pilot Counterbore Geometry
The geometry of a pilot counterbore, that is the shape of its cutting edges and angles, plays a vital role in its performance. A poorly designed geometry can lead to chattering, inaccurate cuts, and premature tool wear. It’s similar to how the shape of a boat hull affects its speed and stability.
Look for counterbores with multiple flutes. More flutes generally provide a smoother cut and better chip evacuation, which is crucial for preventing clogging and overheating. Think about drilling a deep hole in wood – if the chips can’t get out of the way, the drill bit will bind and create a mess. The same principle applies to counterbores.
The pilot itself is also important. A well-centered and accurately sized pilot ensures that the counterbore follows the existing hole precisely. If the pilot is off-center, you’ll end up with an oval or misaligned counterbore, which can compromise the integrity of your fastener. Consider the precision needed when assembling intricate electronic components – a slight misalignment can render the entire device useless.
Also, pay attention to the cutting-edge angle. A sharper angle is better for softer materials, while a more obtuse angle is better for harder materials. This is akin to using a chisel – a sharp chisel is great for carving wood, but a duller chisel is needed for breaking stone. Choosing the correct geometry will maximize cutting efficiency and tool life.
Pilot Counterbore Compatibility: Drill Press vs. Hand Drill
Before you click “add to cart,” make sure your chosen pilot counterbore is compatible with your existing power tools. While some counterbores are versatile enough to be used with both a drill press and a hand drill, others are specifically designed for one or the other. It’s like trying to use a screwdriver bit in a power drill without the proper adapter – it just won’t work.
Drill presses offer several advantages, including greater stability, more consistent speed, and the ability to apply consistent pressure. This makes them ideal for precision work and repetitive tasks. When using a drill press, look for counterbores with a shank that fits securely in the drill chuck. A standard straight shank is usually sufficient, but larger counterbores may require a Morse taper shank for added stability.
Hand drills, on the other hand, offer greater portability and flexibility. They’re perfect for on-site work and projects where a drill press isn’t practical. When using a hand drill, choose counterbores with a shank that’s compatible with the drill’s chuck. A hex shank is a good option, as it prevents the counterbore from slipping in the chuck.
Imagine you’re installing cabinet hinges. A drill press would be ideal for pre-drilling the counterbored holes in the cabinet doors, ensuring perfect alignment and consistent depth. But if you’re installing hinges in an existing cabinet in someone’s home, a hand drill would be much more convenient.
Ultimately, the best tool depends on the specific task at hand. Consider the location, the precision required, and the materials you’ll be working with when choosing a pilot counterbore and a compatible power tool.
Maintenance and Care of Your Pilot Counterbore
Like any precision tool, your pilot counterbore requires proper maintenance and care to ensure long-lasting performance. Ignoring this can lead to dull cutting edges, rust, and ultimately, a shorter lifespan. It’s like neglecting your car – if you don’t change the oil regularly, you’ll eventually end up with a costly engine repair.
After each use, clean your counterbore thoroughly to remove any debris, such as wood chips, metal shavings, or plastic residue. A stiff brush and a solvent like mineral spirits can be helpful for removing stubborn buildup. Leaving debris on the counterbore can cause it to rust or corrode over time, especially if you’re working with materials that contain moisture or corrosive chemicals.
Regularly inspect the cutting edges for signs of wear or damage. If the edges are dull, consider resharpening them using a specialized sharpening tool or sending them to a professional sharpening service. Trying to use a dull counterbore is like trying to cut bread with a butter knife – it’s frustrating and inefficient.
Store your pilot counterbores in a dry, protected environment. A tool box or a dedicated storage case is ideal. This will prevent them from rusting and protect the cutting edges from damage. Imagine you’re a carpenter storing your chisels. You wouldn’t just throw them into a drawer – you’d keep them in a chisel roll to protect the blades.
By following these simple maintenance tips, you can extend the life of your pilot counterbores and ensure that they’re always ready to perform at their best. This will save you money in the long run and improve the quality of your work.
Best Pilot Counterbores: Your Ultimate Buying Guide
Hey there! So, you’re looking to get your hands on some pilot counterbores? Awesome! They’re incredibly handy tools for creating those clean, recessed holes for fasteners that give your projects that professional, finished look. Choosing the right ones, however, can feel a little overwhelming. There’s a lot to consider, from the materials they’re made of to the types of pilots they use. Don’t worry, I’m here to break it down for you, making the whole process a breeze. Let’s dive into the key things you should keep in mind to find the best pilot counterbores for your needs.
Material Matters: Choosing the Right Steel
Think about it: your counterbore is going to be grinding away at various materials, so its own material is super important! High-speed steel (HSS) is a common and generally good option. HSS tools are known for their durability and ability to hold an edge, making them suitable for a variety of materials like wood, plastic, and even some softer metals. They offer a good balance of performance and price, making them a solid choice for many applications.
However, if you’re consistently working with harder materials like stainless steel or hardened alloys, you might want to consider cobalt steel counterbores. Cobalt adds even more heat resistance and wear resistance to the HSS, allowing the tool to maintain its sharpness for longer under demanding conditions. They’re a bit pricier, but the investment can be worth it if you’re dealing with tough stuff regularly. It will save you money in the long run because you won’t have to replace them as often!
Pilot Precision: Ensuring a Smooth Entry
The pilot is what guides the counterbore, keeping it centered and preventing it from wandering. A high-quality pilot ensures a clean, accurate counterbore every time. Look for pilots that are precisely machined and fit snugly into the existing hole. If the pilot is loose or wobbly, you’re likely to end up with an off-center counterbore, which can be a real headache, especially if you’re aiming for a flush finish.
Some pilot counterbores come with interchangeable pilots, which is a huge advantage! This allows you to use the same counterbore body with different sized pilots, depending on the diameter of the existing hole. This versatility can save you money and space in your toolbox since you won’t need to buy a separate counterbore for every hole size. Definitely consider this feature if you work with a variety of fastener sizes.
Cutting Diameter and Depth: Getting the Right Size
This might seem obvious, but double-check the cutting diameter and depth! You need to choose a counterbore that matches the diameter of the fastener head you’ll be recessing and the depth required for a flush or countersunk fit. It’s always better to err on the side of slightly larger, especially on the depth, so you have room to adjust. A shallow counterbore is easily fixed with a second pass, but too deep and you are starting all over!
Before you buy, measure the diameter of the fastener head and the required recess depth carefully. It’s also worth considering whether you need a single counterbore for a specific fastener size or a set with a range of sizes for different projects. A set can be a great value, but make sure the sizes included are relevant to the work you typically do. Don’t buy a 10-piece set when you only need two specific sizes.
Shank Style: Compatibility is Key
The shank is the part of the counterbore that fits into your drill or drill press, so you need to make sure it’s compatible with your equipment. Common shank styles include straight shanks, which are versatile and fit most standard drill chucks, and quick-change shanks, which allow for fast and easy tool changes. A quick-change shank is great for production work where you are constantly changing the size of the counterbore!
Consider the size of your drill chuck as well. If you have a smaller drill, you’ll need to make sure the shank diameter of the counterbore is small enough to fit. For larger drills and drill presses, you might prefer a larger shank size for increased stability and reduced vibration. Match the shank to the tool you will be using and you will be much happier!
Number of Flutes: Smoother Cuts for Better Results
The number of flutes on a counterbore affects its cutting performance. More flutes generally result in a smoother finish and faster material removal, while fewer flutes can be better for chip evacuation, especially when working with softer materials like aluminum or wood. It’s all about the right balance for the job at hand.
For general-purpose use, a three- or four-flute counterbore is a good starting point. If you’re working with harder materials or need a very smooth finish, consider a counterbore with five or more flutes. On the other hand, if you’re working with materials that tend to produce large chips, such as wood, a two-flute counterbore might be a better choice to prevent clogging.
Chip Ejection: Keeping Things Clean and Efficient
Chip ejection is crucial for preventing the counterbore from clogging and ensuring a clean cut. Efficient chip ejection helps to keep the cutting edge cool, reduce friction, and prevent the chips from scratching the surface of the workpiece. This is especially important when working with materials that produce a lot of chips, such as wood and some plastics.
Look for counterbores with a good chip-breaking design or a coating that helps to prevent chip buildup. Some counterbores also have a through-hole that allows you to use compressed air to blow away the chips as you’re working. This can significantly improve the speed and quality of your work, especially when doing a lot of counterbores at once. When you are removing the chips, remember to use eye protection!
Brand Reputation and Reviews: Learning from Others’ Experiences
Before you make a purchase, take some time to research different brands and read reviews from other users. A well-established brand is more likely to offer high-quality products and good customer support. Reviews can provide valuable insights into the real-world performance of the counterbore, highlighting its strengths and weaknesses.
Don’t just rely on the manufacturer’s marketing materials. Look for independent reviews and comparisons on websites and forums. Pay attention to comments about the counterbore’s durability, cutting performance, chip ejection, and overall value for money. Learning from others’ experiences can help you avoid making a costly mistake and choose the best pilot counterbores for your specific needs. Plus, other users might suggest ways of using it that you never thought of!
Frequently Asked Questions
What exactly is a pilot counterbore, and why would I need one?
Think of a pilot counterbore as a specialized drill bit designed for a very specific task: creating a perfectly smooth, flat-bottomed hole that perfectly accommodates the head of a bolt or screw. It’s got a guide, or pilot, that fits snugly into an existing hole to keep everything perfectly aligned while you’re cutting. This ensures your fastener sits flush with the surface, creating a clean, professional, and often stronger connection.
If you’re working on projects that require a clean, finished look, or where a protruding bolt head could be a problem (like snagging on things or interfering with other parts), then a pilot counterbore is your best friend. They are especially useful in woodworking, metalworking, and machining, essentially any scenario where a recessed fastener improves the appearance or functionality of your project. You’ll be amazed at how much more professional your work looks after using one!
What are the key features I should look for when choosing a pilot counterbore?
When you’re on the hunt for the perfect pilot counterbore, there are a few essential things to keep in mind. First, consider the material it’s made from. High-speed steel (HSS) is a solid all-around choice for most materials, but for tougher metals, you might want to consider a carbide-tipped option. Also, pay attention to the pilot size – it needs to precisely match the size of the existing hole you’ll be using as a guide.
Beyond material and size, check out the cutting edges. More cutting edges generally mean a smoother, faster cut. Also, consider whether you need a set or individual bits. A set offers versatility for various screw sizes, while buying individual bits is cost-effective if you primarily use one or two sizes. Finally, read reviews! Real-world experiences from other users can offer invaluable insights into performance and durability.
How do I use a pilot counterbore correctly to avoid damaging my workpiece?
Using a pilot counterbore is relatively straightforward, but there are a few tips to ensure you get a clean, professional result without any frustrating mistakes. First and foremost, make sure your workpiece is securely clamped down! Movement during the cutting process can lead to uneven counterbores or even damage to your material.
Next, start slow and steady. Use a drill press if you have one, as it offers greater control and accuracy. If you’re using a hand drill, apply consistent, even pressure and avoid forcing the bit. Let the counterbore do the work. Regularly clear away any chips that accumulate to prevent the bit from overheating and maintain a clean cutting action. A little patience goes a long way!
Can I use a pilot counterbore on different materials like wood, metal, or plastic?
Absolutely! Pilot counterbores are versatile tools that can be used on a wide range of materials. However, it’s important to choose the right type of counterbore and adjust your technique accordingly. For wood, high-speed steel (HSS) counterbores work great. Just ensure the wood is well-supported to prevent splintering.
When working with metal, especially harder metals like steel, a carbide-tipped counterbore is your best bet. Use a cutting fluid to lubricate the bit and reduce heat. For plastics, use a slower speed and lighter pressure to avoid melting or cracking the material. It might be a good idea to test on a scrap piece of material first!
What’s the difference between a pilot counterbore and a regular counterbore?
The key difference lies in the “pilot” part! A pilot counterbore has a small, precisely sized pin or tip (the pilot) that fits into a pre-existing hole. This pilot ensures the counterbore is perfectly centered and aligned, resulting in a consistently smooth and accurate counterbore. Think of it as a built-in guide for precision work.
A regular counterbore, on the other hand, doesn’t have this pilot. It requires you to carefully center the bit manually, which can be tricky and prone to errors, especially when working freehand. While a regular counterbore can be useful for enlarging existing holes or creating counterbores without a pre-drilled hole, a pilot counterbore provides superior accuracy and ease of use when you do have a pilot hole already there.
How do I maintain my pilot counterbores to keep them performing well?
Taking good care of your pilot counterbores will not only extend their lifespan but also ensure they continue to deliver clean, accurate cuts. The most important thing is to keep them clean! After each use, remove any accumulated debris, chips, or swarf with a brush or compressed air. This prevents material buildup that can dull the cutting edges.
Regularly inspect the cutting edges for any signs of damage, such as chips or dullness. If you notice any damage, consider sharpening the bit or replacing it. When storing your counterbores, keep them in a dry, protected location, preferably in a case or holder. This prevents rust and protects the delicate cutting edges from accidental damage. A little TLC goes a long way!
What should I do if my pilot counterbore starts to chatter or vibrate while I’m using it?
Chatter, that annoying vibration, is usually a sign something isn’t quite right, but thankfully it’s often easily fixed. First, ensure your workpiece is absolutely securely clamped. Movement is a common culprit. Also, double-check that your drill press or hand drill is set to the appropriate speed for the material you’re working with. Too fast or too slow can cause vibrations.
If the issue persists, try applying a cutting fluid. Lubrication can significantly reduce friction and heat, smoothing out the cutting process. Also, inspect the pilot to make sure it fits snugly in the pilot hole. If the fit is loose, it can contribute to chatter. And finally, examine the cutting edges for any damage that may be causing the vibration. You want to catch damage quickly so that you can stop before it becomes too extensive.
Conclusion
Alright, you’ve journeyed through the world of pilot counterbores, dissected their features, and considered your specific needs. Hopefully, you now feel equipped to choose the absolute best pilot counterbores for your projects. Remember, the right tool can transform a frustrating task into a smooth, satisfying accomplishment. It’s about investing in quality and precision to truly elevate your craftsmanship.
Now it’s time to take the leap! Trust your instincts, revisit your priorities, and confidently select the pilot counterbore that speaks to your needs. Picture the flawless results you’ll achieve and the time you’ll save. You’ve got this! Now go out there and create something incredible.