Ever find yourself staring at your Mac, a perfectly captured moment on your phone just begging to be transferred, but the process feels a little… clunky? Maybe you’re trying to share a beloved album with family or simply want to free up some precious storage space. We’ve all been there, juggling cables and software updates, wishing for a simpler, more direct way to move those cherished memories from device to desktop. It’s about making those digital treasures easily accessible and sharable, keeping your workflow smooth and your precious photos readily available.
That’s where a good photo stick comes in, and specifically, finding the best photo sticks for Mac can make all the difference. These handy gadgets are designed to bridge the gap between your iPhone, iPad, or even your digital camera and your Mac, offering a streamlined solution for transferring and storing your visual diary. Forget the digital hoops; we’re here to help you navigate the options and pinpoint the perfect companion for your Apple ecosystem, ensuring your photo transfer process is as seamless and enjoyable as the moment you captured the image itself.
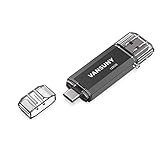
Before moving into the review of the best photo sticks for mac, let’s check out some of the relevant products from Amazon:


Last update on 2026-03-03 / #ad / Affiliate links / Images from Amazon Product Advertising API
Remembering Those Precious Pixels? Let’s Get Them Organized!
Remember that amazing trip where you snapped hundreds of photos? Or that family gathering where Uncle Bob told his legendary (and slightly embarrassing) story, all captured on your iPhone? Those digital memories are priceless, but let’s be honest, they can quickly become a jumbled mess on your Mac. We’ve all been there, scrolling endlessly through folders, trying to find that one specific shot. It’s like searching for a needle in a digital haystack, right?
That’s where the magic of a photo stick comes in. Think of it as your personal digital filing cabinet, but way cooler and portable. These handy little devices are designed to seamlessly transfer and store your photos, freeing up precious space on your Mac and making organization a breeze. In fact, many Macs, especially older models, might be running low on storage. Did you know that the average smartphone user takes over 1,000 photos per year? Imagine all that data piling up!
So, if you’re looking to reclaim your Mac’s storage, easily back up your precious memories, or simply want a more organized way to manage your ever-growing photo library, then you’re in the right place. We’re diving deep into the world of external storage solutions specifically tailored for our Apple-loving friends. Today, we’re on a mission to find the best photo sticks for Mac, ensuring your digital life is as streamlined as your favorite Apple device.
Forget wrestling with cloud storage limitations or complicated transfer methods. We’ll guide you through what makes a photo stick truly great for Mac users, from lightning-fast transfer speeds to sturdy build quality and of course, compatibility. Get ready to say goodbye to storage anxiety and hello to beautifully organized, easily accessible memories, all thanks to the right photo stick by your side.
5 Best Photo Sticks For Mac
SanDisk iXpand Flash Drive Luxe
This little gem is a lifesaver for anyone with a Mac and an iPhone who’s constantly running out of storage for photos and videos. What’s really cool about the iXpand Luxe is its dual connector design. It’s got a Lightning connector for your iPhone, and then on the other end, a USB-C connector that plugs right into your Mac. This makes transferring files a breeze, no adapters needed. Plus, the drive itself feels really premium, with a sleek metal casing.
Getting your photos off your phone and onto your Mac is as simple as plugging it in and using the iXpand app. The app is pretty intuitive and lets you back up your entire camera roll automatically, or you can selectively choose which photos you want to save. It’s also great for freeing up space on your phone so you can keep capturing those memories without worrying about that dreaded “storage full” notification.
iOgrapher GoCam 4K Action Camera + iPhone Mounting System
Okay, so this isn’t just a photo stick in the traditional sense, but for Mac users who want to get creative with their mobile photography and videography, the GoCam is seriously impressive. It’s a compact 4K action camera that comes with a fantastic mounting system designed specifically for iPhones. This means you can attach your iPhone directly to the camera, essentially giving you a much more robust and professional setup for shooting photos and videos on the go.
The real magic happens when you pair it with your Mac. The footage you capture is incredibly sharp, and you can easily transfer it via USB-C for editing in Final Cut Pro or iMovie. It’s perfect for anyone who wants to elevate their iPhone content without investing in a whole new camera system. Think vlogging, travel videos, or even just getting those epic wide-angle shots with a stable grip.
Leef iBridge 3 Mobile Memory
The Leef iBridge 3 is another solid contender for expanding your Mac’s storage, especially if you’re someone who shoots a ton of photos and videos on your iPhone. Its design is pretty no-nonsense; it’s a small, discreet stick with a Lightning connector on one end. The real advantage here is its compatibility with Macs via its USB 3.0 connector. Transferring files is quick and painless, and it’s a reliable way to offload those large photo libraries.
What makes the iBridge 3 stand out is its user-friendly app. It makes backing up your photos and videos incredibly simple, and you can even stream media directly from the drive without taking up space on your iPhone. It’s a straightforward solution that does exactly what it promises: gives you more room for your digital life, making it super easy to get those precious memories onto your Mac for safekeeping.
iPhone to USB-C Adapter with Memory Card Reader
This option is a bit more versatile and budget-friendly if you’re comfortable with a slightly more manual approach. It’s essentially a compact adapter that has a Lightning connector on one end to plug into your iPhone, and then a standard SD card slot on the other. You’ll need to get a separate microSD card to put into it, but this gives you a lot of flexibility in terms of storage capacity.
Once you’ve transferred your photos from your iPhone to the microSD card, you can then plug the entire adapter into your Mac’s USB-C port. It reads the card just like any other external drive. This setup is great for photographers who already have SD cards lying around and appreciate the ability to swap them out for different capacities. It’s a no-frills, effective way to bridge the gap between your iPhone and your Mac.
RAVPower FileHub Plus (RP-WD009)
While not strictly a “photo stick,” the RAVPower FileHub Plus is an incredibly versatile gadget for Mac users who want to manage their photos and files wirelessly. It acts as a portable wireless router, external hard drive enclosure, and power bank all in one. You can plug in a regular external hard drive or even an SD card reader into it, and then access those files wirelessly from your iPhone and Mac.
The convenience of this device is its ability to create its own Wi-Fi network, allowing you to back up your iPhone photos directly to a connected hard drive without needing your Mac. You can then access those backed-up photos on your Mac wirelessly, or even plug the hard drive directly into your Mac. It’s perfect for travel or for creating a centralized, wireless photo library accessible from all your devices.
Why Mac Users Benefit from Photo Sticks
Remember that time you were on vacation, snapping photos left and right, only to find your iPhone or iPad full and unable to capture another memory? It’s a frustrating feeling, isn’t it? That’s where a photo stick, sometimes called a flash drive for photos or the best photo stick for Mac, comes in incredibly handy. These compact devices are designed to effortlessly transfer and store your precious photos and videos directly from your Apple devices, freeing up valuable space without the need for a computer. Imagine the relief of being able to keep capturing those spontaneous moments, from your child’s first steps to breathtaking sunset views, knowing your device won’t suddenly tell you it’s at capacity.
Beyond just saving space, photo sticks offer a secure and convenient backup solution. Instead of relying solely on cloud storage, which can sometimes be subject to internet connectivity issues or subscription fees, a physical photo stick provides an immediate and reliable way to safeguard your memories. Think about all those irreplaceable family photos – birthdays, holidays, graduations. A photo stick acts as a tangible safeguard against accidental deletions or device malfunctions. You can simply plug it in, back up your entire photo library, and rest easy knowing your visual history is protected and accessible even when offline.
The beauty of a photo stick for Mac users is its seamless integration with the Apple ecosystem. Many are designed with Lightning connectors for iPhones and iPads, and USB-A or USB-C connectors for MacBooks and iMacs, making the transfer process incredibly straightforward. No more wrestling with cables, complicated software, or slow internet uploads. You can quickly move photos from your iPhone to your Mac for editing, sharing, or simply keeping them organized. It’s like having an extension of your device’s storage, always ready to help you manage your ever-growing photo collection.
In essence, a photo stick for Mac empowers you to take control of your digital memories. It’s an affordable and practical tool for anyone who loves capturing life’s moments. Whether you’re a seasoned photographer or just enjoy documenting everyday life, a reliable photo stick ensures you never have to miss a shot due to storage limitations and provides peace of mind knowing your cherished memories are securely backed up and easily accessible. It’s an investment in preserving your personal story, one photo at a time.
Understanding Photo Stick Compatibility with macOS
When choosing a photo stick for your Mac, compatibility is paramount. Not all photo sticks are created equal, and some may not function seamlessly with macOS. This section delves into the key considerations to ensure your chosen device works effortlessly with your Apple ecosystem, from file system compatibility to software integration.
We’ll explore the different file systems that photo sticks typically use, such as FAT32, exFAT, and NTFS. While Macs can read and write to FAT32 and exFAT, NTFS drives usually require third-party software for full functionality. Understanding these nuances will help you avoid potential frustration and ensure a smooth data transfer experience.
Furthermore, we’ll examine the importance of USB port compatibility. Most modern Macs utilize USB-A and USB-C ports. Many photo sticks come with both connector types, or offer adapters, but it’s essential to verify this to avoid needing additional dongles or converters, which can detract from the convenience.
Key Features to Consider in a Mac-Compatible Photo Stick
Beyond basic compatibility, several features can significantly enhance your experience with a photo stick on your Mac. This section highlights the most important aspects to look for, ensuring you select a device that meets your specific needs for speed, capacity, and ease of use.
Storage capacity is a primary consideration. Photo libraries can grow rapidly, so assess how much storage you anticipate needing. Photo sticks come in various sizes, from a few gigabytes to several terabytes, so choosing the right capacity upfront can save you from needing multiple devices or frequent transfers.
Transfer speed is another crucial factor, especially when dealing with large photo and video files. Look for photo sticks that support faster USB standards like USB 3.0 or USB 3.1, which offer significantly quicker read and write times compared to older USB 2.0 devices. This can make a substantial difference when backing up or transferring large collections.
Finally, consider any included software or management features. Some photo sticks come with dedicated apps that can help organize, back up, and even edit your photos directly from the stick. These can add significant value and streamline your photo management workflow on your Mac.
Maximizing Your Photo Stick’s Performance on macOS
Once you’ve chosen the right photo stick for your Mac, understanding how to optimize its performance can ensure a smooth and efficient experience. This section offers practical tips and best practices for getting the most out of your device.
Proper formatting is key to optimal performance. While most photo sticks will be pre-formatted, reformatting them to a Mac-friendly file system like exFAT can sometimes improve compatibility and transfer speeds. Be sure to back up any existing data on the stick before reformatting, as this process will erase everything.
Regularly checking for and installing firmware updates for your photo stick, if available from the manufacturer, can also enhance performance and stability. Similarly, keeping your macOS operating system up-to-date ensures that it has the latest drivers and support for external storage devices.
Finally, avoid filling your photo stick to its absolute maximum capacity. Leaving a small amount of free space can help maintain better read/write speeds and reduce the likelihood of data corruption, especially during large transfers.
Troubleshooting Common Photo Stick Issues on Mac
Despite best efforts, you might encounter occasional issues with your photo stick on your Mac. This section provides solutions to common problems, helping you get back to smoothly managing your photo library.
One frequent issue is the photo stick not being recognized by your Mac. This can often be resolved by trying a different USB port, ensuring the stick is properly seated, or restarting your Mac. If the problem persists, you might need to check Disk Utility to see if the drive is detected at a lower level.
If you’re experiencing slow transfer speeds, it could be due to using an older USB port, a drive that is nearly full, or a corrupted file system. Reformatting the drive to exFAT and ensuring you’re using a USB 3.0 or higher port can often address these speed concerns.
For data corruption or unreadable files, a Disk Utility repair or a full reformat might be necessary. However, always attempt to recover any important data first using specialized data recovery software if the drive is still partially accessible before resorting to formatting.
The Ultimate Guide to Finding the Best Photo Sticks for Mac
Hey there, fellow Mac enthusiast! So, you’ve been snapping pictures like crazy, filling up your iPhone or digital camera, and now you’re wondering about the easiest, most streamlined way to get all those precious memories onto your Mac. You’ve probably heard about photo sticks, those handy little devices that promise to simplify photo transfers. But with so many options out there, how do you choose the best photo sticks for Mac that won’t give you a headache? Don’t worry, I’ve got your back! Think of me as your friendly tech advisor, here to guide you through the digital jungle and help you find the perfect photo stick to keep your memories safe and sound on your Apple device.
1. Compatibility is King: Making Sure It Plays Nice with Your Mac
First things first, let’s talk about making sure your new photo stick actually works with your Mac. It sounds obvious, but you’d be surprised how many people skip this step! You’re looking for something that plugs in seamlessly, without needing a million adapters or complicated software downloads. Most modern photo sticks designed for iPhones and iPads will also work beautifully with Macs, but it’s always worth a double-check. Look for mentions of Mac compatibility on the packaging or product description, and ideally, something that supports USB-C or Thunderbolt, since those are the ports you’ll find on most newer Macs.
Think of it like this: you wouldn’t buy a charger for an Android phone and expect it to work with your iPhone, right? The same principle applies here. You want that “plug and play” experience that Macs are so famous for. The best photo sticks for Mac will integrate effortlessly into your workflow, allowing you to quickly access and manage your photos without any fuss. Trust me, the last thing you want after a fantastic trip is to spend hours troubleshooting your photo transfer.
2. Storage Space: How Much Room Do Your Memories Need?
Now, let’s get down to the nitty-gritty: storage. How many photos are we talking about here? Are you a casual snapper, taking a few photos here and there, or are you a prolific photographer who’s constantly backing up gigabytes of high-resolution images? Photo sticks come in all sorts of storage capacities, from a modest 32GB all the way up to a whopping 1TB or even more. It’s essential to get a size that comfortably accommodates your current photo library and leaves you with plenty of room for future adventures.
Consider your shooting habits. If you shoot a lot of video in 4K, or if you’re always using burst mode on your camera, you’ll chew through storage pretty quickly. It’s usually better to err on the side of caution and get a slightly larger capacity than you think you’ll need. That way, you won’t find yourself scrambling for more space just when you’ve captured that perfect sunset. Investing in a little extra room upfront can save you the hassle of needing a new stick sooner than you expected when searching for the best photo sticks for Mac.
3. Transfer Speed: Getting Those Photos Over, Fast!
We’ve all been there – staring at a progress bar that seems to move at a snail’s pace. When it comes to transferring photos, speed really matters, especially if you’re dealing with large files or a massive library. Look for photo sticks that boast fast transfer speeds, often measured in megabytes per second (MB/s). Technologies like USB 3.0, USB 3.1, or even USB 3.2 will offer significantly faster performance than older USB 2.0 ports.
Think about your typical workflow. If you’re someone who likes to quickly offload photos after an event or a weekend getaway, a speedy transfer rate will make a huge difference in your daily routine. A slower stick might mean you’re waiting around more often, which can feel like a real drag. Prioritizing a fast photo stick can genuinely make the entire process of managing your photo library a much more pleasant and efficient experience.
4. Ease of Use: Simple is Usually Best
Let’s be honest, we’re all looking for convenience, right? When it comes to transferring photos, the simpler the process, the better. The best photo sticks for Mac will be incredibly user-friendly, requiring minimal setup and intuitive operation. Ideally, you want something that you can just plug in, open a familiar Finder window on your Mac, and drag and drop your photos without any complicated software or cryptic menus.
Some photo sticks come with their own dedicated apps, which can be great for organizing or automatically backing up your photos. However, if you prefer a more manual approach, or if you’re not keen on installing extra software, make sure the stick functions as a standard external drive that your Mac recognizes instantly. The goal is to make photo transfer as effortless as possible, so you can spend less time managing files and more time enjoying your memories.
5. Durability and Design: Built to Last, and Look Good Doing It
These little photo sticks can go places – on trips, to events, maybe even just tossed in your bag for safekeeping. That’s why durability is a key factor. You want a stick that’s built to withstand a bit of everyday wear and tear. Some are made from sturdy metal, while others might have a more robust plastic casing. Consider what kind of environment you’ll be using it in most often.
Beyond just toughness, think about the design. While not as critical as storage or speed, it’s nice to have a photo stick that looks good and is easy to handle. Some have sleek, minimalist designs, while others might have a handy keychain loop so you don’t lose them. The best photo sticks for Mac will offer a good balance of practical durability and aesthetically pleasing design that makes them a pleasure to use.
6. Extra Features: What Else Can It Do?
While the primary function is photo transfer, some photo sticks offer a few extra bells and whistles that might be worth considering. For instance, some have built-in encryption to keep your photos super secure. Others might offer automatic backup features, or even the ability to connect to multiple devices. Think about what would genuinely make your photo management life easier.
For example, if you’re constantly worried about losing your precious photos, a stick with robust encryption and automatic backup capabilities could be a game-changer. Or, if you’re often transferring photos from your digital camera as well as your phone, a stick with multiple connector types or a card reader slot could be incredibly useful. These extra features can elevate a good photo stick to a truly great one.
7. Price and Value: Getting the Most Bang for Your Buck
Of course, we all have a budget! Photo sticks can range quite a bit in price, depending on their capacity, brand, and features. It’s important to find a good balance between what you can afford and the features that are most important to you. Don’t automatically go for the cheapest option if it means sacrificing crucial storage or speed.
Ultimately, you’re looking for the best value. This means finding a photo stick that offers a good combination of reliable performance, sufficient storage, and the features you need, all at a price that feels fair. Read reviews, compare different models, and consider how much you’ll be using the stick. Investing a little more in a high-quality, reliable option can save you a lot of frustration down the line when you’re looking for the best photo sticks for Mac that truly meet your needs.
FAQs
What exactly is a photo stick and how does it work?
A photo stick, sometimes called a flash drive or USB stick, is basically a small, portable storage device that you can plug directly into your Mac’s USB port. Its main job is to help you transfer and back up your photos and videos from your iPhone, iPad, or even directly from your Mac’s internal storage. Think of it as a super-convenient way to keep your precious memories safe and easily accessible without needing to upload them to the cloud or deal with cables and complicated software.
When you plug it in, your Mac recognizes it as an external drive, just like an external hard drive. You can then simply drag and drop your photo and video files onto it. Many photo sticks also come with their own dedicated app or software that makes the process even smoother. This app often automatically scans your devices for new photos, allows you to select specific albums, and can even help you organize and manage your library right from the stick itself.
Are photo sticks safe for my Mac and my photos?
You bet! Photo sticks are designed to be perfectly safe for your Mac. They’re essentially just storage devices, so plugging one in is no different than plugging in a mouse or keyboard. The software that often comes with them is also generally very secure and only interacts with your photo and video files. Reputable brands prioritize data integrity, so you can trust that your photos won’t be corrupted or lost when using a quality photo stick.
When it comes to the safety of your photos themselves, think of a photo stick as a great backup solution. While it’s always wise to have multiple backups (perhaps one in the cloud and one locally), a photo stick offers a physical, offline copy of your memories. This means if something were to happen to your Mac or your cloud account, your photos on the stick would remain safe and sound. Just be sure to keep your photo stick in a secure place, as you would any valuable physical item.
Can I use a photo stick to transfer photos from my iPhone to my Mac?
Absolutely! That’s one of the primary reasons people get photo sticks. Instead of wrestling with iCloud Photo Library syncing issues or dealing with AirDrop when you have a ton of photos, a photo stick offers a super straightforward way to get them off your iPhone and onto your Mac. You just plug the stick into your iPhone (you might need an adapter, depending on your iPhone model and the stick’s connector type), and then use the stick’s app to select and transfer your photos and videos.
Once the transfer is complete to the stick itself, you can then plug that same photo stick into your Mac’s USB port. Your Mac will see it as an external drive, and you can then easily drag and drop all those photos and videos from the stick into your Photos app, a specific folder, or wherever else you’d like them to live on your computer. It’s a really efficient way to move large batches of media without relying on internet speed or cloud storage.
What’s the difference between a photo stick and a regular USB flash drive?
That’s a great question, and the lines can sometimes be a little blurry! A regular USB flash drive is a general-purpose storage device. You can use it for anything – documents, software, music, and yes, photos too. However, a device specifically marketed as a “photo stick” often comes with a few extra bells and whistles designed to make photo and video management easier, especially when transferring from mobile devices.
These “photo sticks” often include specific connectors for iPhones and iPads (like Lightning or USB-C) and usually come bundled with a dedicated app. This app is what really sets them apart. It simplifies the process of finding, selecting, and transferring your photos and videos from your phone directly to the stick, and often has features for organizing and backing up your media. So, while you could use a regular USB drive for photos, a photo stick is tailored to make that specific task more streamlined and user-friendly.
How much storage space do I need on a photo stick?
The amount of storage space you’ll need really depends on how many photos and videos you plan to store on it. Think about your current photo library size and how quickly it grows. If you only take a few pictures here and there and mostly want to use it for occasional transfers, a smaller capacity like 32GB or 64GB might be perfectly fine. However, if you’re a prolific photographer or videographer, or you want to create a substantial backup, you’ll likely want to opt for larger capacities.
Many people find that 128GB or 256GB offers a good balance between affordability and ample space for a significant photo and video collection. If you shoot a lot of high-resolution photos or record videos in 4K, those files take up a lot more space, so leaning towards 256GB or even 512GB could be a wise investment to ensure you have plenty of room for current and future memories without needing to constantly shuffle files around.
Can I use a photo stick to back up my entire Mac’s hard drive?
While a photo stick is fantastic for backing up your photos and videos, it’s generally not designed for backing up your entire Mac’s hard drive. Mac hard drives typically store much more than just photos and videos – they contain your operating system, all your applications, documents, settings, and much more. These types of full system backups usually require larger external hard drives and specialized backup software like Time Machine, which is built right into macOS.
Photo sticks are primarily intended for transferring and backing up media files (photos and videos) from your iPhone, iPad, or directly from specific folders on your Mac. They’re portable and convenient for media, but the capacity and functionality are usually geared towards that specific purpose. For a comprehensive backup of your entire Mac, you’ll want to look into dedicated external hard drives and use macOS’s built-in backup tools.
Are there any compatibility issues I should be aware of with Mac?
Generally speaking, most modern photo sticks are designed with Mac compatibility in mind, especially the ones specifically marketed for Apple devices. You’ll want to check the product description to ensure it explicitly states compatibility with macOS. Most will use standard USB connections (USB-A or USB-C), which are readily available on Macs. If your Mac only has USB-C ports, you’ll want to make sure the photo stick you choose has a USB-C connector or comes with a USB-C adapter.
The main area where compatibility can sometimes be a consideration is with the accompanying app. While most apps are designed to work seamlessly with macOS, it’s always a good idea to check if the app supports your specific version of macOS. Most reputable brands will list the supported operating system versions on their website or product packaging. If you’re running a very old version of macOS, it’s worth double-checking, but for most users with reasonably up-to-date Macs, compatibility is rarely an issue.
The Bottom Line
You’ve navigated the world of photo sticks for your Mac, armed with the knowledge to choose the perfect companion for your digital memories. Remember, the “best photo sticks for Mac” aren’t just about storage; they’re about making your photos accessible, secure, and ready for wherever inspiration takes you. Whether you’re a budding photographer wanting to back up your latest shoot, a traveler preserving precious moments, or simply someone who wants to declutter their digital life, there’s a photo stick out there that will be your reliable partner.
So go ahead, take that leap! With this guide, you’re empowered to find a solution that fits your needs and budget. Imagine effortlessly transferring those cherished family photos, freeing up space on your Mac, and knowing your memories are safe. The perfect photo stick is within reach, waiting to enhance your creative flow and bring peace of mind to your digital world. Get ready to organize, protect, and relive your favorite moments with confidence!