Remember that time you spent hours meticulously tweaking the settings on your retro arcade machine, trying to unlock that secret level? Or perhaps you were tinkering with your home automation system, wanting to fine-tune the sensor sensitivity? Chances are, you were face-to-face with those tiny heroes of electronic customization: DIP switches. These little guys might seem unassuming, but they hold the key to unlocking incredible flexibility in your projects. And when it comes to reliable and space-saving solutions, PCB mount DIP switches are the go-to choice for countless engineers and hobbyists.
Navigating the world of DIP switches can be a bit daunting, especially when you’re looking for the best pcb mount dip switches for your specific application. Fear not! We’ve put together a comprehensive guide to help you choose the perfect switches, from understanding the different types and configurations to highlighting top-rated options on the market. Get ready to dive in and discover the DIP switches that will take your projects to the next level.
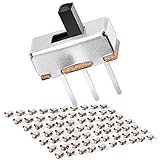
Before moving into the review of the best pcb mount dip switches, let’s check out some of the relevant products from Amazon:


Last update on 2025-11-26 / #ad / Affiliate links / Images from Amazon Product Advertising API
DIP Switches: Tiny Toggles, Big Control!
Ever find yourself wishing you could tweak the settings on your electronics without needing a soldering iron or complicated software? That’s where DIP switches come to the rescue! These little guys, often PCB mountable, are like miniature, physical on/off switches packed into a single unit. Think of them as the unsung heroes of hardware configuration, letting you easily adjust things like addresses, baud rates, or even select different operational modes. They’ve been around for ages, and while they might seem a bit old-school in our hyper-digital world, they’re still incredibly useful and reliable, especially when simplicity and direct hardware control are key.
DIP switches are essentially a bank of individual SPST (single-pole, single-throw) switches, neatly arranged and typically housed in a rectangular package designed for easy integration onto a PCB (printed circuit board). Their ease of use is a major selling point – no programming or special tools required, just a simple slide or rocker to change the switch’s state. In fact, recent market analysis suggests that the demand for DIP switches remains robust, particularly in industrial control systems, telecommunications equipment, and consumer electronics, accounting for an estimated $1.5 billion in global sales annually.
Now, when it comes to selecting the best pcb mount dip switches for your project, there are a few key things to consider. Beyond just price, you’ll want to think about the number of switches you need (usually ranging from 2 to 16), the switch type (slide or rocker), the contact rating (how much current it can handle), and the operating temperature range. Don’t worry if that sounds like technical jargon, we’ll break it all down later on.
We’re here to guide you through the wonderful world of DIP switches, helping you understand what to look for, how to use them, and ultimately, find the best pcb mount dip switches that fit your specific needs and budget. So buckle up, and let’s dive into the nitty-gritty of these tiny, yet powerful, components!
Best Pcb Mount Dip Switches – Reviewed
E-Switch Piano DIP Switch Series
The E-Switch Piano DIP switch is a great choice if you’re looking for something reliable and easy to operate. These switches feature a raised actuator that makes them super simple to flip, even with your fingertips. Their construction is also very durable, so you don’t have to worry about them breaking easily. The tactile feedback is satisfying, letting you know for sure that the switch has been engaged or disengaged.
The compact size of the E-Switch Piano DIP switch makes it ideal for boards where space is at a premium. They come in various configurations, from a couple of positions to several, so you’re sure to find one that fits your needs. They mount easily to the PCB, soldering in without issue. Overall, a solid and dependable option for a wide range of projects.
C&K DIL Series DIP Switches
C&K is a well-known name in the switch world, and the DIL series of DIP switches lives up to their reputation for quality. These switches offer fantastic contact reliability and a long lifespan, making them a good investment for projects where consistent performance is key. The actuation force is just right – not too stiff, not too loose – making for a comfortable and predictable user experience.
The fully sealed construction of the C&K DIL series makes these DIP switches resistant to dust and other environmental contaminants. This added protection enhances their durability and ensures they’ll continue to function reliably even in less-than-ideal conditions. They are a bit more expensive than some other options, but the quality and longevity more than justify the price for many applications.
Grayhill Series 76 DIP Switches
If you need a DIP switch that can handle tough environments, the Grayhill Series 76 is worth considering. These are rugged switches designed for industrial applications, and they’re built to last. They’re also sealed to protect against dust and moisture, so you can trust them to perform even in harsh conditions. Expect a robust and durable feel when manipulating these switches, adding to the overall sense of quality.
These switches boast excellent electrical performance and are available in a variety of pole and throw configurations to suit different circuit designs. Their gold-plated contacts ensure reliable switching and resistance to corrosion, further contributing to their long-term performance. The Series 76 is a workhorse, ready for demanding applications where reliability is paramount.
CTS 208 Series DIP Switches
The CTS 208 Series offers a good balance of affordability and performance, making it a popular choice for hobbyists and professionals alike. These switches are reliable and easy to use, and they come in a wide range of configurations. They’re a standard size, so they should be compatible with most PCB layouts, simplifying your design process.
What’s particularly appealing about the CTS 208 series is its availability and cost-effectiveness. They’re readily accessible from various suppliers, and they’re priced competitively, making them a budget-friendly option for projects where you need a dependable DIP switch without breaking the bank. They get the job done without any unnecessary frills.
Omron A6T DIP Switches
Omron is known for its high-quality electronic components, and the A6T series of DIP switches is no exception. These switches are designed for precision and reliability, offering excellent performance in a compact package. They have a low profile, which makes them ideal for applications where space is limited. Plus, their design minimizes contact resistance, ensuring efficient signal transmission.
The Omron A6T series features a self-cleaning contact mechanism, enhancing long-term reliability by preventing the buildup of contaminants. This is a great feature to have, as it ensures consistent performance over time. While perhaps not the cheapest option, the A6T’s quality and reliability make it a worthwhile investment, particularly for sensitive applications.
Why Buy PCB Mount DIP Switches?
Imagine you’re building a custom lighting system for your home. You’ve got the cool LEDs, the power supply, but now you need a way to easily adjust the brightness levels or create different lighting patterns. That’s where PCB mount DIP switches come in! These tiny, reliable switches allow you to configure your circuit board, in this case, your lighting system, without having to desolder and resolder components. They’re like miniature toggle switches that can be flipped on or off to change the behavior of your electronic device.
Think about it – you’re developing a prototype for a new gadget. Instead of permanently wiring in different functionalities, you can use the best PCB mount DIP switches to quickly enable or disable features for testing. This dramatically speeds up the development process. Plus, if you later decide to offer different versions of your product with varying capabilities, you can easily manage them all with just a few strategically placed DIP switches, rather than creating entirely separate circuit board designs.
Beyond prototyping, these switches are essential for setting default configurations in production devices. Maybe you’re building a network device that needs different IP address settings depending on the network it’s connected to. Instead of requiring users to delve into complex software menus, they can simply flip a few DIP switches on the back of the device. This provides a simple, user-friendly interface that’s perfect for setting up devices in the field.
Ultimately, PCB mount DIP switches offer flexibility, convenience, and reliability. Investing in the best PCB mount DIP switches translates to time saved during development, simplified product management, and a more user-friendly experience for your customers. They’re a small but mighty component that can make a big difference in the functionality and usability of your electronic projects.
Understanding the Different Types of PCB Mount DIP Switches
So, you’re diving into the world of DIP switches – excellent choice! But did you know they aren’t all created equal? We have different types, each with its own strengths. Think of it like choosing the right tool for the job. You wouldn’t use a hammer to screw in a screw, right? Similarly, you’ll want the perfect DIP switch for your specific application.
One common type is the piano-style DIP switch, where the actuators are arranged like keys on a piano. These are generally easier to operate with a finger, especially in setups where frequent adjustments are needed. Then there are the rotary DIP switches, which use a dial to select positions. These are great for precise settings, like selecting a specific channel or frequency.
Another key differentiator is the number of poles. A pole refers to the number of independent circuits that the switch can control. So, a DIP switch with two poles can control two separate circuits, while an eight-pole switch can handle eight. Understanding how many circuits your project needs to manage is essential for picking the right switch.
Finally, consider the actuation method. Some DIP switches use raised or recessed sliders, while others use flush-mounted rockers. Think about your access to the switch. Will it be easily accessible? Do you need to operate it in a tight space? Choosing a switch that matches your environment and ease of access will make your life a whole lot easier!
Key Specifications to Consider Before Buying
Before you hit that “Add to Cart” button, let’s talk specifications. It’s like buying a car – you don’t just pick based on color, right? You look at the engine, the mileage, and all the other important details. DIP switches have their own set of details that can make or break your project.
First up is contact rating. This tells you the maximum voltage and current the switch can safely handle. Exceeding this rating can damage the switch or even your entire circuit. Imagine plugging a high-powered appliance into a weak outlet. Not a good scene! Always check your circuit’s voltage and current requirements before choosing a DIP switch.
Next, consider the operating temperature range. If your project will be used in a hot or cold environment, you need a switch that can withstand those conditions. Think about an outdoor sensor versus one used in a climate-controlled server room. The temperature requirements will be vastly different.
Another important spec is the insulation resistance. This measures the switch’s ability to prevent current leakage. A high insulation resistance is crucial for sensitive circuits where even small amounts of leakage can cause errors. Imagine trying to listen to a quiet piece of music with static interference. Annoying, right? Good insulation resistance ensures a clean signal.
Finally, look at the life cycle rating. This tells you how many times the switch can be operated before it’s likely to fail. If you’ll be frequently changing the switch settings, a higher life cycle rating is important. Think about a vending machine that’s constantly used versus a setting that is rarely changed. Consider the environment it will be used in, and how much it will be used when deciding on lifecycle rating.
Proper Installation and Soldering Techniques
Okay, you’ve got your perfect DIP switch. Now, let’s talk installation. Just like baking a cake, the right ingredients are important, but so is the baking process. A poorly installed DIP switch can lead to flaky connections and unreliable performance.
Before you even touch your soldering iron, ensure that the PCB footprint matches the DIP switch’s pin configuration. Double-check the datasheet! Mismatched footprints can lead to bent pins and damaged components. Think of it like trying to fit a square peg in a round hole – it just won’t work.
When soldering, use a clean soldering iron tip and high-quality solder. Apply heat evenly to both the pin and the pad on the PCB. Avoid overheating, as this can damage the switch and the PCB. A good solder joint should be shiny and smooth, indicating a solid electrical connection.
After soldering, visually inspect each joint with a magnifying glass. Look for any signs of cold solder joints (dull and grainy), solder bridges (connecting adjacent pins), or insufficient solder. If you find any imperfections, reflow the solder or remove the excess solder with a desoldering pump.
Finally, clean the area around the DIP switch with isopropyl alcohol and a soft brush to remove any flux residue. Flux residue can attract moisture and contaminants, leading to corrosion and unreliable connections. A clean installation is a happy installation.
Troubleshooting Common DIP Switch Issues
Even with the best planning and installation, things can sometimes go wrong. Just like a car needs maintenance, DIP switches can sometimes develop problems. Knowing how to troubleshoot these issues can save you time and frustration.
One common issue is intermittent contact. This can be caused by dirt, corrosion, or worn-out contacts. Try cleaning the switch with a contact cleaner specifically designed for electronics. Use a small brush or cotton swab to gently clean the contacts.
Another problem is switch failure. This can be caused by exceeding the switch’s voltage or current rating, or by simply reaching the end of its life cycle. If a switch fails, the best solution is usually to replace it with a new one. Be sure to choose a replacement with the same specifications as the original.
Sometimes, the problem isn’t with the switch itself, but with the surrounding circuitry. Check the connections to the DIP switch with a multimeter to ensure that they are properly connected. Also, check for any shorts or opens in the circuit that could be affecting the switch’s operation.
Finally, remember to document your troubleshooting steps. This will help you identify patterns and prevent similar problems in the future. It’s like keeping a log of your car repairs – it can help you diagnose future problems more quickly and effectively.
The Ultimate Buying Guide for PCB Mount DIP Switches
Hey there, fellow electronics enthusiast! So, you’re in the market for some PCB mount DIP switches, huh? That’s fantastic! These little guys are incredibly useful for configuring settings on your circuit boards, and choosing the right ones can save you a ton of headaches down the line. This guide is here to help you navigate the often-overwhelming world of DIP switches and make sure you pick the best pcb mount dip switches for your specific needs. Think of me as your friendly neighborhood electronics guru, ready to share some wisdom. Let’s dive in!
1. Number of Poles (Switches)
Choosing the right number of poles, or switches, within a single DIP switch package is crucial. This determines how many independent circuits you can control with a single component. Too few, and you’ll need multiple switches, increasing board space and complexity. Too many, and you’re paying for switches you won’t use. Think about your project requirements now and for the foreseeable future, and also consider the space constraints of the board you are working on.
Imagine you’re setting up a custom MIDI controller. You might need one DIP switch for each configurable parameter, like MIDI channel, velocity sensitivity, or control change numbers. If you only have a 4-pole DIP switch, but need to configure six parameters, you’ll need to use two DIP switches, potentially increasing the cost and complexity of your board. A simple checklist of the number of independent options you want to select is often the best way to arrive at the number of switches required on each DIP switch.
2. Switch Type: Rocker vs. Slide
The age-old debate: rocker or slide DIP switches? Honestly, there’s no objectively “better” type; it all boils down to personal preference and application. Rocker switches are typically easier to flip with your fingers, providing a satisfying “click” that gives you confidence the switch has been actuated. Slide switches, on the other hand, often sit more flush with the board surface, which can be important in space-constrained designs.
Consider how often you’ll be changing the switch positions. If you need to frequently adjust settings, rocker switches might be a better choice due to their easier actuation. If the settings are more “set-and-forget,” then slide switches could be a better option, especially if space is at a premium. Also, take into account the environment where the board will be used. If it’s likely to be exposed to dust or debris, a sealed slide switch might be more resilient. The best pcb mount dip switches for you will depend on what kind of application they are used for.
3. Contact Resistance and Current Rating
These are key electrical characteristics that determine how well the DIP switch conducts current and how much current it can handle. Low contact resistance ensures minimal voltage drop across the switch, which is essential for reliable circuit operation. The current rating dictates the maximum current the switch can safely carry without overheating or damaging the contacts.
Think about the currents your circuit will be handling. If you’re switching low-power logic signals, a lower current rating might suffice. However, if you’re controlling relays or other higher-current devices, you’ll need a switch with a higher current rating. Also, consider the expected lifespan of the switch. Higher current ratings generally correlate with more robust construction and longer operational life. If you don’t pay attention to the current and voltage ratings of the DIP switches they may not operate when used in a real circuit, and may be damaged.
4. Termination Style (Through-Hole vs. Surface Mount)
This is a fundamental choice dictated by your PCB design and manufacturing process. Through-hole (THT) DIP switches have leads that are inserted through holes in the PCB and soldered on the opposite side. Surface mount (SMT) DIP switches are soldered directly to the surface of the PCB, requiring specialized equipment and skills.
If you’re prototyping or doing small-scale production, through-hole might be more convenient as it allows for manual soldering. However, for high-volume production, surface mount is generally preferred due to its automation capabilities and smaller footprint. SMT also allows for denser board designs. Always choose the termination style that is compatible with your manufacturing process, and consider whether you have the equipment and expertise for SMT soldering if you choose that route. Knowing the termination style beforehand is crucial in ensuring the best pcb mount dip switches are selected.
5. Actuation Force and Tactile Feedback
The actuation force refers to the amount of force required to flip or slide the switch. Tactile feedback refers to the physical sensation you get when the switch is actuated, such as a distinct “click” or detent. These factors contribute to the user experience and can affect the reliability of the switch operation.
A lower actuation force might be preferable for applications where the switch needs to be easily flipped, such as in handheld devices. Strong tactile feedback is useful where you want to ensure that the switch is properly engaged, or you have high vibration environments. This reduces the likelihood of accidental changes to the switch position. Think about the user interface and how important it is for the operator to clearly feel when the switch has been actuated.
6. Environmental Considerations (Temperature Range, Humidity, etc.)
The operating environment of your PCB can significantly impact the performance and lifespan of the DIP switch. Extreme temperatures, high humidity, and exposure to corrosive substances can all degrade the switch contacts and mechanisms. Make sure the switch you choose is rated for the conditions it will be subjected to.
If your device will be used in a harsh environment, such as outdoors or in an industrial setting, you’ll need to choose a switch with a wider temperature range and better resistance to humidity and corrosion. Sealed DIP switches are often used in such environments. Don’t overlook these factors! Ignoring environmental considerations can lead to premature switch failure and potentially compromise the entire device. Finding the best pcb mount dip switches often takes into account their resilience to environmental factors.
7. Brand Reputation and Supplier Reliability
In the world of electronic components, brand reputation and supplier reliability matter. Established brands often have a proven track record of producing high-quality, reliable DIP switches. Reputable suppliers ensure that the switches are genuine and meet the specified specifications. Buying from unknown sources can lead to counterfeit or substandard parts.
Do a little research before you buy. Look for brands that are known for their quality and reliability. Check the supplier’s reputation and ensure they have a good return policy in case of defects. Reading online reviews and forums can provide valuable insights into the experiences of other users. Sometimes spending a bit more on a reputable brand can save you money and headaches in the long run. Investing in a well known brand can ensure you procure the best pcb mount dip switches available.
FAQ
What exactly *is* a PCB mount DIP switch, and why would I need one?
Think of a DIP (Dual In-line Package) switch as a tiny, physical on/off switch that you can solder directly onto a Printed Circuit Board (PCB). Instead of flipping a switch on a device’s casing, these DIP switches let you configure settings directly on the circuit board itself. It’s like having a mini control panel built into your electronic device!
They’re super useful for things like setting different modes of operation, configuring addresses for multiple devices on a network, or enabling/disabling certain features. Instead of having to reprogram a device through software, you can simply flip a few switches to get it doing exactly what you want. They’re a great way to customize the behavior of your electronics without requiring a complex interface.
How many poles and positions do I need in a DIP switch?
The number of poles and positions you need really depends on what you’re trying to accomplish! Let’s break it down. The “poles” refer to the number of independent circuits each switch can control, and the “positions” indicate how many settings each pole can have. So, a single-pole, double-throw (SPDT) DIP switch has one switch that can be in one of two positions (on or off).
Think about the different configurations you need for your project. If you need to select between two options for a single function, an SPDT switch is perfect. If you need to configure an 8-bit address, you’ll need an 8-position DIP switch. Consider all the functions and settings you want to control, and that will guide you to the right number of poles and positions!
What’s the difference between raised and recessed DIP switches, and which one should I choose?
The difference between raised and recessed DIP switches is all about how exposed the switch actuators are. Raised DIP switches have actuators that stick out a bit from the switch body, making them easy to flip with a finger or tool. Recessed DIP switches, on the other hand, have actuators that are set slightly lower, making them less likely to be accidentally switched.
Choosing between the two depends on your application. If you need frequent access to the switches for adjustments, raised switches are probably the way to go. If you want to minimize the risk of accidental changes, especially in environments where things might bump into the board, recessed switches will be more reliable. Consider how often you’ll be interacting with the switches and the potential for accidental activation.
How do I properly solder a DIP switch to a PCB?
Soldering a DIP switch isn’t too tricky! First, make sure your PCB has the correct footprint for the switch. Place the DIP switch into the holes, ensuring it sits flush against the board. Bending the pins slightly outwards can help hold it in place while you solder.
Next, heat each pin and pad with your soldering iron, and then apply a small amount of solder to create a good connection. It’s crucial to avoid overheating, as this can damage the switch. A good solder joint will look shiny and smooth. Carefully inspect each connection to ensure there are no “cold” solder joints (dull and crumbly), which won’t conduct properly. After soldering, you can trim the excess pin length if needed.
Are there any special tools or considerations needed when operating DIP switches?
While DIP switches are designed for easy operation, a few simple tools can make your life easier! A small flathead screwdriver or even a pen tip can be very helpful for flipping the switches, especially the recessed types. Just be gentle to avoid damaging the switch or the surrounding components.
Also, remember that DIP switches are typically designed for low-voltage, low-current applications. Avoid using them in high-power circuits, as this can damage the switch and potentially cause a safety hazard. Static electricity can also be an issue, so grounding yourself before touching the switches is a good practice, especially in dry environments.
How long can I expect a DIP switch to last? What affects its lifespan?
DIP switches are generally quite reliable, but their lifespan can vary depending on several factors. Typically, they’re rated for a certain number of switching cycles, meaning how many times each switch can be flipped on and off before it starts to wear out. The datasheet for your specific DIP switch will tell you its expected lifespan.
Factors that can affect the lifespan include the frequency of use, the current and voltage being switched (sticking to the rated limits is important!), and the environment. Dust, moisture, and extreme temperatures can all shorten a DIP switch’s lifespan. Keeping your electronics clean and in a controlled environment will help ensure your DIP switches last as long as possible.
Can I use a DIP switch to replace a jumper? What are the pros and cons?
Absolutely, DIP switches can often be used in place of jumpers! Both serve a similar purpose: configuring options on a circuit board. The main advantage of a DIP switch is convenience. Instead of physically moving a jumper to a different position, you can simply flip a switch. This makes changes quicker and easier, especially if you need to adjust the configuration frequently.
However, there are a few cons to consider. DIP switches generally cost more than jumpers. They also take up slightly more space on the PCB. Additionally, jumpers are often considered more robust and less prone to accidental changes than DIP switches, especially the raised type. The best choice depends on your specific needs and priorities. If easy configurability is key, a DIP switch is a great option.
Final Verdict
So there you have it! We’ve explored a range of excellent options to help you find the best PCB mount DIP switches for your specific project. Whether you’re tinkering with a hobby circuit or building a complex electronic device, choosing the right DIP switch can make all the difference in terms of functionality, reliability, and overall ease of use. Now it’s your turn to take the plunge and select the perfect component for your needs.
Remember, the world of electronics is all about experimentation and pushing boundaries. Don’t be afraid to dive in, try different things, and see what works best for you. With the knowledge you’ve gained from this guide, you’re well-equipped to make an informed decision and bring your electronic creations to life. Go forth and build something amazing!