Remember that feeling you had as a kid, bundled up in blankets, staring up at the inky blackness, wondering what secrets the stars held? I remember my own first glimpse through a neighbor’s telescope – a blurry, but undeniably magical, view of the moon’s craters. That moment sparked a lifelong fascination with astronomy, and if you’re reading this, chances are you share that same wonder. Now, as an adult with a little more knowledge (and a bigger blanket!), I’ve come to appreciate the importance of quality optics. Whether you’re a seasoned stargazer or just beginning your cosmic journey, finding the right telescope can make all the difference.
That’s where Orion comes in. They’ve built a solid reputation for producing reliable and affordable telescopes that cater to a wide range of experience levels. But with so many models to choose from, how do you find the best orion telescopes for your needs? This guide will cut through the jargon and provide you with clear, unbiased reviews and helpful tips to help you choose the perfect telescope for your next adventure under the stars. So grab a warm drink, settle in, and let’s explore the universe together!
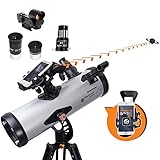
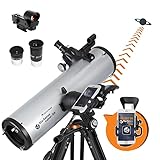
Before moving into the review of the best orion telescopes, let’s check out some of the relevant products from Amazon:


Last update on 2025-11-28 / #ad / Affiliate links / Images from Amazon Product Advertising API
Gazing Up: Finding Your Perfect Orion Telescope
Have you ever looked up at the night sky and felt a tug, a yearning to see beyond what’s visible with the naked eye? Maybe you’ve seen a blurry image of Saturn’s rings and thought, “I want to see that for myself!” That’s where a telescope comes in, and when it comes to balancing quality and affordability, Orion Telescopes are a popular choice for budding astronomers.
Choosing your first telescope can feel overwhelming, like navigating a star chart without a compass. There are reflectors, refractors, GoTos, equatorials…the list goes on! But don’t worry, it doesn’t need to be complicated. The goal is to find a telescope that suits your needs, skill level, and observing location. Did you know that around 60% of telescopes purchased are never used more than a handful of times? This is often due to being too complex or not matched with the user’s lifestyle.
Orion Telescopes offers a diverse range of instruments, from beginner-friendly models ideal for viewing the Moon and planets to more advanced options capable of revealing faint deep-sky objects like nebulae and galaxies. We’ll be exploring some of the best Orion telescopes across various price points and observing goals. Understanding the different types of telescopes, aperture size (the light-gathering diameter), and mount options is crucial to making an informed decision.
So, let’s embark on this celestial journey together! We’ll help you cut through the jargon, understand the key features, and ultimately find the Orion telescope that will unlock the wonders of the universe for you. Get ready to explore craters on the Moon, marvel at Jupiter’s bands, and perhaps even catch a glimpse of a distant galaxy millions of light-years away.
The Best Orion Telescopes
Orion SkyQuest XT8 Classic Dobsonian Telescope
The Orion SkyQuest XT8 Classic Dobsonian telescope is a fantastic entry point into the world of serious stargazing. This telescope offers a generous 8-inch aperture, which translates to bright and detailed views of celestial objects. Expect to see stunning details on the Moon, planets like Jupiter and Saturn, and even faint deep-sky objects like nebulae and galaxies. Its simple Dobsonian design makes it incredibly easy to set up and use, even for beginners.
The XT8’s intuitive point-and-view operation makes navigating the night sky a breeze. Its stable base ensures smooth tracking, while its relatively affordable price point makes it an exceptional value. If you’re looking for a telescope that delivers impressive performance without breaking the bank, this is definitely one to consider. It’s a telescope that can grow with you as your interest in astronomy deepens.
Orion AstroView 90mm EQ Refractor Telescope
The Orion AstroView 90mm EQ Refractor Telescope is a solid choice for beginner astronomers looking for a versatile and user-friendly instrument. Its 90mm aperture gathers a good amount of light, providing clear and crisp views of the Moon, planets, and brighter deep-sky objects. The equatorial mount, while requiring a bit of a learning curve, allows for precise tracking of celestial objects as they move across the sky.
This refractor telescope is lightweight and portable, making it easy to transport to dark sky locations. Its included accessories, such as eyepieces and a finder scope, provide everything needed to start observing right away. While it may not have the light-gathering power of larger reflectors, its sharp optics and stable mount make it a great option for those just starting their astronomical journey.
Orion StarBlast 4.5 Astro Reflector Telescope
The Orion StarBlast 4.5 Astro Reflector Telescope is a popular choice for beginners due to its compact size, portability, and ease of use. This tabletop reflector telescope requires no assembly and is ready to go right out of the box. Its 4.5-inch aperture provides decent views of the Moon, planets, and some brighter deep-sky objects.
The StarBlast 4.5’s simple point-and-view operation makes it incredibly user-friendly, even for complete novices. Its compact size makes it ideal for those with limited storage space or who want a telescope that’s easy to transport. While its aperture limits its ability to resolve faint objects, it’s an excellent entry-level telescope that’s perfect for introducing astronomy to children or anyone new to the hobby.
Orion SpaceProbe 130ST EQ Reflector Telescope
The Orion SpaceProbe 130ST EQ Reflector Telescope is a fantastic choice for those looking to take their stargazing to the next level. Its 130mm (5.1 inch) aperture gathers a significant amount of light, allowing for brighter and more detailed views of the Moon, planets, and deep-sky objects. The short tube design makes it more portable than traditional reflector telescopes, while still offering impressive optical performance.
The included equatorial mount provides smooth and precise tracking of celestial objects, allowing for longer and more enjoyable observing sessions. While the equatorial mount requires a bit of practice to master, it’s well worth the effort for serious astronomy enthusiasts. The SpaceProbe 130ST offers a great balance of aperture, portability, and affordability, making it an excellent choice for intermediate astronomers.
Orion SkyView Pro 8 GoTo Reflector Telescope
The Orion SkyView Pro 8 GoTo Reflector Telescope is a sophisticated instrument designed for serious amateur astronomers. Its 8-inch aperture provides exceptional light-gathering ability, allowing for stunning views of faint deep-sky objects like nebulae, galaxies, and star clusters. The GoTo computerized system makes locating celestial objects incredibly easy, even for those unfamiliar with the night sky.
This telescope’s robust equatorial mount provides stable and precise tracking, ensuring sharp and detailed views at high magnifications. The GoTo system contains a database of thousands of celestial objects, allowing you to easily navigate the night sky and explore the wonders of the universe. While the SkyView Pro 8 GoTo represents a significant investment, it’s a worthwhile one for dedicated astronomers who demand the best possible performance.
Why Invest in an Orion Telescope?
Ever looked up at the night sky and felt a sense of wonder, a yearning to see beyond what’s visible to the naked eye? An Orion telescope can be your gateway to unlocking the universe’s secrets. Forget struggling to make out faint stars or fuzzy blobs – with an Orion telescope, you can witness the vibrant colors of nebulae, the intricate details of lunar craters, and even the rings of Saturn, all from the comfort of your own backyard. Imagine sharing these breathtaking views with your family and friends, sparking their curiosity and igniting a passion for astronomy that will last a lifetime.
Think of it like this: you wouldn’t watch a movie on a tiny, blurry screen when you could experience it in high definition on a large display, right? Similarly, basic stargazing is fascinating, but an Orion telescope elevates the experience exponentially. The “best Orion telescopes” offer superior optics, allowing you to see fainter objects and finer details that are simply invisible to the unaided eye or with inferior telescopes. Whether you’re a beginner just starting to explore the cosmos or an experienced astronomer seeking to upgrade your equipment, Orion has a telescope to fit your needs and budget.
Choosing an Orion telescope is an investment in more than just a piece of equipment; it’s an investment in experiences, knowledge, and connection. Picture yourself pointing out constellations to your children, watching their faces light up as they spot their first meteor shower, or even collaborating with other amateur astronomers to track a distant comet. These are moments that build memories, foster curiosity, and broaden your understanding of the universe we inhabit.
Furthermore, Orion is a trusted brand known for its quality, reliability, and excellent customer support. Buying an Orion telescope means you’re joining a community of passionate stargazers who are eager to share their knowledge and enthusiasm. So, why settle for merely gazing at the stars when you can explore them in breathtaking detail? With an Orion telescope, the universe is within your reach.
Understanding Telescope Types for Orion Scopes
Choosing an Orion telescope can feel like navigating a cosmos of options, and the first step is understanding the different types. Reflectors, which use mirrors, are great for deep-sky objects like nebulae and galaxies, offering a lot of aperture for your money. Imagine wanting to see the Andromeda galaxy’s spiral arms – a reflector would be your best bet. Refractors, on the other hand, use lenses and are known for their sharp, high-contrast images, excellent for planetary viewing and lunar detail. Think of scrutinizing the craters on the Moon – a refractor shines here.
Then there are catadioptric telescopes, a hybrid using both mirrors and lenses. These are compact and versatile, giving you a bit of both worlds. Picture yourself living in an apartment with limited space but still wanting to explore planets and some brighter deep-sky objects – a catadioptric might be perfect. Each type has its strengths and weaknesses, so consider what you primarily want to observe. Are you a planetary enthusiast, a deep-sky explorer, or someone looking for a versatile all-rounder? This initial understanding will narrow down your choices significantly.
Beyond these basics, consider the telescope’s aperture, which is the diameter of the light-gathering element (mirror or lens). A larger aperture means a brighter and more detailed image. Think of it like a bucket collecting rainwater – a bigger bucket collects more. For instance, a larger reflector can reveal faint details in distant galaxies, whereas a smaller one might only show a blurry smudge.
Finally, don’t forget about the mount. The mount supports the telescope and allows you to smoothly track celestial objects as they move across the sky. An unstable mount makes observing frustrating, even with the best optics. Imagine trying to take a picture with a shaky tripod – the image will be blurry. A solid mount is just as crucial as the telescope itself for a rewarding stargazing experience.
Essential Accessories for Your Orion Telescope
Once you’ve chosen your Orion telescope, the journey of discovery truly begins with the right accessories. Eyepieces are arguably the most important. They determine the magnification and field of view. Think of them like interchangeable lenses for a camera – each one offers a different perspective. A lower magnification eyepiece gives a wide view, perfect for locating objects, while a higher magnification eyepiece zooms in for closer detail, ideal for planetary observation.
A good finderscope or red dot finder is another essential accessory. This helps you to locate objects in the night sky. Imagine trying to find a specific star in a vast field of stars without any guidance – it’s like finding a needle in a haystack. A finderscope, especially a Telrad, projects a red bullseye onto the sky, making it incredibly easy to aim your telescope.
Filters can dramatically enhance your viewing experience. Light pollution filters, for example, block out artificial light, allowing you to see fainter deep-sky objects from urban environments. Think of them like sunglasses for your telescope, blocking out unwanted light. Planetary filters, on the other hand, enhance specific details on planets, like the red spot on Jupiter or the cloud bands on Saturn.
Lastly, consider a Barlow lens. This accessory effectively doubles or triples the magnification of your existing eyepieces. It’s like getting extra eyepieces without having to buy them individually. Imagine you have a 10mm eyepiece, and you want to see planets in greater detail. A 2x Barlow lens turns your 10mm eyepiece into a 5mm one, giving you twice the magnification.
Maintenance and Care for Long-Term Performance
Keeping your Orion telescope in top condition is key to years of enjoyable stargazing. Dust and debris are your telescope’s worst enemies. Think of it like keeping your glasses clean – smudges obscure your vision. Clean your telescope’s optics regularly, but gently. Use a dedicated lens cleaning solution and a microfiber cloth specifically designed for optics. Avoid using household cleaners or paper towels, which can scratch the delicate surfaces.
Proper storage is also crucial. Moisture can cause corrosion, and extreme temperatures can damage the optics. Imagine leaving your telescope in a damp garage or a hot car – it’s a recipe for disaster. Store your telescope in a dry, climate-controlled environment. A telescope case can provide added protection from bumps and scratches.
Collimation, the alignment of the mirrors in a reflector telescope, is something you’ll need to learn. Over time, vibrations and handling can knock the mirrors out of alignment, resulting in blurry images. Think of it like aligning the wheels on your car – if they’re out of alignment, the ride will be bumpy. Collimation is a relatively simple process that you can do yourself with the right tools.
Finally, handle your telescope with care. Avoid dropping it or bumping it against hard surfaces. Treat it like the precision instrument it is. Think of it like handling a camera lens – you wouldn’t throw it around carelessly. With proper care and maintenance, your Orion telescope will provide you with years of breathtaking views of the cosmos.
Troubleshooting Common Issues with Orion Telescopes
Even with the best care, you might encounter occasional issues with your Orion telescope. One common problem is blurry images. This could be due to several factors, such as poor seeing conditions (atmospheric turbulence), incorrect focus, or misalignment of the optics (collimation). Think of it like trying to see through heat haze on a hot day – the air distorts the view. Check the collimation first, then ensure you’ve focused the telescope properly, and finally, wait for a night with stable atmospheric conditions.
Another common issue is difficulty finding objects in the night sky. This could be due to a misaligned finderscope or red dot finder, or simply a lack of familiarity with the night sky. Think of it like trying to navigate a new city without a map – you’ll get lost. Align your finderscope carefully during the day using a distant object, and use a star chart or a stargazing app to help you locate celestial objects.
Sometimes, you might experience difficulty focusing, especially at high magnifications. This could be due to the telescope not being fully cooled down to the ambient temperature. Think of it like condensation forming on a cold glass – it blurs the image. Allow your telescope to acclimatize to the outside temperature for at least 30 minutes before observing. This will allow the optics to stabilize and provide sharper images.
Lastly, if you’re experiencing problems with the mount, such as jerky movements or difficulty tracking objects, check the balance of the telescope. An unbalanced telescope puts strain on the mount and can lead to tracking errors. Think of it like trying to carry a heavy object that’s not centered – it’s awkward and difficult. Adjust the position of the telescope on the mount until it’s properly balanced. If you’re still experiencing problems, consult the telescope’s manual or contact Orion’s customer support for assistance.
Best Orion Telescopes: A Buying Guide for Stargazers
Hey there, future astronomer! Ready to explore the cosmos from your backyard? You’ve come to the right place. Picking a telescope, especially when there are so many options, can feel a little overwhelming. That’s why this buying guide focuses on Orion telescopes. Orion has earned a stellar reputation for quality and value.
This guide aims to simplify the process and help you find the perfect telescope to fuel your passion for astronomy. We’ll break down the key factors to consider, so you can confidently choose the best orion telescopes for your needs and budget. Let’s embark on this celestial journey together!
Aperture: How Much Light Can You Grab?
Think of aperture as the telescope’s pupil. Just like your eyes dilate to let in more light at night, a larger aperture telescope gathers more light from faint celestial objects. More light equals brighter and more detailed images of planets, nebulae, and galaxies. This is arguably the most crucial factor to consider. If you want to see those faint fuzzies, aperture is king.
Imagine trying to read a book in dim lighting. A small aperture telescope is like trying to read with a tiny flashlight, while a larger aperture telescope is like having a bright lamp. The difference is huge! For beginners, a telescope with an aperture of 60mm to 80mm can be a good starting point for viewing the Moon and planets. However, if you’re serious about deep-sky observing, consider a telescope with an aperture of 100mm or larger. This will allow you to see fainter objects and enjoy more detailed views.
Telescope Type: Refractor, Reflector, or Catadioptric?
Telescopes come in three main flavors: refractors (using lenses), reflectors (using mirrors), and catadioptrics (a combination of both). Each type has its pros and cons. Refractors are known for their sharp images and ease of use, making them a great choice for beginners. Reflectors offer larger apertures at a lower cost, ideal for deep-sky observing. Catadioptrics combine the best of both worlds, providing good image quality and portability.
Think of it like choosing a car. A refractor is like a sporty coupe – sleek, precise, and easy to handle. A reflector is like a powerful truck – it can haul a lot of “light” and is relatively affordable. A catadioptric is like an SUV – versatile and balanced for various conditions. For instance, beginner astronomers might find an Orion refractor easy to set up and use, while more experienced observers might prefer an Orion reflector for its light-gathering capabilities. The type of telescope also affects its portability and maintenance requirements, so factor those in as well.
Magnification: It’s Not Everything!
While magnification might seem like the most important factor, it’s actually less crucial than aperture. Magnification simply enlarges the image, but it doesn’t improve the detail. In fact, too much magnification can result in blurry and distorted images. A good rule of thumb is to use a magnification of no more than 50x per inch of aperture.
Don’t fall into the trap of thinking that a telescope with the highest magnification is the best. It’s more important to have a sharp, clear image than a highly magnified, blurry one. Think of it like blowing up a digital photo too much – eventually, you just see pixels. The same is true with telescopes. It’s better to have a bright, detailed image at a lower magnification than a dim, fuzzy image at a high magnification. The best orion telescopes strike a balance between magnification and image quality.
Mount Type: Stability is Key!
The mount is what holds your telescope and allows you to point it at different objects in the sky. There are two main types of mounts: alt-azimuth (alt-az) and equatorial. Alt-az mounts are simpler and more intuitive to use, making them a good choice for beginners. Equatorial mounts are more complex, but they allow you to easily track objects as they move across the sky, which is essential for astrophotography.
Imagine trying to take a picture with a shaky camera. The resulting image will be blurry. The same is true with telescopes. A stable mount is crucial for getting sharp, clear images. An alt-az mount is like a simple tripod – easy to set up and use. An equatorial mount is like a more advanced camera tripod with a pan-and-tilt head, allowing you to smoothly track moving objects. For visual observing, a sturdy alt-az mount is often sufficient. But if you plan on doing astrophotography, an equatorial mount is a must.
Focal Length and Focal Ratio: The Image’s Personality
Focal length is the distance between the telescope’s lens or mirror and the point where the image comes into focus. The focal ratio is the focal length divided by the aperture. A shorter focal length and faster focal ratio (e.g., f/5) will give you a wider field of view, which is great for viewing large objects like nebulae and galaxies. A longer focal length and slower focal ratio (e.g., f/10) will give you a narrower field of view and higher magnification, which is better for viewing planets and the Moon.
Think of focal length as the “zoom” level of your telescope. A shorter focal length is like having a wide-angle lens on your camera, while a longer focal length is like having a telephoto lens. The focal ratio, on the other hand, influences the brightness of the image. A faster focal ratio (smaller number) means a brighter image, which is important for viewing faint objects. So, if you’re interested in wide-field views of nebulae, look for a telescope with a shorter focal length and faster focal ratio. If you’re more interested in high-magnification views of planets, look for a telescope with a longer focal length and slower focal ratio.
Portability: Where Will You Be Observing?
Consider where you’ll be using your telescope most often. If you plan on traveling to dark sky locations, a smaller and more portable telescope is a better choice. Larger telescopes can be heavy and cumbersome to transport. On the other hand, if you’ll be observing from your backyard, portability may not be as important.
Imagine trying to carry a heavy suitcase through an airport. It’s not fun! Similarly, a large and heavy telescope can be a pain to transport. A smaller and more portable telescope is like a carry-on bag – easy to take with you wherever you go. If you live in an area with light pollution, it might be worth traveling to a darker location to get the best views. In that case, portability is key. But if you have a dark sky location right in your backyard, you can afford to go for a larger, more powerful telescope.
Budget: How Much Are You Willing to Invest?
Telescopes range in price from a few hundred dollars to several thousand dollars. It’s important to set a budget before you start shopping and stick to it. While it’s tempting to buy the most expensive telescope you can afford, it’s often better to start with a more affordable model and upgrade later as your skills and interests develop. Also, don’t forget to factor in the cost of accessories, such as eyepieces, filters, and a good star chart.
Think of it like buying a car. You could go for the most luxurious model with all the bells and whistles, but it might not be the best choice for your needs and budget. A more affordable car might be just as reliable and get you where you need to go. The same is true with telescopes. A less expensive telescope can still provide amazing views of the night sky, especially for beginners. It’s better to start with a telescope that you’ll actually use than to buy an expensive one that sits in a closet. The best orion telescopes offer different price points and quality.
FAQs
What’s the difference between a reflector and a refractor telescope, and which is better for an Orion telescope?
Okay, so you’re diving into the telescope world, awesome! The main difference boils down to how they gather light. Reflector telescopes use mirrors to bounce light and focus it, while refractors use lenses. Think of it like a funhouse mirror versus eyeglasses.
For Orion telescopes, both are great choices, but reflectors tend to offer more “bang for your buck,” especially for larger apertures (meaning how much light they can gather). This generally makes them better for viewing faint deep-sky objects like nebulae and galaxies. However, refractors are often more compact and require less maintenance, making them a good choice if you prioritize portability and ease of use. It really comes down to your personal observing goals and preferences!
I’m a complete beginner. Which Orion telescope would be easiest to learn with?
Welcome to the fascinating world of astronomy! It’s totally understandable to feel a little overwhelmed at first, but don’t worry, everyone starts somewhere. For beginners, an Orion telescope that’s easy to set up and use is key to a positive experience.
Look for a Dobsonian reflector, like the Orion SkyQuest XT Classic Dobsonian series. These telescopes have a simple, intuitive design. Just point and view! The larger aperture will give you great views of the moon, planets, and brighter deep-sky objects without a complicated setup. Avoid anything too advanced at first; you can always upgrade later as you gain experience and confidence.
What does “aperture” mean, and why is it important?
Aperture is simply the diameter of the telescope’s main light-gathering element – either the lens in a refractor or the mirror in a reflector. It’s measured in inches or millimeters, and it’s arguably the most important factor when choosing a telescope!
Think of aperture like the pupil of your eye. The bigger it is, the more light it can collect. More light means brighter, sharper images, and the ability to see fainter objects that would otherwise be invisible. Larger aperture telescopes will reveal finer details on planets and show you those faint galaxies that you only dreamed of seeing.
How much magnification do I need on my Orion telescope?
That’s a great question because it’s a common misconception that higher magnification is always better. Actually, too much magnification can lead to blurry, dim images. The usable magnification depends on the telescope’s aperture and atmospheric conditions.
A good rule of thumb is that the maximum usable magnification is about 50x per inch of aperture. So, a 6-inch telescope could theoretically handle around 300x magnification, but you’ll rarely use that much. Start with low magnification eyepieces to find your target, then gradually increase magnification to see more detail. Experimentation is key!
I live in a city with a lot of light pollution. Can I still see anything with an Orion telescope?
Absolutely! Light pollution is definitely a challenge, but it doesn’t mean you can’t enjoy astronomy. While you might not see the faintest galaxies from your backyard, there’s still plenty to observe.
Consider using light pollution filters, which block out specific wavelengths of light emitted by streetlights and other artificial sources. Also, try to observe from a darker location, even if it’s just a short drive outside the city. The Moon and planets are relatively bright and can be observed even in light-polluted skies. You can also use your telescope to observe brighter objects like double stars and star clusters.
How often does an Orion telescope need maintenance?
The amount of maintenance required depends on the type of Orion telescope you have. Refractors generally require very little maintenance; you might need to occasionally clean the lens with a special lens cleaning solution.
Reflectors may require occasional collimation, which is the process of aligning the mirrors. Don’t worry, it sounds complicated, but it’s relatively easy to do with a simple collimation tool and there are tons of helpful videos online. Other than that, just keep your telescope covered when not in use to protect it from dust and moisture.
What accessories should I buy for my Orion telescope?
Investing in a few accessories can significantly enhance your observing experience. First, a good set of eyepieces with different magnifications is essential to give you viewing flexibility.
Next, a Barlow lens can double or triple the magnification of your eyepieces. A good star chart or astronomy app will help you locate objects in the night sky. Finally, a red flashlight helps you read those charts without ruining your night vision! Consider these additions as you further immerse yourself in the world of astronomy.
Final Words
So, there you have it! We’ve explored some fantastic contenders for the title of the best Orion telescopes, each promising a unique journey through the cosmos. Remember, the “best” is subjective and depends entirely on your individual needs and stargazing ambitions. Don’t get bogged down in analysis paralysis! Weigh your priorities, consider your budget, and trust your gut. The universe is vast and waiting to be explored, and the perfect Orion telescope is just the first step on that incredible adventure.
The night sky beckons! With the knowledge you’ve gained from this guide, you’re well-equipped to make an informed decision and choose the best Orion telescope for you. Don’t delay! Order that telescope, find a dark spot, and prepare to be amazed by the wonders that await you. Happy stargazing, and may your nights be filled with celestial inspiration!