Remember that one time you were getting ready for a special night out? You had the perfect outfit, the shoes were killer, but something was missing. You wanted that extra touch of sparkle, that subtle shimmer that screams “effortlessly glamorous.” That’s when you remembered the nail art potential! You dove into your stash, searching for something truly magical, something that would catch the light just so. Maybe you even considered the best opal nail art rhinestones, knowing that their iridescent beauty could be the answer.
But where do you even begin with so many choices? Size, shape, quality – it can all feel overwhelming. Fear not, fellow nail art enthusiasts! We’ve been there, done that, and spent countless hours researching and experimenting to bring you the ultimate guide to finding the perfect opal rhinestones for your next dazzling manicure. Get ready to discover our top picks, helpful tips, and everything you need to know to create stunning, head-turning nail art that’s as unique as you are.
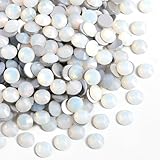
Before moving into the review of the best opal nail art rhinestones, let’s check out some of the relevant products from Amazon:


Last update on 2026-02-04 / #ad / Affiliate links / Images from Amazon Product Advertising API
Unlocking the Magic of Opal Nail Art Rhinestones
Ever caught a glimpse of your nails and wished they had just a little bit more… enchantment? I get it! We all crave that touch of sparkle and uniqueness. And that’s where opal nail art rhinestones come in. They’re like tiny, iridescent jewels that transform your manicure from “meh” to mesmerizing. They catch the light like no other, shifting between shades of pink, green, blue, and gold depending on the angle – it’s pure magic on your fingertips!
But, with so many options out there, diving into the world of nail art embellishments can feel overwhelming. Where do you even begin to find the perfect sparkle? Are all rhinestones created equal? Absolutely not! Just like diamonds, rhinestones have varying levels of quality, clarity, and brilliance. Did you know the global nail care market is projected to reach $25.8 billion by 2027? That means a whole lot of people are searching for ways to elevate their nail game!
That’s why I’ve put together this guide to help you navigate the dazzling universe of opal nail art rhinestones. We’ll explore what makes these gems so special and how to choose the best ones for your budget and style. Think of it as your friendly roadmap to rhinestone mastery!
So, whether you’re a seasoned nail art pro or just starting your DIY journey, get ready to unlock the secrets to achieving stunning, head-turning nail designs. We’ll cover everything from size and shape to adhesive and application, ensuring you discover the absolute best opal nail art rhinestones to create the manicure of your dreams. Let’s dive in and get ready to sparkle!
Best Opal Nail Art Rhinestones – Reviews
Swarovski Crystal Opal Nail Rhinestones
These Swarovski crystals are the gold standard for a reason. The multifaceted cut catches the light beautifully, creating a mesmerizing shimmer that will elevate any manicure. The opal effect isn’t just a flat color; it has depth and complexity, with subtle shifts in hue depending on the angle.
The price tag might seem a little high, but the quality is undeniable. They’re incredibly durable and resistant to chipping, so you can trust that they will stay looking flawless for the entire life of your manicure. If you’re looking to add a touch of luxury and brilliance to your nails, these are well worth the investment.
Moyra Opal Nail Art Rhinestones
Looking for a fantastic opal effect without breaking the bank? Moyra’s rhinestones deliver a captivating iridescent shine that rivals more expensive brands. The color shift is mesmerizing, flashing hints of pink, green, and blue. They’re relatively easy to work with, adhering well to nail glue or builder gel.
While they might not have the same level of sparkle as Swarovski, they still pack a punch of shimmer. A great option for adding a pop of color and dimension, Moyra stones give a sophisticated touch. For those on a budget but not wanting to compromise on style, these are a definite winner.
Born Pretty Opal Nail Art Gems
Born Pretty’s opal gems offer a great selection of shapes and sizes, giving you the freedom to create intricate and unique designs. The opal effect is vibrant and eye-catching, offering a good amount of shimmer and color play. Plus, the variety of shapes lends itself to creative freedom.
These gems are an excellent value for money, making them perfect for experimenting with different nail art looks. They may not be quite as durable as higher-end options, so sealing them well with a top coat is key. Still, they’re a fantastic choice for adding a touch of sparkle and personality to your nails without overspending.
Sunshine Supplies Opal Nail Crystals
These gems from Sunshine Supplies bring a subtle and delicate opal shimmer to your nails. Their refined sparkle adds a touch of elegance without being too flashy. They’re particularly good for adding a hint of color to nude or pastel manicures.
Sunshine Supplies’ crystals are user-friendly. The flat-back design makes them easy to apply and they sit comfortably on the nail. They’re a great pick for someone who wants a more understated yet sophisticated opal effect. Perfect for everyday wear!
Beadsland Opal Nail Rhinestones
These are a solid pick for adding a playful touch to your nails. The opal effect has a brighter, almost holographic quality that makes them stand out. They are great for accent nails and more extravagant nail art designs.
Beadsland offers a decent amount of rhinestones for the price, and they have a good adhesive quality. However, they’re not as durable as some of the more premium options. For someone looking for a flashy and fun effect without the big investment, these are a great deal.
Why Invest in Opal Nail Art Rhinestones?
Ever feel like your nails are missing that certain something? You’ve got the perfect color, the ideal shape, but they still lack that captivating sparkle? That’s where opal nail art rhinestones come in. Think of them as the icing on the cake, the earrings to your little black dress, the sprinkles on your already delicious latte. They take your manicure from “nice” to “wow!” instantly, adding a touch of elegance and intrigue that draws the eye.
But why opals specifically? Unlike clear rhinestones that offer a straightforward shimmer, opals possess an ethereal, iridescent quality. They reflect light in a myriad of colors, creating a mesmerizing effect that mimics the natural beauty of genuine opals. Imagine attending a summer wedding, and your nails catch the sunlight with a subtle yet captivating rainbow of hues. Or perhaps you’re on a date night, and your opalescent nails sparkle under the candlelight, adding a touch of mystery and romance to your look. The versatility of opal rhinestones makes them suitable for any occasion, elevating your style effortlessly.
Now, not all opal rhinestones are created equal. That’s why it’s important to invest in the best opal nail art rhinestones. Cheaper versions often lack the clarity and multi-faceted shimmer that makes opals so special. Imagine being disappointed when the rhinestones appear dull and lifeless under regular light, missing that magical opal effect you were hoping for. Investing in high-quality rhinestones ensures they retain their brilliance and won’t easily chip or fade, giving you long-lasting sparkle and value.
Ultimately, buying opal nail art rhinestones is about more than just embellishing your nails; it’s about expressing your personal style and adding a touch of luxury to your everyday life. Whether you’re a nail art enthusiast or simply looking to elevate your manicure game, the best opal nail art rhinestones are a small investment that yields a big return in confidence and glamour. So go ahead, treat yourself, and let your nails shine!
Opal Nail Art Rhinestone Application Techniques
Ever struggled with getting those tiny rhinestones to stay put on your nails? You’re not alone! The application technique is just as important as the quality of the rhinestones themselves. Using the right tools and methods can make all the difference between a dazzling, long-lasting manicure and a frustrating, short-lived one.
One common mistake is using too much or too little nail glue. Too much can cause the glue to seep out and create a messy, cloudy appearance around the rhinestone, while too little will lead to the rhinestone popping off within hours. Experiment with a small amount of glue, using a dotting tool or a fine-tipped applicator for precision. Think of it like frosting a cupcake – a thin, even layer is key!
Placement is also crucial. Consider the overall design and the curvature of your nail. If you’re applying a larger opal rhinestone, you might need to use a thicker layer of gel or acrylic to create a small platform, ensuring it sits flush and doesn’t snag on clothing or hair. Imagine trying to build a tower on uneven ground; you need a stable base for everything to stay in place.
Finally, remember to seal everything in with a top coat. This will not only protect your design but also prevent the edges of the rhinestones from lifting. Think of the top coat as a protective shield for your beautiful creation, locking everything in and adding that final touch of shine. You want to make sure your beautiful nail art remains perfect for as long as possible.
Maintaining Your Opal Nail Art Rhinestones
So, you’ve finally achieved that stunning opal rhinestone nail art look! Now, how do you keep it looking its best for as long as possible? Maintenance is key. Just like any piece of jewelry, your nail art requires a little TLC to maintain its sparkle and integrity. Neglecting proper care can lead to dullness, loosening, and even loss of rhinestones.
Everyday activities can take a toll on your manicure. Think about all the times your hands come into contact with water, chemicals, and abrasive surfaces. Wearing gloves when washing dishes or cleaning can protect your rhinestones from harsh detergents and excessive moisture, which can weaken the adhesive. It’s like protecting your precious gemstone rings from scratches.
Be mindful of potential hazards. Avoid activities that might cause excessive friction or impact, such as gardening without gloves or constantly picking at your nails. A single careless movement can dislodge a rhinestone and ruin your entire design. Treat your opal rhinestone nails with care, as they are delicate works of art.
If you notice any rhinestones starting to loosen, don’t wait until they fall off completely. Apply a tiny dab of nail glue to re-secure them. A quick touch-up can prevent further damage and extend the life of your manicure. Think of it like patching a small hole in your tire before it becomes a flat. Regular maintenance will keep your nail art looking flawless for longer.
Trends in Opal Nail Art Rhinestone Designs
Opal nail art rhinestones are a timeless classic, but their application is constantly evolving with new trends. From minimalist accents to elaborate, statement-making designs, there’s an opal rhinestone look for every personality and occasion. Staying up-to-date on these trends can help you create fresh, innovative manicures that truly stand out.
One popular trend is the “scattered opal” effect. Instead of creating a symmetrical pattern, rhinestones are randomly placed across the nail, creating a whimsical and ethereal look. This technique works especially well with iridescent opal rhinestones, which catch the light beautifully and add a touch of magic to any manicure. Imagine a starry night sky captured on your nails.
Another growing trend is combining opal rhinestones with other nail art elements, such as glitter, chrome powder, or stamping designs. This allows for endless creative possibilities and adds depth and dimension to your manicure. For example, you could pair opal rhinestones with a gradient of pastel colors for a soft, dreamy effect. It’s like creating a unique masterpiece with a mix of different artistic mediums.
The “negative space” trend is also making waves in the opal rhinestone world. This involves leaving sections of the nail bare, creating a minimalist yet eye-catching design. For example, you could apply a row of opal rhinestones along the cuticle line on a bare nail for a subtle and sophisticated look. This trend is perfect for those who prefer a more understated approach to nail art.
Troubleshooting Common Opal Nail Art Rhinestone Issues
Even with the best products and techniques, you might encounter some challenges when working with opal nail art rhinestones. From cloudy glue to dull rhinestones, understanding how to troubleshoot these common issues can save you time, money, and frustration. Knowing how to fix these problems will help you achieve salon-worthy results at home.
One frequent problem is the glue clouding or yellowing over time. This can be caused by using low-quality glue or exposing your manicure to harsh chemicals. To prevent this, always use a high-quality nail glue specifically designed for rhinestones. Also, avoid using acetone-based nail polish removers directly on the rhinestones, as they can damage the finish. It’s like using the wrong cleaning products on your delicate furniture.
Another issue is rhinestones losing their sparkle. This can happen due to dirt, oil, or product buildup. To restore their shine, gently clean your rhinestones with a soft brush and a mild soap and water solution. Avoid using harsh chemicals or abrasive cleaners, as they can scratch the surface. Imagine carefully cleaning your favorite jewelry to bring back its luster.
Sometimes, rhinestones may start to lift or fall off prematurely. This can be caused by improper application, weak adhesive, or simply wear and tear. To prevent this, ensure your nails are properly prepped before applying rhinestones. This includes cleaning, buffing, and dehydrating the nail surface. This allows the glue to adhere properly, just as preparing a surface before painting is important for the new coat of paint to hold. If a rhinestone does come loose, re-apply it immediately to prevent further damage.
Finding Your Sparkle: A Buying Guide to the Best Opal Nail Art Rhinestones
Hey there, nail art enthusiast! Ready to take your manicure game to the next level? Opal nail art rhinestones are the secret weapon to achieving that mesmerizing, ethereal look that catches everyone’s eye. But with so many options out there, it’s easy to feel overwhelmed. Don’t worry, I’m here to guide you through the shimmering world of opal nail art, ensuring you choose the perfect gems to make your nails truly sparkle. Let’s dive in and uncover the secrets to selecting the best opal nail art rhinestones!
Facet Quality: Shine Bright Like a Diamond (Well, an Opal!)
Think of the facets as the tiny mirrors on your rhinestones. The more precisely cut and polished they are, the more light they’ll reflect, resulting in that dazzling sparkle we all crave. Imagine wearing a dress covered in dull, flat sequins – it just wouldn’t have the same impact as one adorned with meticulously cut, shimmering crystals. When selecting opal rhinestones, take a close look (or even better, read reviews that mention it!) to see if the facets are crisp and well-defined. Rhinestones with poorly cut facets will appear cloudy and lack that vibrant, eye-catching brilliance.
I remember buying a set of rhinestones once that looked amazing in the picture, but when they arrived, they were surprisingly dull. Turns out, the facets were uneven and poorly polished. It was such a disappointment! Learn from my mistake and prioritize facet quality. Your nails (and your sanity) will thank you! Investing a little more upfront in higher-quality rhinestones will give you that professional, salon-worthy finish that truly elevates your nail art.
Opal Effect: Capturing the Rainbow Within
The magic of opal rhinestones lies in their iridescent play of color – that mesmerizing rainbow effect. However, not all “opal” rhinestones are created equal. Some might have a subtle shimmer, while others boast a vibrant, almost holographic display of hues. Consider the intensity of the opal effect you desire. Are you aiming for a delicate, understated elegance, or a bold, statement-making sparkle?
I’ve found that some of the best opal nail art rhinestones actually layer different materials to achieve that effect. Look for descriptions that mention things like “iridescent film” or “AB coating” (which stands for Aurora Borealis, mimicking the Northern Lights). These coatings enhance the color play and give the rhinestones that truly otherworldly appearance. Don’t be fooled by purely pearlescent rhinestones – while pretty, they lack the depth and complexity that defines the genuine opal effect.
Size and Shape: Tailoring the Sparkle to Your Design
Rhinestones come in a dazzling array of sizes and shapes, from tiny micro-beads to larger, statement-making gems. The size and shape you choose will depend heavily on the specific design you’re envisioning. For intricate details and delicate accents, smaller rhinestones like SS3 or SS5 are ideal. If you’re looking to create a focal point or add a bold touch, larger sizes like SS10 or SS12 might be more suitable.
Choosing the right shape can also dramatically impact the overall look. Round rhinestones are a classic and versatile choice, while square or triangular shapes can add a modern, geometric flair. And don’t be afraid to experiment with different shapes! Consider using teardrop or heart-shaped rhinestones for a romantic, whimsical touch. Think about the overall aesthetic you’re aiming for and select rhinestones that complement your design. Having a variety of sizes and shapes on hand will unlock endless creative possibilities.
Material: Durability Meets Dazzle
The material of your rhinestones affects their durability and overall appearance. While plastic rhinestones are a budget-friendly option, they tend to be less sparkly and more prone to scratching and fading. Glass rhinestones, on the other hand, offer superior brilliance and durability. They are typically more expensive, but the investment is worth it for a long-lasting and eye-catching sparkle.
I personally prefer glass rhinestones for their superior shine and longevity. They just look more luxurious and hold up better to daily wear and tear. Think of it like comparing costume jewelry to fine jewelry. While both might look pretty at first glance, the quality and durability of the materials make a significant difference in the long run. Look for rhinestones that are made from crystal or high-quality glass for the best results.
Adhesive: Ensuring Your Sparkle Stays Put
A crucial (and often overlooked!) aspect of rhinestone application is the adhesive. You want to make sure your sparkly gems stay securely in place without damaging your natural nails or polish. There are various types of adhesives available, ranging from nail glue to rhinestone waxes and gels.
I’ve learned that the best adhesive depends on the size and weight of your rhinestones and the type of nail art you’re creating. For small rhinestones, a good quality nail glue or rhinestone wax can work wonders. For larger, heavier rhinestones, a stronger gel adhesive might be necessary to prevent them from popping off. Always read the product descriptions and reviews to ensure the adhesive is compatible with your chosen rhinestones and nail polish. Proper application is key to preventing embarrassing rhinestone casualties!
Quantity and Packaging: Getting the Most Sparkle for Your Buck
Before you hit that “add to cart” button, take a moment to consider the quantity and packaging of the rhinestones you’re buying. Are you purchasing a small assortment for a specific project, or a bulk pack to fuel your nail art obsession? Check the product description carefully to see the exact number of rhinestones included in each pack.
Pay attention to the packaging as well. Are the rhinestones neatly organized in separate compartments, or are they all jumbled together in a bag? Well-organized packaging makes it much easier to find the right size and shape when you’re in the middle of creating your masterpiece. I once bought a huge bag of rhinestones only to find they were all tangled together, making it a nightmare to sort them out. Lesson learned! Consider the number of projects you have in mind and look for the best opal nail art rhinestones in quantities and packaging that suits your needs.
Brand Reputation and Reviews: Learning from Others’ Sparkly Adventures
In the vast online marketplace, brand reputation and customer reviews can be invaluable resources. Before committing to a purchase, take some time to research the brand and read reviews from other nail art enthusiasts. What are their experiences with the quality, durability, and overall value of the rhinestones?
Pay attention to comments about the opal effect, facet quality, and adhesive performance. Are customers generally satisfied with their purchase, or are there recurring complaints about dullness, poor adhesion, or inaccurate sizing? A little research can save you from disappointment and ensure you’re investing in a product that lives up to its promises. Think of it as tapping into the collective wisdom of the nail art community!
FAQs
What makes opal rhinestones so special for nail art?
Opal rhinestones are a fantastic choice for nail art because they offer a mesmerizing, iridescent shimmer that mimics the look of real opals. They aren’t just one solid color; instead, they play with light, displaying a rainbow of hues that shift and change depending on the angle. This quality makes them incredibly eye-catching and adds a touch of luxury and sophistication to any manicure.
Plus, opal rhinestones are available in a variety of shapes, sizes, and cuts, allowing you to create a wide range of designs. Whether you’re going for a subtle sparkle or a bold, dazzling statement, opal rhinestones can help you achieve your desired look. They’re also relatively easy to apply, making them a great option for both beginners and experienced nail artists alike.
Are opal nail art rhinestones difficult to apply?
Not at all! Applying opal nail art rhinestones is actually quite straightforward and something you can easily master with a little practice. The most common method involves using a dotting tool or wax pencil to pick up the rhinestone and carefully place it onto a layer of tacky nail glue or gel adhesive that you’ve already applied to your nail.
The key is to use a small amount of adhesive so that it doesn’t overflow and create a messy look. Once the rhinestone is in place, gently press it down to ensure it’s securely attached. For gel applications, you’ll need to cure it under a UV/LED lamp according to the product instructions. With a steady hand and the right tools, you’ll be dazzling with opal rhinestones in no time!
How do I choose the right size opal rhinestone for my nail art?
Choosing the right size opal rhinestone really depends on the design you’re going for and the size of your nails! Smaller rhinestones (like 2mm-3mm) are great for creating delicate accents, filling in small spaces, or adding subtle shimmer. They’re perfect for intricate designs or if you want a more understated look.
Larger rhinestones (like 4mm-6mm and up) are ideal for making a bold statement. You can use them as focal points on your nail or create eye-catching patterns. Consider the overall design you have in mind and the size of your nail bed when making your choice. Don’t be afraid to experiment with different sizes to see what you like best!
Can I use opal rhinestones with regular nail polish or do I need gel?
Good news – you can definitely use opal rhinestones with both regular nail polish and gel polish! The main difference lies in the adhesive you’ll use. With regular nail polish, you’ll want to use a nail glue specifically designed for rhinestones. Apply the polish, let it dry a bit until it’s slightly tacky, then apply a tiny dot of glue where you want the rhinestone and place it carefully.
For gel polish, you’ll typically use a gel adhesive or a clear builder gel. After applying your gel color, apply a small amount of the gel adhesive, place your rhinestone, and then cure it under a UV/LED lamp according to the gel’s instructions. Either way, ensure the rhinestone is firmly secured and then seal it with a top coat (or multiple!) to protect your design and prevent the rhinestone from snagging.
How do I properly clean and care for my opal rhinestone nail art?
Taking care of your opal rhinestone nail art will help it last longer and keep it looking its best. Avoid harsh chemicals and prolonged exposure to water, as these can dull the rhinestones or weaken the adhesive. When washing your hands, try to be gentle around the rhinestone area.
When you’re cleaning around the house, consider wearing gloves to protect your manicure from cleaning products. If you notice any dirt or residue on your rhinestones, you can gently clean them with a soft brush or a cotton swab dipped in a mild soap and water solution. Be sure to dry them thoroughly afterward to prevent any damage to the adhesive. A little care goes a long way!
What are some popular opal rhinestone nail art design ideas?
Oh, the possibilities are endless! One popular idea is to create a “galaxy” nail using a dark base color and scattering opal rhinestones of varying sizes across the nail to mimic stars. Another idea is to use opal rhinestones as accents along the cuticle line for a touch of elegance.
You can also create a “dripping” effect by placing larger opal rhinestones at the tip of the nail and gradually decreasing the size as you move down towards the base. For a minimalist look, try placing a single opal rhinestone on each nail for a subtle yet sophisticated sparkle. Don’t be afraid to experiment and let your creativity shine!
Where is the best place to buy opal rhinestones for nail art?
You’ve got several great options for finding opal rhinestones for nail art! Online marketplaces like Amazon and Etsy are treasure troves of nail art supplies, offering a wide variety of sizes, shapes, and colors from different vendors. Just be sure to check reviews and ratings to ensure you’re buying from a reputable seller.
Alternatively, you can check out specialty nail supply stores, either online or in person. These stores often carry higher-quality rhinestones and can offer expert advice on selecting the right products for your needs. Social media platforms like Instagram and TikTok can also lead you to smaller, independent shops that offer unique and trendy opal rhinestones. Happy shopping!
The Bottom Line
So there you have it! You’re now armed with the knowledge to find the best opal nail art rhinestones for your next dazzling manicure. We’ve explored the options, weighed the pros and cons, and hopefully sparked some inspiration for your own creative nail art journey. Don’t be afraid to experiment with different shapes, sizes, and placements – let your imagination run wild!
Now it’s your turn to shine! Take the plunge, order a set (or two!), and prepare to be amazed at the instant glam these little gems bring. Remember, nail art is all about self-expression and having fun. So go ahead, create something beautiful, and rock those stunning opal rhinestone nails with confidence. You deserve it!