Remember that time you were getting ready for that summer music festival, desperately trying to find the perfect way to stand out from the crowd? You envisioned vibrant, electric colors that would pop under the festival lights and capture the carefree energy of the weekend. You experimented with neon eyeshadow, tie-dye shirts, but something was still missing! Then it hit you – your nails! The only problem was finding glitters that actually delivered that punchy, luminous effect you were craving. You didn’t want something dull and underwhelming. You needed the real deal, the kind of sparkle that screams “party!”
Well, fret no more! If you’ve ever been on the hunt for that ultimate dazzling effect for your nails, you’re in the right place. We’ve done the digging and the testing to bring you the ultimate guide to the best neon nail art glitters. Forget endless scrolling and hoping for the best; we’re diving deep into reviews, highlighting top picks, and giving you the inside scoop on what to look for to achieve the most eye-catching, show-stopping manicure imaginable. Get ready to unleash your inner artist and make your nails the life of the party!
Before moving into the review of the best neon nail art glitters, let’s check out some of the relevant products from Amazon:


Last update on 2025-12-01 / #ad / Affiliate links / Images from Amazon Product Advertising API
Ready to Glow Up Your Mani? A Glittery Guide to Neon Nails!
Okay, let’s talk nails! We all love a good manicure, and sometimes you just want something that pops, right? Something that screams fun, vibrancy, and maybe a little bit of “look at me!”. That’s where neon nail art comes in, and trust me, once you add glitter to the mix, it’s game over. Prepare for compliments galore. But with SO many options out there, where do you even start? Don’t worry, I’ve got you covered with all you need to find the best neon nail art glitters.
Choosing the right glitter can feel overwhelming, I know. You’ve got chunky glitters, micro glitters, holographic glitters… the list goes on! And then you have to consider the base color you’re going to use, the application method, and whether you want a subtle shimmer or an all-out dazzling effect. According to recent trend reports, neon nail designs have seen a 35% increase in popularity this year alone! So, you’re definitely not alone in wanting to embrace this electrifying style.
Think of this as your friendly guide to navigating the world of neon glitter. We’ll be diving into the different types of glitter available, exploring which shades work best with various skin tones, and even sharing some insider tips and tricks for flawless application. I’ll also be sharing my top picks for the best neon nail art glitters, based on quality, color payoff, and overall sparkle factor.
So, buckle up, grab your favorite polish, and let’s get ready to create some seriously eye-catching nail art! Get ready to explore which neon glitters will have your nails shining brighter than a summer sunset. We’re about to uncover the secrets to achieving the perfect neon glitter manicure that will leave everyone asking, “Where did you get your nails done?”.
Best Neon Nail Art Glitters – Reviews
Neon Glitz Glitter Mix
This glitter mix is a total game-changer for anyone looking to add a pop of electric color to their nails. The blend of different shapes and sizes creates a dazzling, multi-dimensional effect that catches the light beautifully. Whether you’re going for a subtle shimmer or a full-on glitter bomb, this mix delivers serious impact.
Application is surprisingly easy. Just dip a brush into the glitter and gently pat it onto a layer of wet nail polish or gel. The colors are incredibly vibrant and true to what you see in the container. The long-lasting shimmer of this nail glitter will not disappoint!
Electric Glow Fine Glitter Powder
For those who prefer a more refined, almost ethereal glow, this fine glitter powder is a must-have. It’s so finely milled that it blends seamlessly into your nail polish, creating a smooth, even finish. The neon pigments are incredibly saturated, giving your nails an otherworldly radiance that’s sure to turn heads.
This product is fantastic for creating gradient effects, ombre looks, or simply adding a subtle shimmer to your manicure. Be sure to use a good base coat and top coat to ensure longevity and prevent chipping. This glitter can be used with both acrylic and gel nails.
Iridescent Neon Chunky Glitter
If you’re all about making a statement, this chunky glitter is your new best friend. The iridescent finish adds a mesmerizing depth and dimension to your nails, reflecting light in a rainbow of neon hues. It’s perfect for creating bold, eye-catching designs that scream confidence.
Due to its size, application requires a bit more finesse. Try using a toothpick or dotting tool to carefully place the glitter onto your nails. Encapsulating the glitter in a layer of clear gel or acrylic will prevent it from snagging and ensure a smooth, long-lasting finish.
UV Reactive Neon Glitter Flakes
Get ready to glow under the blacklights with these UV reactive glitter flakes. These are like tiny pieces of confetti for your nails. They come alive under UV light, transforming your manicure into a mesmerizing display of vibrant color. Perfect for parties, raves, or any occasion where you want to shine.
These flakes are lightweight and easy to work with. Simply apply them to a layer of wet nail polish or gel and seal with a top coat. For an even more intense glow, consider using a UV-reactive base coat. Get ready to party!
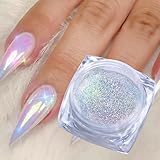
Neon Holographic Glitter Dust
This glitter dust is like magic in a jar. The holographic particles reflect light in a dazzling array of colors, creating a mesmerizing effect that’s simply irresistible. The neon pigments add an extra layer of vibrancy, making your nails pop with electric energy.
This glitter dust is incredibly versatile. You can use it to create a subtle shimmer, a bold glitter gradient, or a full-on holographic explosion. Just be sure to use a lint-free applicator and apply a generous layer of top coat to smooth out any imperfections. The sparkle will leave you in awe.
Why You Need Neon Nail Art Glitters in Your Life!
Ever feel like your nails are missing that certain something? Like they’re just…blah? We all know that feeling! You’re dressed to impress, hair perfectly coiffed, but your nails are lagging behind. That’s where neon nail art glitters swoop in to save the day! Forget subtle and ordinary, these vibrant bursts of color will instantly elevate your entire look, adding a playful and attention-grabbing pop that reflects your personality.
Imagine this: you’re heading out for a fun night with friends. You’re wearing your favorite little black dress, but want to add a touch of edgy personality. A dash of neon pink or electric green glitter over your nails, catching the light with every gesture, will undoubtedly make a statement! Or picture a sunny summer day, chilling by the pool. Wouldn’t a vibrant coral or dazzling yellow glitter manicure perfectly complement the vibe? It’s like sunshine at your fingertips!
The best neon nail art glitters are incredibly versatile too. You can go full-on glitter bomb for a bold and daring look, create delicate glitter gradients for a subtle sparkle, or use them to add pops of color to accent nails. They work beautifully with gel polish, acrylics, or even regular nail polish. Plus, they’re surprisingly easy to apply! A simple brush and a little patience is all it takes to achieve a salon-worthy manicure at home.
Ultimately, investing in some fabulous neon nail art glitters is about expressing yourself and having fun with your look. They’re an affordable and easy way to inject personality and excitement into your style. So, ditch the mundane, embrace the vibrancy, and let your nails do the talking! You deserve to shine, and the best neon nail art glitters are the perfect way to do just that.
DIY Neon Nail Art Ideas: Get Creative!
Let’s be real, the best part about having a killer glitter collection is actually using it! Neon glitters are incredibly versatile, opening up a world of DIY possibilities. Think beyond just a single layer. How about creating a stunning neon ombre effect? Start with a base color that complements your chosen glitter, like a pastel or even white, then gradually build up the glitter towards the tip of your nail. It’s easier than it looks, and the result is totally Instagram-worthy.
Another fun idea is to use neon glitters for accent nails. A full set of neon might be a bit much for some situations, but a single accent nail (or two!) adds a pop of brightness without being overwhelming. Consider using a matte topcoat over your non-glitter nails to create a cool contrast in textures. This is a great way to subtly incorporate the neon trend into your everyday look.
Stencils are your best friend when it comes to creating precise glitter designs. You can find nail art stencils online or at most beauty supply stores in tons of different shapes – stars, hearts, geometric patterns, you name it! Simply apply the stencil to your nail, layer on the neon glitter, and then carefully remove the stencil. Voila! A perfect, professional-looking design in minutes.
Don’t forget about encapsulation! If you’re rocking acrylic or gel extensions, you can encapsulate the neon glitter for a long-lasting, durable finish. This involves embedding the glitter within the acrylic or gel layers, so it’s protected from chipping or fading. While it might require a bit more practice and skill, the results are definitely worth it – think of it as preserving your masterpiece for weeks!
Troubleshooting Common Neon Glitter Nail Issues
Okay, let’s face it, even the most experienced nail artists run into snags from time to time. One common issue with glitter nails is uneven application. You might end up with clumps of glitter in some spots and bare patches in others. To combat this, try using a fan brush to gently distribute the glitter evenly across your nail. Another helpful tip is to apply a thin layer of clear polish before adding the glitter – this creates a tacky base that helps the glitter adhere more uniformly.
Another problem people encounter is glitter fallout. No one wants to leave a trail of sparkling dust wherever they go! To minimize fallout, make sure you’re using a good quality topcoat specifically designed for glitter nails. These topcoats tend to be thicker and more durable, providing a strong seal that locks the glitter in place. You can also try applying multiple thin layers of topcoat, allowing each layer to dry completely before applying the next.
Sometimes, neon glitters can bleed or fade over time, especially if they’re exposed to sunlight or harsh chemicals. To prevent this, store your neon glitter polishes in a cool, dark place away from direct sunlight. When doing household chores or working with chemicals, wear gloves to protect your manicure. A UV-protective topcoat can also help shield the glitter from fading.
Lastly, removing glitter polish can be a real pain. Instead of endlessly scrubbing and damaging your nails, try the foil method. Soak a cotton ball in acetone-based nail polish remover, place it on your nail, and then wrap your fingertip in foil. Let it sit for about 10-15 minutes, and then gently scrape off the polish with a cuticle pusher. This method allows the acetone to really soak into the glitter, making it much easier to remove.
Choosing the Right Neon Shade for Your Skin Tone
Let’s talk about finding that perfect neon shade to complement your complexion! Just like clothing and makeup, certain neon colors will look more flattering on some skin tones than others. It’s all about understanding undertones. If you have warm undertones (think golden or olive), you’ll likely look amazing in neon oranges, yellows, and greens. These colors will enhance your natural warmth and give you a radiant glow.
Cool undertones (pink or blue) tend to pair beautifully with neon pinks, purples, and blues. These shades will brighten your complexion and create a striking contrast. If you’re unsure about your undertones, a simple trick is to look at the veins on your wrist. Blue veins generally indicate cool undertones, while green veins suggest warm undertones.
Neutral skin tones are the lucky ones – you can pretty much rock any neon color! However, consider the occasion. A vibrant neon yellow might be perfect for a summer music festival, but a more subdued neon coral could be a better choice for a work event. Experiment and see what makes you feel confident and comfortable.
Don’t be afraid to mix and match! You don’t have to stick to just one neon color. Create a fun and unique manicure by combining different shades that complement each other. For example, neon pink and purple, or neon orange and yellow. Just make sure to balance the colors and avoid overwhelming your nails with too many conflicting shades.
Beyond Nails: Creative Uses for Neon Glitter
Neon glitter isn’t just for manicures! Think outside the box and explore its potential in other creative endeavors. One super fun idea is to use neon glitter to customize your phone case. Simply apply a layer of clear adhesive or resin to your case, sprinkle on the glitter, and then seal it with another layer of adhesive. This is a great way to add a personal touch to your phone and make it stand out from the crowd.
You can also use neon glitter to embellish clothing and accessories. Imagine adding a pop of sparkle to a denim jacket, a pair of sneakers, or even a plain tote bag. Use fabric glue to adhere the glitter to the fabric, and then seal it with a fabric sealant to prevent it from flaking off. This is a fantastic way to upcycle old items and give them a fresh, vibrant look.
Get crafty with your makeup! Neon glitter can be used to create stunning eye looks, adding a touch of drama and sparkle. Just be sure to use a glitter primer or adhesive to keep the glitter in place and prevent it from getting into your eyes. You can also use neon glitter to highlight your cheekbones or collarbones for a festival-ready glow.
Don’t forget about home décor! Neon glitter can be used to add a playful touch to your living space. You can use it to decorate picture frames, vases, or even create a glittery accent wall. Simply apply adhesive to the surface you want to decorate, sprinkle on the glitter, and then seal it with a clear sealant. The possibilities are endless! Just remember to use caution when working with glitter and avoid getting it into your eyes or inhaling it.
Your Guide to Finding the Best Neon Nail Art Glitters
Hey there, nail art enthusiast! Ready to take your manicure game to the next level? Neon nail art glitters are the perfect way to add a vibrant pop of color and a touch of sparkle to your nails. But with so many options out there, finding the best neon nail art glitters can feel a little overwhelming. Don’t worry, I’m here to help! This guide will walk you through everything you need to consider so you can create dazzling, eye-catching nail designs that will turn heads. Let’s dive in!
Neon Pigmentation is Key, Babe!
When it comes to neon, we want serious vibrancy, right? Dull or washed-out neon glitter is a major bummer. Look for glitters that are highly pigmented and truly POP under different lighting conditions. Check out photos and videos of the glitter in action, especially under natural sunlight and UV light. Reading reviews can be super helpful here too! People will definitely share if the color payoff wasn’t as advertised. You deserve glitter that screams neon, not whispers it.
Think of it like this: you wouldn’t want to order a neon pink dress and have it arrive looking pastel. The same applies to your nail glitter! Intense pigmentation will make your designs really stand out. If you’re applying the glitter over a base color, consider a white or light-colored base to really amplify the neon effect. Test a small amount of the glitter on a swatch before committing to a full manicure to ensure the color is as vibrant as you expect.
Glitter Size and Shape: Finding Your Perfect Blend
Glitter comes in all sorts of sizes and shapes, from chunky hexagons to ultra-fine dust. The best neon nail art glitters for you will depend on the look you’re going for. Larger glitters are great for creating bold, textured designs, while finer glitters can be used to create a smoother, more subtle sparkle. Mixing different sizes and shapes can also add dimension and interest to your manicures.
Consider how you plan to apply the glitter. Chunky glitters can be a bit trickier to work with and may require careful placement, while fine glitters are easier to blend and can be applied with a brush or sponge. Experiment with different sizes and shapes to see what you like best. Don’t be afraid to mix and match to create your own unique glitter blends! There are so many possibilities!
Material Matters: Opting for Quality and Safety
Not all glitter is created equal! The material used to make the glitter can affect its appearance, durability, and even its safety. Look for glitters that are made from high-quality materials like PET (polyethylene terephthalate) or glass. These materials are generally more resistant to fading and dissolving in nail polish or gel. Avoid glitters that are made from metal, as they can tarnish or corrode over time.
Pay attention to the labeling. While nail glitter doesn’t necessarily need to be “cosmetic grade” (that term is legally defined for products used on the skin around the eyes), you should still ensure it’s non-toxic and safe for use on nails. Avoid purchasing glitter from unknown sources that don’t provide information about the materials used. Your nail health is important!
Compatibility is Key: Will It Play Nice with Your Polish?
Before you stock up on a ton of glitter, make sure it’s compatible with your favorite nail polishes and gels. Some glitters can bleed color or dissolve in certain solvents, which can ruin your manicure. The best neon nail art glitters will be resistant to these issues. A little research goes a long way!
To avoid disappointment, test a small amount of the glitter with your nail polish or gel before applying it to your entire manicure. Let it sit for a few hours or even overnight to see if the glitter color changes or if it affects the consistency of the polish. Look for glitters that are specifically designed for use in nail art to ensure they are compatible with most nail products.
Application Method: Finding What Works for You
There are several ways to apply neon nail art glitters. You can sprinkle them onto wet polish, press them into a sticky base coat, or mix them directly into your nail polish. Some glitters are better suited for certain application methods than others. Consider how you plan to use the glitter and choose a product that is easy to work with.
For example, if you want to create a gradient effect, you might prefer a fine glitter that can be easily blended. If you’re going for a full glitter nail, a larger glitter with good coverage might be a better choice. Experiment with different application techniques to find what works best for you and the specific glitter you’re using. Don’t be afraid to get creative!
The UV Glow Factor: Does It Actually Glow?
One of the coolest things about neon glitter is its ability to glow under UV light! If you’re planning on wearing your neon nail art to a party or event with UV lighting, you’ll want to make sure your glitter actually glows. Not all neon glitters are UV reactive, so be sure to check the product description or reviews before you buy.
Look for glitters that are specifically advertised as “UV reactive” or “glow in the dark.” Some glitters may only glow faintly, while others will have a super bright, intense glow. The intensity of the glow can also depend on the strength of the UV light. If possible, try to see the glitter under UV light before you purchase it to make sure it meets your expectations.
Price vs. Quantity: Finding the Best Bang for Your Buck
Finally, consider the price and quantity of the glitter. Neon nail art glitters can range in price from a few dollars to upwards of $20 or more. Think about how often you plan to use the glitter and how much you need. A small amount of high-quality glitter can go a long way, especially if you’re only using it for accent nails or small details.
Compare prices from different retailers and brands to find the best deal. Look for sets of neon glitters that offer a variety of colors at a discounted price. Read reviews to see if customers feel the glitter is worth the price. Sometimes it’s worth spending a little more for a higher-quality product that will last longer and give you better results. Plus, getting all the best neon nail art glitters doesn’t have to break the bank.
FAQs
What exactly are “neon” nail glitters, and how do they differ from regular glitters?
Think of neon nail glitters as regular glitters’ more vibrant, energetic cousins! They’re specially formulated with pigments that absorb ultraviolet (UV) light and re-emit it as visible light. This process makes them appear much brighter and more intense than standard glitters, especially under UV or black lights. The result is a dazzling, eye-catching effect that regular glitters just can’t quite match.
Essentially, it’s all about the science of light absorption and emission. Regular glitters simply reflect light, while neon glitters actively convert UV light into more visible brightness, giving them that signature glowing effect. So, if you’re looking for a manicure that truly pops, neon glitters are the way to go!
Are neon nail glitters safe to use? I’ve heard concerns about certain nail products.
That’s a very valid question! When it comes to nail products, it’s always best to be cautious. Generally, neon nail glitters are considered safe when used as intended and purchased from reputable brands. However, it’s important to check the ingredients list and look for products that are free from harsh chemicals like formaldehyde, toluene, and DBP (dibutyl phthalate).
To be extra safe, always apply a base coat before using any glitter, and avoid direct skin contact with the glitter itself. Also, make sure your workspace is well-ventilated. If you have sensitive skin or allergies, it’s a good idea to do a small patch test before applying the glitter to your entire nail. And if you experience any irritation or allergic reaction, discontinue use immediately.
How do I apply neon nail glitter for the best, longest-lasting results?
Getting the perfect neon glitter manicure is all about the application! First, make sure your nails are clean, dry, and prepped with a base coat. This will protect your natural nails and provide a smooth surface for the glitter to adhere to. Then, apply a layer of nail polish in a color that complements your neon glitter – a white or light-colored base often works best to really make the neon pop!
While the base coat is still slightly tacky, you can apply the glitter using a few different methods. You can sprinkle it directly onto the nail, use a brush to carefully place the glitter, or even use a sponge for a more textured effect. Once the glitter is in place, gently press it down to ensure it’s secure. Seal it all in with a generous layer of top coat to prevent chipping and keep your neon glitter sparkling for days! Don’t be afraid to apply 2-3 coats of top coat for maximum smoothness.
Can I use neon nail glitters with gel polish?
Absolutely! Neon nail glitters work wonderfully with gel polish, and can create a dazzling, long-lasting manicure. The key is to incorporate the glitter into the gel layers properly.
After applying your base gel coat and curing it under a UV/LED lamp, apply a thin layer of gel polish in your desired color. While this layer is still tacky (before curing), sprinkle or gently press the neon glitter onto the nail. Cure the glitter-covered layer under the lamp. To seal the glitter and create a smooth, glossy finish, apply a top gel coat and cure it again. You might want to add a second top coat if you feel any texture from the glitter, curing after each application.
How do I remove neon nail glitter without damaging my nails?
Removing glitter can be a bit of a chore, but with the right approach, you can avoid damaging your nails. Avoid just peeling it off, as that will cause damage. The foil method is your best friend!
Soak cotton balls in acetone-based nail polish remover, place them over your nails, and then wrap each finger in foil to keep the cotton ball in place and prevent the remover from evaporating too quickly. After about 10-15 minutes, the glitter should have loosened. Gently rub off the remaining glitter with the cotton ball. If some stubborn pieces remain, repeat the process. Once all the glitter is removed, wash your hands and apply a nourishing cuticle oil to rehydrate your nails and cuticles.
Are there different types of neon nail glitter (size, shape, finish)? What should I consider when choosing?
Yes, there’s a whole world of neon nail glitters out there! You’ll find them in various sizes, from super fine powders to chunky flakes, as well as in different shapes like hexagons, stars, hearts, and more. The finish can also vary, with some glitters being more holographic or iridescent than others.
When choosing neon nail glitter, think about the look you’re going for. Fine glitters are great for creating a subtle shimmer or adding a touch of sparkle to a design, while chunky glitters can make a bold statement. Also, consider the color of the base polish you’ll be using, and choose a glitter that complements it. If you’re new to using glitters, starting with a smaller size is usually easier to manage.
Can neon nail glitters be used for things other than manicures?
Absolutely! While they’re primarily designed for nails, neon nail glitters are incredibly versatile and can be used for a variety of creative projects.
They can be incorporated into resin art, added to slime for a fun, shimmery effect, or even used in makeup looks to create dazzling eye or body art. Just be sure to use cosmetic-grade glitter if you’re applying it to your skin. With a little imagination, neon nail glitters can add a pop of vibrant color and sparkle to just about anything!
Verdict
So, there you have it! Your complete guide to finding the best neon nail art glitters to make your fingertips truly shine. We’ve explored a spectrum of dazzling colors, textures, and application techniques to ensure you’re fully equipped to create show-stopping manicures. Now, it’s time to stop dreaming and start doing! Go on, browse those reviews one last time, and pick the perfect glitter that speaks to your inner artist.
Don’t be afraid to experiment and let your creativity flow. Remember, nail art is all about self-expression, so unleash your inner sparkle and rock those vibrant, neon looks! We’re confident that with the information you’ve gleaned from this guide, you’ll find the perfect best neon nail art glitters to turn heads and make a bold statement. Now go forth and paint the town (or at least your nails) neon!