Remember that time I tried re-siding my garage with Hardie Board? What started as a weekend DIY project quickly turned into a lesson in frustration. My trusty old nail gun, the one I used for everything, just couldn’t handle the dense material. Nails were bending, splitting, or simply bouncing back, leaving me with a mess of dents and a serious headache. It was then I realized the importance of having the right tool for the job, specifically one of the best nail guns for Hardie Board.
Choosing the perfect nail gun can feel overwhelming with so many options available. That’s why I created this comprehensive guide. We’ll dive into detailed reviews of top-rated models specifically designed for the unique demands of Hardie Board siding. We’ll also break down the key features, factors to consider, and essential tips to ensure your next siding project is a resounding success, saving you time, money, and a whole lot of aggravation.
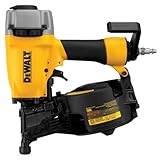
Before moving into the review of the best nail guns for hardie board, let’s check out some of the relevant products from Amazon:


Last update on 2026-01-23 / #ad / Affiliate links / Images from Amazon Product Advertising API
So, You’re Tackling Hardie Board Siding? Let’s Talk Nail Guns!
Alright, so you’re diving into the world of Hardie board siding – fantastic choice! It’s durable, looks great, and really boosts curb appeal. But before you start swinging a hammer like it’s 1899, let’s get you equipped with the right tools, specifically, nail guns. Because trust me, after the first few boards, your arm will thank you. Choosing the best nail guns for Hardie board isn’t just about convenience; it’s about ensuring a proper, lasting installation that protects your investment.
Now, why all the fuss about specialized nail guns? Well, Hardie board, being a fiber cement product, isn’t like nailing into soft wood. It’s denser and requires specific nail types and precise depth control to avoid cracking or creating unsightly nail heads. According to industry research, improper nailing is a leading cause of Hardie board failure, which can lead to costly repairs down the road. Think of it like this: using the wrong nail gun is like trying to assemble a delicate watch with a sledgehammer. Not ideal!
We’re going to explore the world of pneumatic and cordless nail guns, looking at the pros and cons of each, and what makes them suitable for Hardie board siding. We’ll also delve into important features like depth adjustment, nail type compatibility (because, yes, there are specific nails approved by James Hardie), and even the weight and ergonomics of the gun, since you’ll likely be holding it for hours.
Ultimately, selecting the best nail guns for Hardie board comes down to understanding your project’s scope, your budget, and your personal preferences. But don’t worry, we’re here to guide you through the process. Let’s get your Hardie board project nailed – pun intended! – with the right tools for the job.
The Best Nail Guns For Hardie Board
BOSTITCH MCN150 Metal Connector Nailer
Looking for a reliable workhorse for your Hardie board installation? The Bostitch MCN150 might just be your answer. This nailer is built tough, designed specifically for metal connector nails, which are exactly what you need for secure Hardie board fastening. It’s known for its consistent driving power, minimizing the risk of overdriving or leaving nails proud. Plus, its lightweight design helps reduce fatigue during those long days of siding work.
The MCN150’s precise nail placement is a major advantage, ensuring that your fasteners hit the framing members exactly where they need to be. While it’s not a dedicated siding nailer, its robust build and ability to handle the right type of nail make it a solid choice for Hardie board projects where strength and accuracy are paramount. It’s a workhorse, plain and simple, and will help you get the job done right, the first time.
Hitachi NR65AK2(S) Framing Nailer
The Hitachi NR65AK2(S) is a fantastic option for those who prefer a pneumatic nailer with a bit more versatility. While primarily designed for framing, it can be easily adapted for Hardie board with the correct nail selection and depth adjustment. This nailer is known for its durability and power, making it capable of driving nails through dense materials with ease. Expect consistent performance and a tool that’s built to last through project after project.
One of the great features is its adjustable depth of drive, allowing you to dial in the perfect setting to avoid overdriving nails into the Hardie board. The NR65AK2(S) also boasts a comfortable grip and well-balanced design, making it comfortable to use for extended periods. If you need a nailer that can handle both framing and Hardie board installation, this Hitachi is definitely worth considering.
Paslode Cordless XP Framing Nailer
If you’re all about convenience and freedom of movement, the Paslode Cordless XP Framing Nailer is a serious contender. No hoses, no compressors – just grab it and go! This cordless nailer offers the power and performance of a pneumatic nailer without the hassle of being tethered. It uses fuel cells and a battery to drive nails, giving you a portable and efficient solution for Hardie board installation.
The Paslode Cordless XP is surprisingly lightweight and well-balanced, making it easy to maneuver in tight spaces. It consistently drives nails flush, ensuring a professional-looking finish on your Hardie board siding. While the fuel cells and batteries add an ongoing cost, the freedom and convenience this nailer provides can be a huge time-saver, especially on larger projects.
MAX CN565S3 SuperSider
For those who are serious about siding, the MAX CN565S3 SuperSider is a top-of-the-line option specifically designed for the job. This pneumatic nailer is engineered for precision and efficiency, with features that make Hardie board installation a breeze. Its lightweight design and comfortable grip reduce fatigue, allowing you to work longer and more comfortably. Plus, the adjustable depth drive ensures consistent nail placement, preventing damage to the Hardie board.
The CN565S3 is known for its smooth operation and reliable performance. It consistently drives nails at the correct depth, leaving a clean and professional finish. While it’s a higher-end option, the investment is well worth it for professionals or serious DIYers who demand the best performance and durability from their tools. It’s truly built with the siding contractor in mind.
Senco SNS200XP Siding and Fencing Nailer
The Senco SNS200XP is a solid choice if you’re looking for a reliable and affordable siding nailer. Designed to be durable and versatile, it is perfectly capable of tackling Hardie board installations. This pneumatic nailer provides ample power to drive nails securely, and its adjustable depth-of-drive feature lets you fine-tune the setting for different Hardie board thicknesses. It’s a solid, no-frills option that gets the job done.
A great feature of the SNS200XP is its easy-to-adjust depth setting, which is crucial for preventing overdriving nails and damaging the Hardie board. Its lightweight design also makes it comfortable to use for extended periods, minimizing fatigue. If you want a straightforward, dependable siding nailer without breaking the bank, the Senco SNS200XP is a great choice.
Hardie Board and Nail Guns: A Perfect Match for a Lasting Home
Imagine spending hours meticulously nailing Hardie board siding, only to find some nails are bent, others are unevenly sunk, and a few are even sticking out. Talk about a frustrating setback! Manually nailing Hardie board can be incredibly time-consuming and prone to errors that compromise the integrity and appearance of your home. This is where nail guns step in, transforming a daunting task into a manageable and even enjoyable project. They provide consistent, accurate, and fast nail placement, crucial for ensuring the durability and weather resistance of your siding.
The key benefit of using nail guns is the consistency and precision they offer. Hardie board is a dense fiber cement material, demanding nails driven at a specific depth and angle to avoid cracking or damage. A nail gun ensures each nail is set perfectly, creating a tight seal and preventing water from seeping behind the siding. Furthermore, consider the sheer volume of nails needed for a typical siding project. Using a hammer for every single nail is not only exhausting but also increases the risk of hand fatigue and mistakes, ultimately impacting the quality of your work.
Choosing the best nail guns for Hardie board means investing in a tool designed for the job. These specialized nail guns are equipped with features like depth adjustment, which allows you to fine-tune the nail depth for optimal holding power without damaging the board. Pneumatic nail guns, powered by compressed air, offer consistent power and are ideal for large projects. Some models even feature nose pieces specifically designed to prevent surface damage to the Hardie board. The right nail gun not only speeds up the project but also dramatically reduces the likelihood of costly repairs down the line.
Think of a nail gun as an investment in both your home’s longevity and your own sanity. It streamlines the installation process, delivers professional-grade results, and ensures your Hardie board siding stands strong against the elements for years to come. By choosing the right nail gun, you’re not just buying a tool; you’re investing in the peace of mind that comes with knowing your home is protected by a well-installed, durable siding system.
Safety First: Protecting Yourself While Nailing Hardie Board
Working with nail guns and Hardie board can be a rewarding experience, transforming your home’s exterior. However, safety should always be paramount. Imagine a scenario where you’re rushing to finish a project before a storm hits and you skip wearing safety glasses. A stray nail could ricochet and cause serious eye injury. Always prioritize wearing appropriate personal protective equipment (PPE), including safety glasses, hearing protection, and gloves.
Consider also the environment you’re working in. Are there power lines nearby? Is the ground uneven? Ensuring a safe workspace reduces the risk of trips, falls, and electrical hazards. Remember, a little preparation goes a long way in preventing accidents. Don’t be tempted to cut corners on safety just to save a few minutes; your well-being is worth more.
Nail gun handling is crucial for safety. Never point the nail gun at yourself or others, even if it’s unloaded. Accidental discharge can happen, and the consequences can be severe. Always keep your fingers away from the trigger when not actively nailing, and ensure the safety mechanism is engaged when moving around the work area. Practice using the nail gun on scrap pieces first to get a feel for its power and recoil.
Finally, be mindful of the potential for silica dust exposure when cutting Hardie board. Silica dust, a byproduct of cutting cement-based materials, can cause respiratory problems. Wearing a properly fitted respirator or dust mask is essential when cutting Hardie board. Consider cutting the boards outdoors and using a wet saw to minimize dust generation. Take regular breaks to get fresh air and protect your lungs.
Choosing the Right Nails: Ensuring a Secure and Lasting Finish
The type of nails you use to install Hardie board directly impacts the longevity and appearance of your siding. Imagine you’ve just completed a beautiful siding job, only to find that the nails are rusting after a few months, leaving unsightly streaks down your walls. Using the wrong type of nail can lead to corrosion, weakening the attachment and compromising the integrity of your siding. Always use corrosion-resistant nails specifically designed for Hardie board.
Consider the climate in your area. If you live in a coastal region with salty air or an area with high humidity, you’ll need extra durable nails. Stainless steel nails offer superior corrosion resistance and are ideal for harsh environments. While they might be slightly more expensive, the investment is worthwhile in the long run to avoid costly repairs later. Hot-dipped galvanized nails are another good option for general use, providing a good level of protection against rust.
The length of the nails is equally important. Nails that are too short won’t provide sufficient holding power, while nails that are too long can bend or protrude through the siding. A general rule of thumb is to use nails that penetrate the framing members by at least one inch. Consult the Hardie board manufacturer’s recommendations for specific nail length requirements based on the thickness of your siding and the type of framing you’re using.
Also, think about the head type of the nail. Hardie board typically requires ring-shank or barbed nails for enhanced grip. These nails have ridges or barbs along the shank that prevent them from backing out over time. Smooth-shank nails are generally not recommended for Hardie board, as they may loosen due to expansion and contraction of the siding with temperature changes. Choosing the right nails is an essential step in achieving a professional and long-lasting finish.
Mastering Nailing Techniques: Achieving a Flush and Professional Look
Proper nailing technique is crucial for ensuring that your Hardie board installation looks professional and performs as intended. Picture this: you’re halfway through installing your siding and realize that some of the nails are driven too deep, leaving unsightly dimples, while others are protruding, creating a bumpy surface. This can happen if you don’t pay attention to the depth setting on your nail gun.
Start by adjusting the depth setting on your nail gun to achieve the perfect nail placement. You want the nail head to be flush with the surface of the Hardie board, without breaking the surface or leaving it sticking out. Practice on scrap pieces of Hardie board to fine-tune the depth setting before you start working on your actual siding. This simple step can save you a lot of time and frustration in the long run.
Spacing the nails correctly is another essential aspect of mastering nailing techniques. Hardie board manufacturers typically specify the recommended nail spacing for their products. Over-nailing can cause the siding to crack or buckle, while under-nailing can compromise its structural integrity. Adhering to the manufacturer’s guidelines ensures that your siding is securely fastened and looks its best.
Finally, always nail straight into the framing members. Angled nails can reduce holding power and may cause the siding to shift or move over time. Use a level or a chalk line to ensure that your nailing pattern is straight and consistent. If you encounter any obstacles or uneven surfaces, take the time to adjust your technique accordingly. Mastering these nailing techniques will help you achieve a flush, professional look that will enhance the curb appeal of your home.
Troubleshooting Common Issues: Addressing Problems and Finding Solutions
Even with the best tools and techniques, you might encounter some challenges while installing Hardie board. Imagine you’re working on a section of siding and suddenly the nail gun starts jamming frequently, slowing down your progress significantly. This can be incredibly frustrating, but understanding common issues and knowing how to troubleshoot them can save you time and prevent further problems.
One common issue is nail gun jams. This can be caused by a variety of factors, such as using the wrong type of nails, debris in the nail gun’s mechanism, or a worn-out driver blade. Start by checking the nail magazine to ensure that you’re using the correct nails and that they are properly aligned. Clean the nail gun regularly to remove any dust or debris that may be causing the jams. If the problem persists, you may need to replace the driver blade.
Another common issue is splitting Hardie board when nailing. This can happen if the nails are driven too close to the edge of the board or if the siding is too dry. To prevent splitting, pre-drill holes near the edges of the board, especially when working with thinner sections. Also, make sure to keep the Hardie board properly stored in a cool, dry place to prevent it from becoming overly brittle.
Finally, you might encounter issues with uneven nail placement. This can be caused by inconsistent pressure applied to the nail gun or by working on an uneven surface. To ensure consistent nail placement, maintain a firm and steady grip on the nail gun. Use a level to check the surface you’re nailing to and make any necessary adjustments to ensure it’s even. By understanding these common issues and knowing how to troubleshoot them, you can overcome challenges and achieve a successful Hardie board installation.
Best Nail Guns For Hardie Board: A Buyer’s Guide
Hey there, DIY enthusiast! Thinking about tackling a Hardie board siding project? Awesome! But before you dive headfirst, let’s talk about the unsung hero of the operation: your nail gun. Choosing the right nail gun is crucial for a professional-looking, long-lasting result. Trust me, using the wrong one can lead to headaches, callbacks, and a seriously unhappy you. This guide is here to help you navigate the world of nail guns and find the absolute best nail guns for Hardie board for your needs.
So, grab a cup of coffee (or your preferred beverage!), and let’s get started. We’ll break down the key factors to consider, so you can confidently choose the right tool for the job and nail that Hardie board project like a pro.
Nail Gun Type: Pneumatic vs. Cordless
Alright, first things first: what kind of power are we talking about? You’ve got two main contenders here: pneumatic (air-powered) and cordless (battery-powered). Pneumatic nail guns are the workhorses of the siding world. They’re known for their consistent power, reliability, and often, a lighter weight. Think of them as the seasoned pros, always ready to deliver. But remember, they require an air compressor and hose, which can limit your mobility and add to the initial cost.
Cordless nail guns, on the other hand, offer ultimate freedom. No hoses to trip over, no need to lug around a compressor. They’re the agile ninjas of the nail gun world. The technology has come a long way, and modern cordless models offer impressive power. The downside? They can be heavier than pneumatic versions due to the battery, and you’ll need to factor in charging time. Plus, the initial cost might be higher. Choosing between them really depends on your priorities and the scope of your project.
Nail Size and Type Compatibility
Hardie board isn’t just any siding material; it’s a fiber cement composite, meaning it requires specific nails for proper installation and long-term durability. Using the wrong nails can lead to cracking, popping, or even complete failure of the siding. That’s why it’s critical to ensure the nail gun you choose is compatible with the recommended nail size and type for your specific Hardie board product.
Typically, you’ll be looking at galvanized or stainless steel nails, often with a ring shank for increased holding power. Check the manufacturer’s instructions for the precise nail specifications. Then, double-check that the nail gun you’re considering can handle those dimensions and types. Some nail guns are designed for a wider range of nail sizes, offering more versatility, while others are more specialized. It is also vital to verify the nail gun is designed to shoot specific Hardie board nails and to use the type of nails and settings recommend by the Hardie board manufacturer.
Depth Adjustment
This is a big one! With Hardie board, you need to get the nail depth just right. Too deep, and you’ll sink the nail through the board, creating an unsightly hole. Not deep enough, and the nail head will stick out, preventing a flush, smooth finish. Think of it like Goldilocks – you need it just right!
A good depth adjustment mechanism is essential for achieving consistent, professional results. Look for a nail gun with a tool-free depth adjustment. These make it easy to dial in the perfect setting without having to fumble with screwdrivers or wrenches. A precise depth adjustment will save you time and frustration and, most importantly, prevent damage to your Hardie board. This feature will ensure that you nail the depth consistently, making it one of the best nail guns for Hardie board.
Sequential vs. Bump Fire Trigger
Here’s where your personal preference and project needs come into play. Nail guns generally come with two trigger options: sequential and bump fire (also known as contact actuation). Sequential triggers require you to depress the safety tip against the work surface before pulling the trigger, firing one nail at a time. This is generally considered safer and more precise, especially for beginners.
Bump fire triggers, on the other hand, allow you to hold the trigger down and “bump” the safety tip against the work surface to fire nails rapidly. This can significantly speed up the process, but it also requires more skill and control. For Hardie board, where precision is key, a sequential trigger is often recommended, especially if you’re not a seasoned nail gun user. But if you’re experienced and confident in your abilities, a bump fire trigger can help you tackle larger projects more efficiently.
Gauge and Shank Type Considerations
The gauge of a nail refers to its thickness, and the shank is the part of the nail that goes into the wood. When working with Hardie board, you need to pay attention to both of these factors to ensure proper holding power and prevent damage to the material. Hardie board manufacturers typically recommend specific nail gauges for their products. Using a nail that’s too thin can result in poor holding power and potential siding failure, while a nail that’s too thick can cause cracking or splitting.
Similarly, the shank type plays a crucial role in the nail’s grip. Ring shank nails, with their small rings along the shank, provide significantly better holding power than smooth shank nails. This is particularly important for Hardie board, which can expand and contract with changes in temperature and humidity. The best nail guns for Hardie board will be able to accomodate the correct gauge and shank type of nail.
Weight and Ergonomics
Let’s be honest, siding projects can be physically demanding. You’ll be spending hours on your feet, holding the nail gun and maneuvering it around the house. That’s why weight and ergonomics are crucial factors to consider. A heavy nail gun can lead to fatigue and reduced accuracy, especially during long days.
Look for a nail gun that’s lightweight and well-balanced. A comfortable grip is also essential. Some nail guns have rubberized grips that provide a secure and comfortable hold, even when your hands are sweaty. Consider the overall design and how it feels in your hand. A little extra comfort can make a big difference in the long run, and ensure you complete the project without injury.
Maintenance and Durability
Investing in a nail gun is a long-term commitment. You want a tool that’s built to last and easy to maintain. After all, no one wants a nail gun that breaks down halfway through a project! Look for nail guns made from high-quality materials, such as durable metals and impact-resistant plastics.
Consider the ease of maintenance. Does the nail gun require regular oiling? Are replacement parts readily available? Read reviews and see what other users have to say about the tool’s reliability. A little research upfront can save you a lot of headaches down the road. Proper maintenance can extend the life of your nail gun and ensure it performs optimally for years to come. By taking care of your tool, you’ll avoid costly repairs and replacements and continue to have one of the best nail guns for Hardie board for many years to come.
Frequently Asked Questions
What size nails should I use with my nail gun for Hardie Board siding?
Choosing the right nail size is crucial for a secure and lasting Hardie Board installation. Generally, you’ll want to use nails that are long enough to penetrate the Hardie Board and go at least 1 inch into the framing studs. Typically, this means nails between 2 inches and 2 ½ inches are ideal, but always double-check the Hardie Board installation instructions for the specific product you’re using.
Also, make sure the nails are specifically designed for cement siding, as these nails often have a special coating that resists corrosion and helps them hold better in the dense material. Using the wrong nail size or type could lead to the siding coming loose over time, so it’s worth taking the time to get it right.
Can I use any nail gun for Hardie Board, or do I need a special one?
While technically you could try using any nail gun, it’s definitely not recommended! Hardie Board is a tough material, and using a standard nail gun could lead to issues like nail heads not being properly set, or even cracking the siding. You really want a nail gun that’s designed or rated for fiber cement siding.
These specialized nail guns often have features like depth adjustments, which allow you to consistently drive nails to the correct depth without damaging the Hardie Board. Some even have a special nose piece that helps prevent cracking. Investing in the right tool will not only make the job easier but will also ensure a professional-looking and long-lasting result.
What’s the difference between a coil nail gun and a stick nail gun for Hardie Board?
Great question! The main difference boils down to nail capacity and reloading frequency. Coil nail guns hold a large coil of nails, meaning you can shoot a lot of nails before needing to reload. This is great for large projects where you want to minimize downtime.
Stick nail guns, on the other hand, hold nails in strips or “sticks.” They typically have a smaller nail capacity, so you’ll need to reload more often. However, stick nail guns are often lighter and more maneuverable, which can be helpful for working in tight spaces or on smaller projects. Ultimately, the best choice depends on the size of your project and your personal preference.
How important is the depth adjustment feature on a Hardie Board nail gun?
The depth adjustment feature is incredibly important! Hardie Board is a unique material, and it’s vital to drive the nails to just the right depth. If the nails are driven too deep, they can crack the siding, compromising its structural integrity and appearance.
On the flip side, if the nails aren’t driven deep enough, they won’t hold the siding securely, and you’ll risk it coming loose over time. The depth adjustment feature allows you to fine-tune the nail depth so that the nail head is flush with the surface of the Hardie Board, providing a secure and professional-looking finish.
Should I choose a pneumatic or cordless (battery-powered) nail gun for Hardie Board?
Both pneumatic and cordless nail guns have their advantages for Hardie Board projects. Pneumatic nail guns are generally more powerful and often lighter, as they don’t have the weight of a battery. They also tend to be more affordable upfront. However, they require an air compressor, which can be bulky and noisy.
Cordless nail guns offer greater freedom of movement since you’re not tethered to an air compressor. They’re also more convenient for smaller projects or when working in areas without easy access to power. However, they can be heavier due to the battery, and you’ll need to ensure the battery is charged throughout the project. The best choice depends on your individual needs and priorities.
How do I prevent Hardie Board from cracking when nailing?
Cracking Hardie Board when nailing is a common concern, but there are several things you can do to minimize the risk. First, and most importantly, use a nail gun specifically designed for fiber cement siding with a depth adjustment feature. This will allow you to control the nail depth and prevent overdriving.
Second, make sure you’re using the correct type and size of nails recommended by the Hardie Board manufacturer. Using the wrong nails can lead to cracking. Third, nail in the correct locations, typically near the edges of the boards and into the framing studs. Avoid nailing too close to the corners, as this can also cause cracking.
What safety precautions should I take when using a nail gun with Hardie Board?
Safety is always paramount when using any power tool, and nail guns are no exception. Always wear safety glasses to protect your eyes from flying debris. Hardie Board can produce dust when cut or nailed, so wearing a dust mask is also a good idea to protect your lungs.
Ear protection is recommended, especially if you are using a pneumatic nail gun, as the compressor can be quite loud. Furthermore, familiarize yourself with the nail gun’s safety features and operating instructions before starting your project. Keep your fingers away from the firing mechanism, and never point the nail gun at yourself or others.
Conclusion
Alright, so we’ve covered a lot of ground, diving deep into the world of the best nail guns for Hardie board. You now have a solid understanding of the different types, features, and important factors to consider. Remember, choosing the right tool is half the battle. Whether you’re a seasoned pro or a DIY enthusiast, with the right nail gun in hand, you can tackle those Hardie board projects with confidence and achieve professional-looking results. Don’t be intimidated by the process!
Now, go forth and conquer those Hardie board projects! Arm yourself with the knowledge you’ve gained, trust your gut, and select the nail gun that feels right for you and your needs. Building and renovating should be an exciting journey, so embrace the challenge, enjoy the process, and watch your vision come to life. You’ve got this!