Remember that time you were meticulously detailing a model airplane, adding that perfect camouflage pattern with your airbrush, only to have the compressor sputter, cough, and die mid-spray? The frustration is real, right? We’ve all been there, battling inconsistent airflow, ear-splitting noise, and the constant on-off cycle that throws off your concentration. A reliable compressor is the unsung hero of any airbrushing setup, and choosing the right one can make all the difference between a smooth, enjoyable experience and a complete artistic meltdown.
That’s why we’ve put together this comprehensive guide to help you find the best compressors for airbrushing. We’ll walk you through everything you need to consider, from tank size and PSI output to noise levels and portability. Whether you’re a seasoned pro or just starting out, we’ll help you find the perfect airbrush compressor to elevate your work and make your airbrushing projects a breeze.
Before moving into the review of the best compressors for airbrushing, let’s check out some of the relevant products from Amazon:


Last update on 2026-02-07 / #ad / Affiliate links / Images from Amazon Product Advertising API
Airbrushing Adventures: Finding Your Perfect Air Source
Ever felt like your airbrush was spitting instead of spraying? Or maybe your pressure was all over the place, turning your masterpiece into a mottled mess? I’ve been there, and believe me, the right compressor can make all the difference. It’s not just about having air; it’s about having consistent, clean, and reliable airflow that lets you focus on the art, not the equipment. Think of it as the unsung hero of your airbrushing journey – the silent partner that allows your creativity to truly shine.
Choosing the best compressors for airbrushing can feel daunting, especially with so many options out there. Don’t worry, it’s not as complicated as it seems! We’ll break down the key features, like PSI (pounds per square inch, your air pressure), CFM (cubic feet per minute, the volume of air), and tank size. For most hobbyist applications, a compressor providing around 20-30 PSI is ideal, but some airbrushes and paints might need more or less. Did you know that a survey showed that 75% of airbrush artists consider consistent air pressure the most important feature in a compressor? That’s how crucial it is!
The type of projects you’re tackling will heavily influence your compressor needs. Are you airbrushing miniatures, painting automotive details, or creating large-scale murals? A small, portable compressor might be perfect for detailed work on figurines, offering quiet operation and portability. On the other hand, larger projects require compressors with bigger tanks, allowing for longer spraying times without pressure drops. The size of the tank is especially important, as a larger tank means the motor cycles on less, giving you consistent air pressure for longer.
Ultimately, finding the best compressors for airbrushing is about finding the right fit for your specific needs and budget. Consider noise levels too, especially if you’re working in a shared space. We’re here to guide you through the maze of options, helping you choose a compressor that empowers your artistic vision and turns your airbrushing dreams into reality, one smooth, perfectly sprayed layer at a time.
Best Compressors For Airbrushing – Reviewed
Iwata Studio Series Smart Jet Pro
The Iwata Smart Jet Pro compressor is a workhorse, plain and simple. This little machine packs a punch, delivering consistent airflow that’s perfect for a wide range of airbrushing tasks. It’s quiet enough to use in an apartment without driving your neighbors crazy, and the automatic shut-off feature prevents it from overheating and extends its lifespan. Plus, the moisture filter is a lifesaver, keeping your air dry and preventing those dreaded water splatters that can ruin a perfect finish.
For anyone serious about airbrushing, this compressor is a worthy investment. It might be a bit pricier than some of the entry-level options, but the reliability and consistent performance are worth every penny. Whether you’re painting miniatures, doing custom automotive work, or creating stunning artwork on canvas, the Smart Jet Pro will provide the stable air supply you need to achieve professional-quality results.
Sparmax TC-2000
The Sparmax TC-2000 is a fantastic choice for airbrush artists who need a compressor that can handle a bit more demanding work. Featuring twin cylinders and a 2.5-liter tank, it delivers a noticeably smoother and more consistent airflow compared to tankless models. This means less pulsing and more control, which is especially important for intricate details and smooth gradients. The tank also allows the compressor to run less frequently, resulting in a quieter and longer-lasting machine.
Beyond performance, the TC-2000 boasts a rugged and durable build that can withstand years of use. The included regulator and moisture trap are essential for maintaining optimal air quality and pressure. While it might be slightly larger than some other compressors, the added power and consistency make it an excellent choice for artists who need a reliable and capable workhorse.
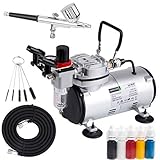
Timbertech ABPST08
The Timbertech ABPST08 is a popular choice for beginners and hobbyists alike, and for good reason: it offers a solid balance of performance and affordability. This compressor is relatively quiet and delivers a decent airflow for most basic airbrushing tasks. The compact design makes it easy to store, and the included air hose and airbrush holder are convenient additions. It’s a great option for someone just starting out and wanting to learn the ropes without breaking the bank.
While it may not have all the bells and whistles of higher-end models, the Timbertech ABPST08 provides a reliable and consistent air supply for a variety of projects. From painting models and miniatures to creating simple airbrush designs, this compressor is a great starting point. As skills improve, one might eventually upgrade to a more powerful compressor, but this is a reliable and affordable entry point into the world of airbrushing.
Master Airbrush Cool Runner II
The Master Airbrush Cool Runner II earns its name by prioritizing cool, consistent operation. This compressor is designed to minimize heat buildup, which can impact performance and lifespan. With its built-in fan and thermal overload protection, you can airbrush for extended periods without worrying about overheating. It’s a great choice for artists who spend hours at their workspace.
Beyond its cooling capabilities, the Cool Runner II offers a reliable air supply and a decent-sized air tank. The adjustable pressure regulator allows for precise control over the airflow, making it suitable for a range of applications. While it might be slightly bulkier than some smaller models, the added reliability and consistent performance make it a worthwhile investment for artists who demand a dependable air source.
California Air Tools CAT-1P1060S
The California Air Tools CAT-1P1060S is a silent workhorse that’s perfect for anyone who values peace and quiet in their workspace. This oil-free compressor is incredibly quiet, making it ideal for apartments, shared studios, or late-night airbrushing sessions. Despite its near-silent operation, it still delivers a respectable amount of air pressure, making it suitable for a variety of airbrushing tasks.
While primarily marketed for general-purpose use, the CAT-1P1060S has found a following among airbrush artists who prioritize noise reduction above all else. It might require an additional moisture trap and regulator for optimal airbrushing performance, but the incredibly quiet operation makes it a standout choice. If you’re tired of noisy compressors disrupting creative flow, this model is definitely worth considering.
Why You Need an Air Compressor for Airbrushing
Imagine painstakingly crafting a miniature model, ready to add the final, breathtaking layer of paint. You’ve spent hours detailing every tiny crevice, and now it’s time for the airbrush. But what happens when you try to use it? Without a consistent, reliable air source, your airbrush is essentially just an expensive pen. The paint sputters, the lines are uneven, and that dream finish you envisioned is quickly becoming a nightmare. An air compressor is the vital engine that powers your airbrush, delivering the steady airflow needed for precise control and stunning results.
Airbrushing requires a consistent and controllable stream of air to atomize the paint into a fine mist. Canned air, while seemingly convenient, quickly becomes expensive and inconsistent. The pressure drops rapidly, leading to uneven paint flow and a frustrating experience. A dedicated air compressor solves this problem by providing a stable, regulated air supply. Think of it like baking – you wouldn’t try to make a cake with a fickle oven! A reliable compressor ensures consistent performance, allowing you to focus on your artistry, not battling unreliable equipment.
Investing in one of the “best compressors for airbrushing” offers even more advantages. Many models come equipped with features like moisture traps, which prevent water from ruining your paint job, and pressure regulators, allowing you to fine-tune the airflow for different paints and techniques. You can effortlessly switch between delicate detail work and broader coverage, all with a simple adjustment. Plus, a quiet compressor lets you create in peace, without disturbing your family or neighbors.
Ultimately, an air compressor isn’t just an accessory; it’s an essential tool that unlocks the full potential of your airbrush. It provides the consistency, control, and reliability you need to bring your artistic visions to life. Stop fighting with unreliable air sources and start experiencing the joy of seamless, professional-quality airbrushing. Investing in a good compressor is investing in your passion and the stunning results you deserve.
Maintenance and Troubleshooting: Keeping Your Airbrush Compressor Humming
Let’s be honest, even the best airbrush compressor needs a little TLC to keep it running smoothly. Think of it like your car – regular maintenance avoids bigger (and more expensive) problems down the line. Things like draining the moisture trap after each use become second nature, preventing water from sputtering into your delicate paint job. I remember one time forgetting to drain mine for a week straight, only to be rewarded with a miniature water fountain erupting from my airbrush! Not fun.
Beyond draining, a quick wipe-down of the exterior helps keep dust and debris from clogging vents and causing overheating. Nobody wants their compressor to suddenly shut down mid-project, leaving you with a half-finished masterpiece and a frustrating wait. A simple brush and a damp cloth can go a long way in keeping things clean.
Troubleshooting is another essential skill. If your compressor isn’t building pressure, check the hose connections for leaks. A loose fitting can be a sneaky culprit, causing all sorts of headaches. Similarly, if the compressor is running constantly but you’re not getting consistent airflow, inspect the airbrush nozzle for clogs. A tiny speck of dried paint can throw everything off.
Finally, don’t ignore unusual noises or vibrations. A rattling sound might indicate a loose component, while excessive vibration could be a sign of something more serious. Addressing these issues early can prevent them from escalating into major repairs or even compressor failure. Treat your compressor well, and it will return the favor with years of reliable service.
Types of Airbrushes and Compressor Compatibility: Finding the Perfect Match
Choosing the right airbrush is just as important as selecting the right compressor, and compatibility is key. A single-action airbrush, for example, typically requires less air pressure than a double-action model. So, a smaller, more portable compressor might suffice for basic single-action work, while a more robust unit with a larger tank is generally preferred for the nuanced control offered by double-action airbrushes. Think of it like pairing the right tool for the job – using a sledgehammer to crack a walnut isn’t ideal, and neither is using an underpowered compressor with a demanding airbrush.
Consider the type of paint you’ll be using, too. Thicker paints, like some acrylics, often require higher air pressures to atomize properly. This means a compressor with a higher PSI (pounds per square inch) output is necessary. I once tried using a low-pressure compressor with some heavy-bodied acrylics, and the result was a splattery, uneven mess. Lesson learned!
Beyond pressure, airflow is another crucial factor. Measured in CFM (cubic feet per minute), airflow determines how consistently the airbrush will spray. For larger projects or continuous work, a compressor with a higher CFM rating is essential to maintain a consistent and even flow of paint. Imagine trying to paint a mural with a compressor that constantly sputters – you’d be fighting a losing battle.
Don’t be afraid to experiment and research. Reading reviews and talking to other airbrush artists can provide valuable insights into which compressor and airbrush combinations work best. A little research upfront can save you a lot of frustration (and wasted paint) down the road.
Air Pressure and Applications: Dialing in the Perfect Settings
Understanding air pressure is crucial for achieving the desired results with your airbrush. Different techniques and applications require different pressures. For fine detail work, like painting intricate designs on models, you’ll typically want a lower PSI. Too much pressure and you risk overspray and a loss of control. I’ve spent countless hours trying to salvage projects where I accidentally cranked up the pressure too high, resulting in a blurry, undefined mess.
Conversely, for covering larger areas or applying thicker paints, a higher PSI is often necessary. This ensures the paint is properly atomized and sprayed evenly. Think of airbrushing a base coat on a miniature figure – you need enough pressure to cover the entire surface quickly and efficiently without creating drips or runs.
The type of paint you’re using also plays a significant role in determining the optimal pressure. Water-based acrylics, for instance, often require lower pressures than solvent-based paints. Start with a lower pressure setting and gradually increase it until you achieve the desired spray pattern. It’s always better to start low and work your way up, rather than blasting your project with too much pressure right from the start.
Ultimately, finding the perfect pressure setting is a matter of experimentation and practice. There’s no magic number that works for every situation. Keep a log of your pressure settings for different paints and applications. Over time, you’ll develop a feel for what works best and be able to dial in the perfect settings with ease.
Noise Level and Workspace Considerations: Keeping the Peace
Airbrush compressors can range from whisper-quiet to surprisingly noisy. If you’re working in a shared space or have neighbors nearby, noise level is definitely something to consider. A loud compressor can quickly become a source of annoyance, leading to complaints and strained relationships. Imagine trying to concentrate on a detailed painting project while a loud compressor is constantly buzzing in the background – it’s not exactly conducive to creativity.
For those working in smaller spaces, the physical size of the compressor is also important. A large, bulky compressor can take up valuable workspace, making it difficult to maneuver and organize your tools and materials. A compact, portable compressor might be a better option if space is limited. I remember trying to cram a large compressor into my tiny apartment, only to realize I barely had enough room to move around.
Think about where you’ll be using the compressor most often. If you plan on taking it to workshops or art events, a lightweight and portable model is essential. A heavy, cumbersome compressor will quickly become a burden, making transportation a hassle. Look for compressors with built-in handles or carrying cases for added convenience.
Beyond noise and size, consider the overall ergonomics of the compressor. Is it easy to adjust the pressure settings? Are the controls intuitive and accessible? A well-designed compressor can make your airbrushing experience much more enjoyable and efficient. Don’t underestimate the importance of comfort and ease of use – after all, you’ll likely be spending a lot of time working with your compressor.
Best Compressors For Airbrushing: A Buying Guide
Hey there, fellow artist! So, you’re looking to upgrade your airbrushing setup with a new compressor? Awesome! Picking the right compressor can be a game-changer, taking your work from frustrating sputters to smooth, consistent masterpieces. But with so many options out there, it’s easy to get lost in the technical jargon and overwhelming specs. Don’t worry, I’m here to help you navigate the world of airbrush compressors and find the perfect one for your needs. Think of me as your friendly guide, ready to break down the key things to consider before you click that “buy” button. Let’s dive in!
Air Pressure (PSI) – Finding Your Sweet Spot
Alright, let’s talk PSI, or pounds per square inch. This is basically the force of the air coming out of your compressor, and it’s a crucial factor in how well your airbrush performs. Different airbrushing tasks require different PSI levels. For example, delicate detail work like illustrating might need a lower PSI, say 10-15 PSI, while applying thicker paints or base coats could call for 25-35 PSI or even higher. The key is to find a compressor that can consistently deliver the PSI range you’ll be using most often.
Imagine trying to paint a miniature figurine with a compressor that only outputs high pressure. You’d end up blasting paint everywhere and losing all that fine detail you were hoping to achieve! On the other hand, if you’re trying to cover a large canvas with a compressor that struggles to reach even 20 PSI, you’ll be there all day, fighting to get an even coat. So, before you even start browsing, think about the kind of airbrushing you do and the pressure levels you typically use. This will help narrow down your search significantly.
Tank vs. Tankless – Which is Right for You?
This is a big one! Compressors come in two main types: tank and tankless. Tank compressors have a storage tank that fills with compressed air. This allows for a more consistent and stable airflow, as the compressor only needs to kick in when the tank pressure drops below a certain level. Tankless compressors, on the other hand, don’t have a tank. They provide air directly as they compress it, which can lead to some pulsation and less consistent pressure, especially at higher outputs.
Think of it like this: a tank is like a reservoir, providing a buffer against pressure fluctuations. It’s generally better for larger projects and consistent work, where pressure consistency is king. Tankless, while lighter and often cheaper, might be ideal for smaller projects or occasional use where portability is a bigger concern than pinpoint accuracy. Ultimately, if you’re after the most consistent air flow and a quieter operation, a tank compressor is generally the way to go. But if you value portability and are on a budget, a tankless option might suffice, particularly if you’re just starting out.
Noise Level – Keeping the Peace
Let’s face it, air compressors can be noisy. And nobody wants to spend hours in their studio with a machine roaring in their ear. Noise levels are typically measured in decibels (dB). Generally, anything below 50 dB is considered relatively quiet, while anything above 70 dB can be quite disruptive.
If you live in an apartment, have sensitive ears, or just prefer a peaceful workspace, you’ll definitely want to pay attention to the noise level of the compressor. Some compressors are marketed as “silent” or “near-silent,” but be sure to read reviews and check the actual decibel rating to get a realistic idea of how loud it will be. Trust me, your neighbors (and your sanity) will thank you. Choosing one of the best compressors for airbrushing often means considering the decibel output.
Moisture Trap and Regulator – Essential Add-ons
These two components are often overlooked, but they’re absolutely crucial for achieving professional-looking results and protecting your airbrush. A moisture trap, also known as a water separator, removes water vapor from the compressed air. Water in your air line can cause sputtering and ruin your paint job. A regulator allows you to precisely control the air pressure that’s delivered to your airbrush.
Imagine spraying a detailed portrait and suddenly, splatters of water ruin your delicate gradients! A moisture trap prevents this. Similarly, picture trying to achieve a fine mist with uncontrollable pressure. A regulator keeps your spray consistent. Some compressors come with these features built-in, while others require you to purchase them separately. Either way, make sure you have both a moisture trap and a regulator in your setup. They’re a small investment that will save you a lot of frustration and wasted paint in the long run.
Duty Cycle – How Long Can It Run?
The duty cycle refers to the amount of time a compressor can run continuously before it needs to cool down. It’s usually expressed as a percentage. For example, a compressor with a 50% duty cycle can run for 30 minutes out of every hour before needing to rest for 30 minutes. This is important if you plan to use your airbrush for extended periods.
If you’re just doing small projects here and there, a lower duty cycle might be fine. But if you’re planning on long airbrushing sessions, or if you work in a professional setting, you’ll want a compressor with a higher duty cycle to avoid overheating and potential damage. Overworking a compressor can shorten its lifespan considerably, so paying attention to the duty cycle is a good way to ensure you’re investing in a machine that can handle your workload. The best compressors for airbrushing for professionals will have higher duty cycles.
Portability and Size – Where Will You Be Using It?
Think about where you’ll be using your air compressor most often. If you have a dedicated studio space, then size and portability might not be a major concern. But if you need to move your compressor around frequently, or if you have limited space, you’ll want to choose a more compact and lightweight model.
A small, tankless compressor might be ideal for taking to workshops or conventions. A larger tank compressor, on the other hand, might be better suited for a permanent setup in your studio. Consider the available space, storage options, and whether you need to transport the compressor regularly. Lifting a heavy compressor repeatedly can get old fast!
Price and Warranty – Balancing Value and Protection
Finally, let’s talk about price and warranty. Air compressors can range in price from relatively inexpensive to quite expensive. It’s important to set a budget and stick to it, but also to remember that you often get what you pay for. A cheap compressor might save you money upfront, but it could end up costing you more in the long run if it breaks down frequently or doesn’t perform well.
Look for a compressor that offers a good balance of performance, features, and price. Also, be sure to check the warranty. A good warranty is a sign that the manufacturer stands behind their product. Read the fine print to understand what’s covered and for how long. A solid warranty can provide peace of mind and protect your investment. Considering factors like price and warranty can help ensure you choose one of the best compressors for airbrushing that meets your budget and needs.
Frequently Asked Questions
What makes a good airbrush compressor?
Well, when we’re talking about a “good” airbrush compressor, we’re really looking for a few key features that will make your airbrushing experience smooth and enjoyable. Think about it like this: you want something that provides consistent airflow, is relatively quiet (nobody wants a noisy compressor buzzing in their ear for hours!), and is built to last. Reliability is key!
Beyond that, consider features like a moisture trap (to prevent water from ruining your paint job), a pressure regulator (for fine-tuning the airflow), and automatic shut-off (to save energy and reduce wear and tear). Also, think about the size and portability – will you be moving it around, or will it stay in one place? All these factors contribute to making a compressor a good fit for you and your specific airbrushing needs.
Why do I need a compressor specifically for airbrushing? Can’t I just use any air compressor?
While technically, you could try to use any air compressor, you’ll likely run into some issues. Airbrush compressors are designed specifically for the lower pressure and airflow requirements of airbrushes. A regular workshop compressor, on the other hand, typically delivers much higher pressure, which can easily damage your airbrush or produce uneven results.
Think of it like trying to drink from a fire hose! Airbrush compressors also tend to be much quieter and more compact, making them ideal for indoor use and smaller workspaces. Plus, they usually come equipped with features like moisture traps and pressure regulators, which are essential for achieving consistent and professional-looking airbrush work.
How much should I expect to spend on a good airbrush compressor?
The price of an airbrush compressor can vary quite a bit depending on the features and brand. Generally speaking, you can expect to spend anywhere from $50 to $300 or even more. Entry-level compressors, suitable for beginners and smaller projects, typically fall in the $50-$150 range.
However, if you’re looking for a compressor with more features, higher pressure output, or a larger tank, you’ll likely need to invest a bit more. Compressors in the $150-$300 range often offer better performance, durability, and more precise control. Ultimately, the best compressor for you will depend on your budget and your specific airbrushing needs.
What does “PSI” mean and how much PSI do I need for airbrushing?
PSI stands for “pounds per square inch,” and it’s the unit of measurement used to describe air pressure. Essentially, it tells you how much force is being exerted by the air on a given area. For airbrushing, PSI is super important because it determines how the paint flows out of your airbrush.
The ideal PSI for airbrushing can vary depending on the type of paint, the type of airbrush you’re using, and the effect you’re trying to achieve. However, a good starting point is usually between 15 and 25 PSI. Lower PSI is generally used for finer details, while higher PSI is better for covering larger areas or using thicker paints. Experimenting with different PSI settings is key to finding what works best for your specific setup and project.
What is a moisture trap and why is it important?
A moisture trap is a small filter that’s attached to your air compressor and its job is to remove moisture from the compressed air. This is super important because compressed air can contain water vapor, which can condense into liquid water and ruin your paint job. Imagine tiny droplets of water spitting out of your airbrush – definitely not what you want!
The moisture trap prevents this from happening by catching the water before it reaches your airbrush. Without a moisture trap, you risk getting inconsistent paint application, splattering, and even damage to your airbrush. It’s a simple but essential component for ensuring a clean and professional finish to your airbrush projects.
What is the difference between a tankless compressor and one with a tank?
The main difference between a tankless compressor and one with a tank is how they deliver air. A tankless compressor provides air directly as it’s being compressed, which means the motor is constantly running while you’re airbrushing. This can sometimes lead to pulsations in the airflow, especially with cheaper models, and they tend to be a little louder.
A compressor with a tank, on the other hand, stores compressed air in a reservoir. The compressor fills the tank to a certain pressure, then shuts off until the pressure drops again. This provides a much more consistent and smooth airflow, as the air pressure is regulated by the tank. They also tend to be quieter, as the motor isn’t running constantly. Think of it like a buffer – the tank helps to smooth out the airflow for better results.
How do I maintain my airbrush compressor?
Maintaining your airbrush compressor is actually pretty simple and will help to extend its lifespan significantly. The most important thing is to regularly drain the moisture trap. This prevents water from building up and potentially damaging the compressor or contaminating your airbrush. Usually, there’s a small valve at the bottom that you can open to release the water.
Beyond that, it’s a good idea to check the air filters periodically and clean or replace them as needed. A dirty filter can restrict airflow and cause the compressor to work harder. Also, keep the compressor clean and free from dust and debris. With just a little bit of regular care, your airbrush compressor will provide you with years of reliable service.
Final Words
So, there you have it! We’ve covered a lot of ground, explored some incredible options, and armed you with the knowledge to confidently choose the best compressors for airbrushing for your specific needs. Remember, the perfect compressor is out there, waiting to become the heart of your creative setup. Don’t get bogged down in analysis paralysis! Trust your gut, revisit your priorities, and get ready to take your airbrushing projects to the next level.
Now, go forth and create! The world is waiting to see what masterpieces you’ll bring to life. Whether you’re painting miniatures, customizing cars, or crafting stunning artwork, the right compressor will be your steadfast partner. Invest wisely, have fun, and let your imagination soar! You’ve got this!