Remember that night you looked up at the stars, really looked, and felt a sense of wonder so profound it took your breath away? Maybe you were camping, or just walking home late, but suddenly the universe didn’t feel so distant anymore. I remember that feeling vividly; for me, it was seeing the rings of Saturn through a borrowed telescope at a friend’s cabin. That glimpse changed everything, sparking a lifelong passion for astronomy. If you’re feeling that same pull, that same curiosity, you’re in the right place.
This guide is dedicated to helping you take that next step on your cosmic journey. We understand that choosing the right equipment can be daunting, especially with so many options available. Don’t worry! We’ve done the research and compiled this comprehensive buying guide to help you find the best amateur telescopes to suit your needs and budget. Get ready to unlock the secrets of the night sky and embark on an unforgettable adventure.
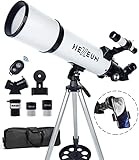
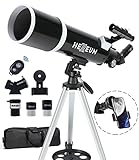
Before moving into the review of the best amateur telescopes, let’s check out some of the relevant products from Amazon:


Last update on 2025-12-08 / #ad / Affiliate links / Images from Amazon Product Advertising API
Reaching for the Stars: Your Journey into Astronomy
Ever looked up at the night sky, speckled with countless stars, and felt a tug of wonder? You’re not alone! For centuries, humans have been captivated by the cosmos, and now, with the right equipment, you can explore it from your own backyard. Entering the world of amateur astronomy can seem daunting, but it’s incredibly rewarding. Forget blurry images and frustration – with the right telescope, you can witness lunar craters, Jupiter’s moons, and even distant galaxies. It’s estimated that over 2 million amateur astronomers are active worldwide, constantly discovering new wonders.
Choosing a telescope can be overwhelming. Dobsonian, Refractor, Reflector…the jargon can be confusing! But don’t worry, we’re here to help. Think of your first telescope as a stepping stone. You don’t need the most expensive, complex equipment to start enjoying the night sky. In fact, many experienced astronomers recommend starting with a simple, easy-to-use model to learn the basics. Learning the night sky is more important than having the largest aperture at first.
The good news is that there are fantastic options available for beginners. The price range for some of the best amateur telescopes suited for beginners starts at around $200 and stretches up to $1000, but that’s not a definitive limit. This selection is wide enough to cater to different needs and budgets. Consider what you want to observe – planets, deep-sky objects, or both? This will help narrow your choices. And don’t forget to factor in portability if you plan to travel with your telescope.
This guide is designed to walk you through the best amateur telescopes available, breaking down the technical terms and offering practical advice. Whether you’re a complete beginner or have some experience, we’ll help you find the perfect instrument to unlock the wonders of the universe. Get ready to embark on an incredible journey of discovery!
Best Amateur Telescopes – Reviews
Celestron NexStar 130SLT Computerized Telescope
Looking for a telescope that’s both powerful and easy to use? The Celestron NexStar 130SLT might be just what you need. This computerized telescope takes the guesswork out of stargazing. Its pre-programmed database of over 4,000 celestial objects allows it to automatically locate planets, stars, galaxies, and more with just a touch of a button. Say goodbye to confusing star charts and hello to a hassle-free observing experience.
The 130mm aperture gathers plenty of light for bright, detailed views of the night sky. You’ll be amazed by the crisp images of lunar craters, the rings of Saturn, and the faint glow of distant nebulae. The included tripod is sturdy and adjustable, making it comfortable to observe from various locations. If you’re a beginner who wants instant access to the wonders of the universe, this telescope is a fantastic choice.
Orion SkyQuest XT8 Classic Dobsonian Telescope
If you crave stunning views without the complicated setup, the Orion SkyQuest XT8 Classic Dobsonian telescope is a real winner. This scope’s simple, elegant design is a throwback to the early days of astronomy, but its performance is anything but old-fashioned. The large 8-inch aperture pulls in a ton of light, revealing fainter objects and sharper details that smaller telescopes simply can’t capture. Get ready for breathtaking views of deep-sky wonders like the Andromeda Galaxy and the Orion Nebula.
The Dobsonian mount is incredibly user-friendly – just point and observe! It’s perfect for beginners who want to jump right into stargazing without a steep learning curve. While it doesn’t have a computerized GoTo system, learning to navigate the night sky yourself can be incredibly rewarding. The XT8 delivers incredible value for its price, making it a top pick for serious amateur astronomers.
Sky-Watcher Heritage 150P Flextube Dobsonian Telescope
Space-saving and powerful don’t often go hand in hand, but the Sky-Watcher Heritage 150P Flextube Dobsonian Telescope manages to pull it off. This telescope features a clever collapsible tube design that makes it incredibly compact for storage and transport. Don’t let its small size fool you, though – the 6-inch aperture gathers plenty of light for impressive views of the Moon, planets, and deep-sky objects.
This Dobsonian telescope provides exceptionally sharp images. Its simple design allows for quick and easy setup, which makes it ideal for spontaneous stargazing sessions. The telescope also makes an excellent gift for older children interested in astronomy, due to its portability and ease of use.
Celestron AstroMaster 70AZ Telescope
For those just starting out in astronomy, the Celestron AstroMaster 70AZ Telescope is an excellent entry-level option. This refractor telescope is lightweight, portable, and incredibly easy to assemble, making it perfect for beginners of all ages. The 70mm aperture provides decent views of the Moon, planets, and brighter deep-sky objects, giving you a taste of what the night sky has to offer.
The alt-azimuth mount is intuitive to use, allowing you to easily move the telescope up, down, left, and right to track objects across the sky. While it may not have the light-gathering power of larger telescopes, the AstroMaster 70AZ is a fantastic way to dip your toes into the world of astronomy without breaking the bank. It’s a great choice for families or anyone looking for a simple and affordable telescope.
Meade ETX90 Observer Telescope
Want a telescope that’s packed with features and ready to travel? The Meade ETX90 Observer Telescope is a compact and versatile telescope with a Maksutov-Cassegrain design, offering excellent image quality in a small package. Its 90mm aperture gathers enough light for detailed views of the Moon, planets, and brighter deep-sky objects. The included AudioStar hand controller boasts a library of over 30,000 celestial objects, and it can automatically guide the telescope to your desired target.
Its portability makes it ideal for taking on camping trips or observing from dark sky locations. The ETX90’s combination of portability, performance, and computerized features make it a compelling choice for both beginners and experienced observers looking for a grab-and-go telescope. Whether you’re observing from your backyard or exploring remote locations, this telescope is sure to impress.
Why Buy an Amateur Telescope?
Ever looked up at the night sky and felt a sense of wonder? That’s the universe calling out to you, inviting you to explore its mysteries! Buying an amateur telescope isn’t just about owning a piece of equipment; it’s about opening a door to a universe of discovery. Imagine pointing your telescope at the moon and seeing craters, mountains, and valleys in breathtaking detail, or catching the shimmering rings of Saturn with your own eyes. These experiences are unforgettable and spark a curiosity that can last a lifetime.
Think about it – instead of passively consuming information through screens, you’re actively participating in the observation of celestial objects. Maybe you’ve always been fascinated by nebulae, those vibrant clouds of gas and dust where stars are born. With a good amateur telescope, you can actually see them, faint whispers of light that have traveled millions of years to reach your eye. It’s an incredibly rewarding feeling to witness these wonders firsthand and develop a deeper understanding of the cosmos.
Now, you might be thinking, “Telescopes are expensive and complicated, right?” While advanced models can certainly be pricey, there are excellent “best amateur telescopes” available at affordable prices, designed specifically for beginners. These telescopes are often easy to set up and use, allowing you to start exploring the night sky right away. Plus, there’s a whole community of amateur astronomers online and in local clubs who are eager to share their knowledge and help you get started.
Consider the educational benefits, too. A telescope can inspire a passion for science in children (and adults!), encouraging them to learn about astronomy, physics, and even mathematics. It’s a fantastic way to spend quality time with family, fostering a sense of wonder and shared discovery. So, why buy an amateur telescope? Because it’s an investment in knowledge, a pathway to adventure, and a window to the universe, all bundled into one fascinating piece of equipment.
Understanding Telescope Types: Which One is Right for You?
Choosing your first telescope can feel a bit like navigating a celestial minefield. Reflectors, refractors, catadioptrics – the terminology alone can be overwhelming. But fear not, aspiring astronomer! Understanding the basic telescope types will help you narrow down your options significantly. Think of it as choosing the right tool for the job, whether you’re building a house or exploring the cosmos.
Reflector telescopes, using mirrors to gather light, are known for their large aperture at a generally lower price point. This makes them fantastic for observing faint deep-sky objects like galaxies and nebulae. Imagine you’re trying to photograph a dimly lit landscape; a large camera lens (the aperture) will capture more light, resulting in a brighter, more detailed image. Reflectors do the same for celestial objects.
Refractor telescopes, employing lenses, are often praised for their sharp, high-contrast views and minimal maintenance. They are well-suited for observing planets, the moon, and double stars. Think of looking through a perfectly clear window on a crisp, sunny day – that’s the kind of clarity a refractor can provide. They’re also generally more robust and require less frequent alignment than reflectors.
Catadioptric telescopes, a hybrid design using both mirrors and lenses, offer a good balance of portability, aperture, and image quality. They’re a versatile option for both planetary and deep-sky observing. Consider them the Swiss Army knife of telescopes, capable of handling a variety of tasks without excelling in one specific area. This makes them a great choice for beginners who want to explore different aspects of astronomy.
Essential Accessories for Beginner Astronomers
Once you’ve got your telescope, the adventure is just beginning! However, to truly maximize your stargazing experience, you’ll need a few essential accessories. These aren’t just fancy add-ons; they’re tools that will significantly enhance your observations and make your life as an astronomer much easier. Think of it as having the right ingredients and utensils to bake a perfect cake.
Eyepieces are arguably the most crucial accessory. The eyepiece determines the magnification of your telescope. A variety of eyepieces allows you to zoom in on details or widen your field of view to find objects more easily. Imagine having different lenses for a camera; each lens offers a different perspective and level of detail. Similarly, different eyepieces provide different magnifications and fields of view.
A Barlow lens is a cost-effective way to double or even triple the magnification of your existing eyepieces. It’s like a magnifying glass for your telescope’s image, allowing you to see finer details on planets and the moon. Think of it as a zoom function on your camera, letting you get a closer look at distant subjects without needing to physically move closer.
A finderscope helps you locate objects in the night sky. Pointing a telescope directly at a faint star or planet can be incredibly frustrating without one. It acts as a wide-field sight, allowing you to aim your telescope with greater accuracy. Consider it the GPS for your telescope, guiding you to your desired destination in the vastness of the night sky. Red dot finders are especially beginner friendly.
Mastering the Night Sky: Finding and Identifying Celestial Objects
Having the best telescope is only half the battle. The real magic happens when you learn how to navigate the night sky and find those hidden gems. It’s like having a high-powered microscope but not knowing how to prepare a slide; the potential is there, but you need the knowledge and skills to unlock it. Don’t worry, it’s easier than it sounds!
Start with familiar constellations. These are the signposts of the sky, making it easier to locate other objects. Download a stargazing app or use a star chart to learn the patterns and their names. Think of it as learning the street names and landmarks in a new city; once you know the basics, you can easily find your way around.
Use a planisphere. This rotating star chart allows you to see which constellations are visible at any given time of year. It’s a simple but incredibly useful tool for planning your observing sessions. Consider it your pocket-sized map of the sky, helping you to navigate the celestial landscape throughout the year.
Start with bright, easy-to-find objects like the Moon, planets, and bright stars. As you gain experience, you can gradually move on to fainter objects like nebulae and galaxies. It’s like learning to ride a bike; start with training wheels and then gradually remove them as you become more confident.
Troubleshooting Common Telescope Issues for Beginners
Even the best telescopes can sometimes present challenges, especially for beginners. Knowing how to troubleshoot common issues will save you frustration and ensure you spend more time observing and less time tinkering. Think of it as knowing basic car maintenance; you don’t need to be a mechanic, but understanding the fundamentals can save you from getting stranded.
Collimation is the process of aligning the mirrors in a reflector telescope. If your images appear blurry or distorted, your telescope may need collimation. There are numerous online tutorials and tools to help you with this. Consider it tuning up your telescope’s optics to ensure optimal performance, like sharpening a camera lens for clearer images.
Dealing with dew can be a common problem, especially in humid climates. Dew shields and dew heaters can help prevent moisture from forming on your telescope’s optics. Think of it as protecting your telescope from the elements, like using an umbrella to shield yourself from the rain.
Light pollution can significantly impact your observing experience. Try to find a dark site away from city lights. You can also use light pollution filters to help block out unwanted light. Consider it finding a quiet place to listen to music; reducing the background noise allows you to hear the details more clearly. Dark sky maps are readily available online.
Here’s your comprehensive guide to buying the best amateur telescopes:
Choosing the Best Amateur Telescopes: A Buyer’s Guide
So, you’re ready to explore the cosmos! That’s fantastic! Buying your first telescope can feel like a daunting task, but it doesn’t have to be. This guide is designed to help you navigate the jargon and find the best amateur telescopes for your needs and budget. Think of me as your friendly neighborhood stargazer, here to offer some helpful advice before you take the plunge into the wonderful world of astronomy.
1. Aperture: The Bigger, the Better (Usually!)
Think of aperture as the telescope’s “light-gathering power.” It’s the diameter of the main lens or mirror that collects light. The larger the aperture, the more light the telescope can gather, and the fainter the objects you’ll be able to see. It’s like upgrading from a pair of regular binoculars to binoculars with massive lenses; you see so much more detail and fainter objects pop into view. You’ll be able to see fainter galaxies, nebulae, and globular clusters with a larger aperture scope.
However, don’t go thinking bigger is always better. Larger apertures mean larger, heavier telescopes. These can be more difficult to transport and set up, especially if you’re a beginner. Also, bigger telescopes typically come with a bigger price tag. It’s a balancing act between what you want to see, how much you’re willing to spend, and how much effort you’re willing to put into setup and transport.
2. Telescope Type: Refractor, Reflector, or Catadioptric?
This is where things can get a little technical, but I’ll break it down for you. There are three main types of telescopes: refractors, reflectors, and catadioptrics. Refractors use lenses to focus light, reflectors use mirrors, and catadioptrics use a combination of both. Each has its pros and cons.
Refractors are known for their sharp, high-contrast images and are generally less prone to maintenance. However, larger aperture refractors can be very expensive. Reflectors, on the other hand, offer a larger aperture for the price, making them a popular choice for beginners looking for the best amateur telescopes. They do require occasional collimation (alignment of the mirrors), but it’s not as scary as it sounds! Catadioptric telescopes, like Schmidt-Cassegrains and Maksutov-Cassegrains, are a compact and versatile option, offering good performance across a range of observing targets.
3. Mount: Stability is Key
The mount is what holds your telescope steady, and it’s just as important as the telescope itself. A shaky mount will make it difficult to focus and enjoy your view. There are two main types of mounts: alt-azimuth (alt-az) and equatorial.
Alt-az mounts move up and down (altitude) and left and right (azimuth), making them intuitive and easy to use, especially for beginners. However, they require constant adjustments to track celestial objects as they move across the sky. Equatorial mounts, on the other hand, are designed to compensate for the Earth’s rotation, making it easier to track objects with minimal adjustments. They’re a good choice for astrophotography, but can be a bit more challenging to set up initially. There are also computerized versions of both types, which can automatically locate and track objects for you.
4. Magnification: Not Always Your Friend
It’s tempting to think that the higher the magnification, the better the telescope. But that’s not always the case. Magnification is determined by the eyepiece you use in combination with the telescope’s focal length. While you can achieve high magnification, the image quality often suffers.
High magnification amplifies atmospheric turbulence, making the image blurry and unstable. A good rule of thumb is to aim for a maximum useful magnification of around 50x per inch of aperture. So, a 6-inch telescope would have a maximum useful magnification of around 300x. The best amateur telescopes provide clear images at reasonable magnifications, allowing you to see more detail without sacrificing image quality.
5. Budget: Be Realistic and Prioritize
Telescopes range in price from a few hundred dollars to tens of thousands. It’s important to set a realistic budget before you start shopping. Don’t feel pressured to buy the most expensive telescope you can afford. It’s better to start with a smaller, well-made telescope that you’ll actually use than a large, complex telescope that sits in your closet collecting dust.
Think about how often you plan to use the telescope and what you want to observe. If you’re just starting out, a good quality entry-level telescope is often the best way to go. You can always upgrade later as your interest and experience grow. Remember to factor in the cost of accessories, such as extra eyepieces, filters, and a good star chart.
6. Light Pollution: Location, Location, Location
Light pollution is artificial light from cities and towns that washes out the night sky, making it difficult to see faint objects. The darker your skies, the more you’ll be able to see with your telescope. If you live in a heavily light-polluted area, consider traveling to a darker location for observing.
There are light pollution maps available online that can help you find dark sky sites near you. Even if you can’t escape the city lights, there are still things you can observe, such as the Moon, planets, and brighter stars. Light pollution filters can also help to improve the contrast of certain objects, especially nebulae. The best amateur telescopes, even those with smaller apertures, can reveal stunning details under dark skies.
7. Accessories: Enhance Your Viewing Experience
While the telescope itself is the main investment, accessories can greatly enhance your observing experience. Extra eyepieces, with different focal lengths, will allow you to vary the magnification. A Barlow lens can effectively double or triple the magnification of your eyepieces.
Filters can improve the contrast of certain objects, such as planetary filters for enhancing details on planets, and light pollution filters for observing nebulae from light-polluted areas. A good star chart or astronomy app is essential for finding objects in the night sky. Don’t overlook simple but important accessories like a red flashlight (to preserve your night vision) and a comfortable observing chair. Think of these additions as tools to maximize the capabilities of your telescope and make your observing sessions more enjoyable. These can make even the best amateur telescopes even better.
Frequently Asked Questions
What does “aperture” mean, and why is it so important for a telescope?
Think of aperture like the size of a bucket collecting rainwater. In a telescope, the aperture is the diameter of the main lens or mirror. The larger the aperture, the more light it can gather, which directly impacts how bright and detailed objects appear in the eyepiece. A bigger bucket (or aperture) means you can see fainter stars, more intricate details on planets, and even delve into some deep-sky objects like nebulae and galaxies.
So, why is it so important? Simply put, aperture is king! More light equals a sharper, brighter image. While other factors like magnification and optics quality play a role, aperture is the foundation for a great observing experience. You’ll be able to see more and see it better with a larger aperture telescope, which is why it’s often the first spec beginners should consider.
Refractor vs. Reflector: Which telescope type is better for a beginner?
Both refractor and reflector telescopes have their strengths and weaknesses, making them suitable for different observing styles and budgets. Refractors, with their lens-based designs, generally offer sharper images with less maintenance. They’re great for planetary and lunar viewing because of their high contrast.
Reflectors, on the other hand, use mirrors to gather light and are typically more affordable for a given aperture size. This means you can get a larger aperture telescope for the same price, allowing you to see fainter deep-sky objects. While they might require occasional collimation (mirror alignment), many beginners find the larger aperture’s light-gathering power well worth the effort, especially if they’re interested in seeing galaxies and nebulae.
What magnification should I look for in a telescope?
Magnification is a bit of a misunderstood topic! While it might seem like the higher the magnification, the better, that’s actually not the case. A telescope’s useful magnification is limited by its aperture and the atmospheric conditions. Overly high magnification will simply magnify the atmospheric turbulence, resulting in blurry and dim images.
A good rule of thumb is to aim for a maximum useful magnification of about 50x per inch of aperture. So, a telescope with a 4-inch aperture could theoretically handle up to 200x magnification under ideal conditions. But remember, most nights won’t be ideal, and you’ll likely spend most of your time observing at lower magnifications for a clearer, brighter image. It’s also much more important to have good quality eyepieces than to chase after high magnification.
What is “GoTo” technology, and do I really need it?
“GoTo” technology is like having a GPS for the night sky. These telescopes have a computerized system that can automatically point the telescope to thousands of celestial objects. You simply enter the object you want to see, and the telescope will slew to its location.
While GoTo telescopes can be incredibly helpful for beginners who are still learning the night sky, they’re not essential. Many experienced amateur astronomers prefer to star-hop manually, using star charts and their own knowledge to navigate the cosmos. Whether you need GoTo really comes down to personal preference. If you’re short on time, easily frustrated with finding objects, or just want the convenience, then a GoTo telescope can be a great investment. But if you enjoy the process of exploration and learning the constellations, a manual telescope might be a better fit.
How important is the mount, and what types are there?
The telescope mount is like the foundation of a building – it’s what keeps the telescope stable and allows you to smoothly move it around. A wobbly or unstable mount will make observing frustrating, as even the slightest vibration can ruin your view, especially at higher magnifications.
There are two main types of mounts: alt-azimuth (alt-az) and equatorial. Alt-az mounts are simpler to use, moving up/down (altitude) and left/right (azimuth), similar to a camera tripod. Equatorial mounts are designed to compensate for the Earth’s rotation, making it easier to track celestial objects as they move across the sky. While equatorial mounts can be a bit more complicated to set up, they’re essential for astrophotography and can be helpful for visual observing at higher magnifications.
How do I maintain my telescope and keep it in good condition?
Telescope maintenance doesn’t have to be a chore! For refractors, the main thing is keeping the lens clean. Use a lens brush to remove dust, and if necessary, use a lens cleaning solution and a microfiber cloth to gently wipe away any smudges. Avoid over-cleaning as unnecessary wiping can scratch the surface.
Reflectors require a bit more attention as the mirrors can accumulate dust. Most of the time, light dust won’t significantly affect performance. However, if the mirror gets noticeably dirty, you might need to clean it. Use distilled water and a drop of mild detergent, and gently roll cotton balls across the surface to lift away dirt. Also, reflectors will need to be collimated from time to time to ensure optimal image quality. But don’t worry, there are plenty of online resources and tutorials to guide you through the process.
What other accessories do I need to get the most out of my telescope?
While the telescope itself is the main investment, a few accessories can greatly enhance your observing experience. A good set of eyepieces with different focal lengths will allow you to vary the magnification and find the optimal view for different objects. A Barlow lens can also double or triple the magnification of your existing eyepieces.
A red dot finder or a Telrad finder can make it much easier to aim your telescope at specific objects. And don’t forget a good star chart or astronomy app to help you navigate the night sky! Consider a comfortable observing chair, especially if you plan to spend long nights under the stars. Finally, a dew shield can prevent dew from forming on the telescope’s lens, which is essential for clear viewing on humid nights.
Final Thoughts
So, there you have it! We’ve explored a universe of options when it comes to the best amateur telescopes, from easy-to-use reflectors to powerful refractors. Hopefully, you now feel more equipped to navigate the cosmos of telescope buying and ready to embark on your own astronomical adventure. Remember, the most important telescope is the one you’ll actually use. Don’t get bogged down in chasing the perfect specs; focus on finding a telescope that sparks your curiosity and fits your budget and lifestyle.
Now, it’s your turn to take the plunge! The night sky is waiting to be explored, and with a little research and a dash of enthusiasm, you’ll be gazing at distant galaxies and lunar craters in no time. Trust your gut, review your notes, and choose the telescope that sings to your soul. Happy stargazing, and may your nights be filled with wonder!