It’s a crisp autumn afternoon, and you’re putting the finishing touches on winterizing your RV. The last thing you want is a burst pipe come spring, but the thought of antifreeze sloshing through your fresh water system just doesn’t sit right. Maybe you’ve heard there’s a better way, a cleaner way, to protect your RV from freezing temperatures. That’s where the right tools come in.
We’re here to help you navigate the world of air compressors and find the best air compressors to blow out RV water lines. This buying guide and review collection offers a comprehensive look at the top models on the market, covering everything from PSI and CFM to ease of use and portability. We’ll help you choose the perfect compressor so you can confidently winterize your RV and enjoy worry-free travels next season.
Before moving into the review of the best air compressors to blow out rv water lines, let’s check out some of the relevant products from Amazon:


Last update on 2026-01-19 / #ad / Affiliate links / Images from Amazon Product Advertising API
Winter is Coming: The Tale of the Frozen RV Pipes
Alright, picture this: you’ve just wrapped up an amazing RV adventure. Sunsets over mountain ranges, cozy campfires under starry skies – pure bliss! But now, reality bites. You’re back home, and that trusty RV is staring you down, needing to be prepped for the looming winter. One of the most critical tasks? Winterizing those water lines! Nobody wants to deal with burst pipes and a flooded RV come spring, believe me. It’s a messy (and expensive!) problem.
The good news is, winterizing doesn’t have to be a Herculean effort. A key part of the process is blowing out the water lines using compressed air. This clears out any remaining water, preventing it from freezing and expanding. Think of it like this: water expands by about 9% when it freezes. That’s a lot of pressure on those pipes! Using compressed air is a simple and effective solution.
Now, you might be thinking, “Okay, compressed air… but how?” That’s where the right tool comes in. There’s a range of options to use to successfully blow out the water lines. I’m talking about the best air compressors to blow out RV water lines. Not just any air compressor will do. You need one that’s reliable, provides the right pressure (typically around 30-40 PSI is ideal for RVs), and is easy to use, especially if you’re a beginner.
So, stick with me! We’re going to dive deep into the world of air compressors, focusing on what makes them suitable for RV winterization. We’ll explore different types, features to look for, and, of course, some top recommendations to help you choose the perfect compressor to keep your RV pipes safe and sound all winter long. Let’s make sure your next spring RV adventure isn’t spent cleaning up a watery mess!
Top 5 Best Air Compressors To Blow Out Rv Water Lines
PORTER-CABLE C2002 Oil-Free UMC Pancake Compressor
This little pancake compressor is a popular pick for RVers, and for good reason. It’s lightweight, portable, and packs a decent punch for its size. Blowing out RV water lines doesn’t require a massive, industrial-strength compressor, and the PORTER-CABLE C2002 definitely fits the bill. The oil-free pump means less maintenance for you, which is always a bonus when you’re on the road. It’s also relatively quiet, as far as compressors go, so you won’t be waking up the entire campground when you’re winterizing.
While the 6-gallon tank is ample for the task at hand, don’t expect to power heavy-duty air tools with this one. It’s designed more for smaller jobs like inflating tires or, you guessed it, blowing out water lines. Some users have reported the included accessories aren’t the highest quality, but the compressor itself is reliable and durable. Overall, it’s a solid and affordable choice for RV owners needing a simple and effective way to winterize their rigs.
California Air Tools 8010 Steel Tank Air Compressor
If you’re looking for something a little quieter than the typical compressor, the California Air Tools 8010 might be your answer. This model is known for its ultra-quiet operation, which is a definite plus if you’re noise-conscious or have close neighbors. It’s still plenty powerful enough for blowing out RV water lines, and the 8-gallon steel tank provides ample air storage for the job. You’ll appreciate the reduced noise levels when you’re working inside or close to your RV.
The oil-free pump design also makes for easy maintenance. Although this model boasts a steel tank, it’s still lightweight enough to be easily transportable. Some users have found that the included hose isn’t the greatest, and recommend buying a higher-quality one. The price point is higher compared to the PORTER-CABLE option, but the lower noise and durable construction may make it worth the investment for many RV owners.
Bostitch BTFP02012 Pancake Air Compressor
The Bostitch BTFP02012 is another popular pancake compressor frequently used by RVers. Like the PORTER-CABLE, it’s lightweight and easy to carry around, making it a great choice for on-the-go winterization. It’s oil-free, so you won’t have to worry about messy oil changes, and it’s powerful enough to effectively blow out your RV’s water lines. The high-flow regulator and couplers maximize air tool performance, ensuring you have sufficient pressure for the task.
While it’s not as quiet as the California Air Tools model, it’s still reasonably quiet compared to some other compressors on the market. A few users have reported minor issues with the pressure gauge’s accuracy, but overall, it’s a reliable and durable option. Its portability and ample air pressure make the Bostitch a valuable tool for ensuring your RV is prepped for colder temperatures.
DEWALT DWFP55126 Pancake Air Compressor
DEWALT’s DWFP55126 Pancake Air Compressor is a workhorse known for its reliability and durability. If you already have a DEWALT tool collection, this compressor will fit right in. It’s built to withstand the rigors of job sites, meaning it can easily handle the occasional RV winterization. The oil-free pump ensures maintenance is kept to a minimum, and the high-flow regulator and couplers are designed to deliver maximum air tool performance.
The 6-gallon tank provides a good balance between capacity and portability. While it might be a bit louder than some of the other options on this list, the DEWALT’s robust construction and consistent performance make it a popular choice among RV owners. Some find the included accessories a bit basic, but the compressor itself is a solid investment for RV winterization.
CRAFTSMAN Air Compressor, 6 Gallon, Pancake, Oil-Free with 13 Piece Accessory Kit
The CRAFTSMAN 6-Gallon Pancake Air Compressor is an affordable and versatile option, especially appealing to those who appreciate a complete package. What sets it apart is the included 13-piece accessory kit, providing everything you need to get started right away. The oil-free pump design ensures low maintenance, and the pancake design makes it relatively compact for easy storage in your RV. The compressor’s design is also focused on portability, making it easy to move around your RV or campsite.
The 6-gallon tank provides adequate air for blowing out water lines, and the included accessories cover a variety of tasks. While some users might find the individual component quality slightly lower than premium brands, the overall value of the CRAFTSMAN is undeniable. It’s a great choice for RVers who want a convenient and budget-friendly solution for winterizing their rigs.
Why Use an Air Compressor to Winterize Your RV?
Imagine this: winter’s icy grip is tightening, and you’re dreaming of your next RV adventure, not a burst pipe and a costly repair bill. That’s where an air compressor comes in. Winterizing your RV’s plumbing is crucial to prevent freezing water from expanding and cracking pipes, fittings, and even appliances. Blowing out the water lines with compressed air is a simple, effective, and often the most cost-effective way to ensure your RV is protected from the damaging effects of freezing temperatures.
Why not just drain the system? While draining is a good first step, water can still linger in low points and crevices within your plumbing system. This residual water is enough to cause significant damage when it freezes. Using an air compressor to force out this remaining water provides a much more thorough and reliable winterization process, giving you peace of mind knowing your RV is truly protected throughout the winter months.
Think of it like this: using an air compressor is like having an insurance policy against plumbing disasters. The “best air compressors to blow out RV water lines” aren’t about fancy features; they’re about reliability, ease of use, and the right pressure to do the job safely. They’re an investment in preventing headaches and expensive repairs down the road, letting you focus on planning your future adventures instead of dealing with frozen pipe catastrophes.
Ultimately, the convenience and security offered by using an air compressor for winterizing your RV is well worth the investment. Instead of stressing about potential freeze damage all winter, you can relax knowing you’ve taken the necessary steps to protect your investment and ensure your RV is ready for your next grand escape. Consider researching the “best air compressors to blow out RV water lines” and add one to your RV maintenance toolkit this season!
Essential Tools for RV Winterization
RV winterization is crucial to prevent costly damage from freezing temperatures. Think of burst pipes and cracked fittings – not a pretty sight, or a cheap repair! Using an air compressor to blow out your water lines is a highly effective and preferred method for removing residual water that could freeze. It’s far more reliable than simply draining the system, which can often leave pockets of water trapped in low points.
Besides an air compressor, several other tools can make the winterization process smoother and more effective. A water heater bypass kit is essential to prevent filling your water heater with antifreeze, saving you money and effort. A blow-out plug that connects to your city water inlet is also a must-have for easy connection to your compressor.
Don’t forget the basics like RV antifreeze, wrenches, and screwdrivers. Having these readily available will prevent frustrating trips to the hardware store mid-winterization. Proper planning and the right tools will ensure a stress-free winter and a ready-to-go RV in the spring.
Consider investing in a small, portable shop vacuum as well. This can be handy for sucking out the last remaining bits of water from faucets and showerheads, ensuring a complete clear-out of your plumbing system. A little extra effort now will save you big headaches later.
Understanding Air Pressure and Flow
Choosing the right air compressor involves understanding air pressure (PSI) and airflow (CFM). PSI, or pounds per square inch, refers to the force of the air, while CFM, or cubic feet per minute, measures the volume of air delivered. For RV winterization, you don’t need extremely high PSI; typically, 30-40 PSI is sufficient.
The crucial factor is CFM. You need enough airflow to effectively push water through your entire plumbing system. A compressor with a low CFM might take a very long time or struggle to clear all the lines, especially in larger RVs with more complex plumbing. Think of it like trying to clear a garden hose with a gentle puff versus a strong blast of air.
Pay attention to the compressor’s duty cycle, too. This indicates how long the compressor can run continuously before needing to cool down. A longer duty cycle is preferable for larger RVs where you might be blowing out lines for an extended period. Overheating can damage the compressor, shortening its lifespan.
Also, consider the tank size. A larger tank provides a buffer, allowing the compressor to deliver a more consistent flow of air. This is particularly helpful when blowing out multiple lines sequentially. It prevents the pressure from dropping significantly during the process, ensuring a thorough clearing.
Step-by-Step Guide to Blowing Out RV Water Lines
The first step is to drain your RV’s water heater and fresh water tank completely. Locate the drain plugs and open them, allowing gravity to do its work. Don’t forget to open all faucets and showerheads (both hot and cold) to help vent the system and speed up the draining process.
Next, install the blow-out adapter to your RV’s city water inlet. Connect your air compressor and set the regulator to around 30-40 PSI. It’s crucial to avoid excessive pressure, which could damage your plumbing. Start with the faucet furthest from the city water inlet and open it, allowing the air to push out any remaining water.
Work your way through each faucet, showerhead, and toilet, repeating the process until only air comes out. Don’t forget to flush the toilet a few times to ensure the water line to the toilet bowl is cleared. Remember to pay attention to the water heater bypass – make sure it’s properly bypassed so you’re not filling the water heater with air.
Finally, pour RV antifreeze into your P-traps (the curved pipes under your sinks and showers) to prevent them from freezing and cracking. This is a crucial step often overlooked. A little antifreeze in these low points will provide extra protection. Now you’re nearly done!
Maintaining Your Air Compressor for Longevity
Proper maintenance is key to extending the lifespan of your air compressor. Regularly drain the moisture from the tank. Compressed air naturally contains moisture, which can condense inside the tank and lead to rust and corrosion. Most compressors have a drain valve at the bottom of the tank. Open it after each use to release the accumulated water.
Check and clean the air filter regularly. A dirty air filter restricts airflow, making the compressor work harder and reducing its efficiency. A clean filter also prevents contaminants from entering the compressor, protecting its internal components. Refer to your compressor’s manual for specific instructions on cleaning or replacing the air filter.
Lubricate the compressor as needed, especially if you have an oil-lubricated model. Check the oil level regularly and top it off with the recommended type of oil. Lubrication reduces friction and wear, ensuring smooth operation and extending the compressor’s life. A dry-running compressor can quickly suffer irreparable damage.
Store your air compressor in a clean and dry place. Avoid exposing it to extreme temperatures or moisture. A garage or shed is usually a good option. Cover the compressor to protect it from dust and debris. Proper storage will prevent corrosion and other damage, ensuring it’s ready for use when you need it.
Best Air Compressors To Blow Out Rv Water Lines: A Comprehensive Buying Guide
So, you’re looking for the best air compressors to blow out RV water lines, eh? Smart move! Winterizing your RV is crucial to prevent burst pipes and expensive repairs. Using an air compressor to clear out the water is a safe, effective, and relatively easy way to do it. But with so many options out there, choosing the right compressor can feel overwhelming. Don’t worry; I’m here to help you navigate the world of air compressors and find the perfect one for your RV winterizing needs. Think of me as your friendly neighborhood RV guru, ready to share some practical advice.
First off, let’s dive into the key factors that will help you make the best decision. We’ll talk about everything from tank size to portability, ensuring you get a compressor that’s not only powerful enough but also convenient to use and store in your RV. By the end of this guide, you’ll be equipped with the knowledge to confidently select the ideal air compressor for keeping your RV water lines safe and sound all winter long!
Tank Size: Bigger Isn’t Always Better (But Sometimes It Is!)
The tank size of an air compressor directly impacts how consistently you can blow out your RV water lines. A larger tank means more stored air, allowing for longer run times and fewer interruptions to refill. For RV winterizing, this translates to being able to clear out longer stretches of plumbing without needing to pause and wait. Imagine trying to blow out a particularly stubborn section of pipe – a larger tank can give you that extra burst of air you need to get the job done in one go.
However, bigger isn’t always better, especially when space is a premium. RVs are notorious for their limited storage. A huge tank might be overkill if you only have a small RV with a simple plumbing system. Plus, a larger tank means more weight, making it less portable and potentially a pain to lug around. You’ll want to strike a balance between sufficient air capacity and manageable size and weight. A smaller tank might be perfectly adequate for smaller RVs, and you can always pause to let it refill, whereas larger rigs might require a bigger tank for maximum efficiency.
PSI (Pounds per Square Inch): Finding the Goldilocks Zone
PSI, or pounds per square inch, measures the air pressure that the compressor can generate. For blowing out RV water lines, you don’t need a super high PSI like you would for running heavy-duty tools. In fact, too much pressure can damage your RV’s plumbing! Think of it like this: you’re trying to gently push the water out, not blast it through with brute force.
Aim for a compressor with an adjustable regulator so you can control the output pressure. Somewhere between 30 and 40 PSI is generally considered safe and effective for RV water lines. It’s enough to clear the water without risking damage to pipes or fittings. This is where the ‘Goldilocks Zone’ comes in – not too high, not too low, but just right. So, before you crank up the PSI, always check your RV’s manual or consult with a professional to determine the recommended pressure for your specific plumbing system.
CFM (Cubic Feet per Minute): The Speed at Which You Get the Job Done
CFM, or cubic feet per minute, indicates the volume of air the compressor can deliver at a specific pressure. It essentially determines how quickly the compressor can get the job done. A higher CFM means more air is being pushed through your RV’s water lines per minute, potentially leading to faster and more efficient winterizing. Imagine trying to inflate a tire with a tiny hand pump versus a powerful electric one – that’s the difference CFM makes.
However, for simply blowing out RV water lines, you don’t need a ridiculously high CFM. Focus more on having consistent pressure at a moderate CFM. Overspending on a high-CFM compressor might be unnecessary and add to the cost and size of the unit. A compressor that delivers around 2.0 CFM at 40 PSI should be more than adequate for most RVs. The key is to ensure the compressor can maintain that CFM consistently while you’re working, preventing frustrating drops in pressure and ensuring a thorough winterization.
Oil-Free vs. Oil-Lubed: Weighing the Pros and Cons
Oil-free and oil-lubed compressors both have their advantages and disadvantages. Oil-free compressors are generally more popular for RV applications due to their lower maintenance requirements. You don’t have to worry about checking and changing the oil, making them more convenient, especially when you’re on the road. They are also usually lighter and less expensive than their oil-lubed counterparts.
On the other hand, oil-lubed compressors tend to be more durable and quieter in operation. They can also often handle longer run times without overheating. However, they require more maintenance, including regular oil changes, and can be heavier and bulkier. For blowing out RV water lines, the extra durability and noise reduction of an oil-lubed compressor are generally not necessary. The convenience and lower maintenance of an oil-free model usually make it the better choice for most RVers.
Portability: Easy to Move and Store
Portability is a critical factor when choosing an air compressor for your RV. RVs are already packed tight, so you need a compressor that’s easy to move around and doesn’t take up too much storage space. Consider the weight and dimensions of the compressor, as well as whether it has a convenient handle or wheels for easy transport.
Look for a compressor that’s lightweight and compact enough to fit in your RV’s storage compartment without too much hassle. A model with a comfortable handle or even wheels can make a big difference when you’re maneuvering it around your RV or campsite. If you have limited storage space, a smaller, pancake-style compressor might be the best option. Remember, the easier it is to move and store, the more likely you are to actually use it for regular maintenance and winterizing.
Noise Level: Keeping the Peace with Your Neighbors
Air compressors can be notoriously noisy, which can be a concern, especially if you’re camping in close quarters with other RVers. A loud compressor can disrupt the peace and quiet of the campground, potentially leading to complaints from your neighbors. Consider the noise level of the compressor before you buy it, especially if you plan to use it in areas where noise is a concern.
Many manufacturers now list the decibel (dB) level of their compressors. Look for a model that’s rated at 80 dB or lower for quieter operation. Some compressors even feature noise-reduction technology to minimize the disturbance. Think about it: you want to enjoy the tranquility of nature, not be drowned out by the roar of your compressor. A quieter compressor will not only keep your neighbors happy but also make your RV experience more enjoyable overall.
Accessories: The Extras That Make a Difference
Beyond the compressor itself, consider the accessories included and whether they meet your needs for blowing out RV water lines. Some compressors come with a basic air hose, while others include a variety of fittings, nozzles, and even a tire inflator. Think about what you’ll need to connect the compressor to your RV’s water system.
A must-have accessory is a blow-out adapter that connects directly to your RV’s city water inlet. This adapter allows you to easily introduce compressed air into the water lines. Make sure the compressor you choose is compatible with this type of adapter. Also, consider the length of the air hose included. A longer hose can provide greater flexibility and reach, allowing you to move around your RV more easily. While accessories can often be purchased separately, it’s often more cost-effective to buy a compressor that includes the necessary accessories upfront. Investing in the best air compressors to blow out RV water lines isn’t just about the unit itself; it’s about having all the right tools for the job.
FAQ
Why is it important to blow out RV water lines before winter?
Well, imagine leaving water sitting inside those pipes all winter long when temperatures drop below freezing! Water expands when it freezes, and that expansion can cause serious damage to your RV’s plumbing. We’re talking cracked pipes, burst fittings, and potentially expensive repairs. Prevention is definitely key here.
Blowing out your water lines ensures you remove most of the water, minimizing the risk of freezing and subsequent damage. Think of it as an inexpensive insurance policy for your RV’s plumbing system. It’s a simple task that can save you a lot of headaches and money down the road, allowing you to enjoy stress-free camping next season.
What size air compressor do I need to blow out RV water lines?
You don’t need anything super powerful! A small, portable air compressor, something around 3 to 6 gallons, should do the trick just fine. The key isn’t about having a huge tank capacity; it’s about maintaining a consistent, regulated air pressure.
Most RV plumbing systems are designed to handle a pressure between 30 and 40 PSI, so look for a compressor that can deliver that within a controlled range. A larger compressor might be overkill, and you definitely don’t want to use high pressure as that could actually damage your RV’s plumbing. It’s always best to start low and increase gradually until the water is cleared.
What PSI should I set my air compressor to when blowing out RV water lines?
This is a really important question! You want to aim for a pressure between 30 and 40 PSI. It’s crucial to stay within this range to avoid damaging your RV’s plumbing system. Remember, more pressure doesn’t necessarily mean better results; it can actually be harmful.
Start with a lower PSI, say around 30, and gradually increase it if you’re not seeing the water clear out effectively. Keep a close eye on your pressure gauge and never exceed 40 PSI. Gentle and consistent air pressure is the key to safely and effectively winterizing your RV’s water lines.
Can I use an air compressor that I use for my car tires to blow out RV water lines?
Absolutely, you can! As long as the air compressor can regulate its pressure and deliver between 30 and 40 PSI, it should work perfectly fine for blowing out your RV water lines. Most tire compressors are capable of this, but always double-check the specifications to be sure.
The only potential drawback might be the tank size. A smaller tire compressor might need to run more frequently to maintain the desired pressure, but it’s still a viable option, especially if you already own one. Just be patient, let the compressor run as needed, and take your time to ensure all the water is cleared from the lines.
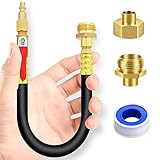
What fittings and adapters do I need to connect my air compressor to my RV’s water system?
You’ll generally need an adapter that connects your air compressor’s air hose to your RV’s city water inlet. These adapters are typically made of brass or plastic and have a standard quick-connect fitting on one end and a male or female garden hose thread on the other.
You can easily find these adapters at most RV supply stores or online. Look for one specifically designed for winterizing RV water lines. Having a few different sizes and thread types on hand can also be helpful, just in case. A small roll of Teflon tape is also a good idea to ensure a tight, leak-free connection.
How do I know when all the water is out of the lines?
That’s a great question! You’ll know the water lines are mostly clear when you see a steady stream of air coming out of each faucet and showerhead, rather than water. It may sputter a bit at first, but the sputtering should eventually stop and be replaced by a consistent flow of air.
Also, don’t forget to flush the toilet a few times to ensure the water is removed from the toilet valve and line. Even after you see air coming out, it’s always a good idea to add RV antifreeze to the P-traps and drain lines to protect them from freezing. It’s better to be safe than sorry!
Is it safe to drink the water after blowing out the lines with an air compressor?
While blowing out the lines with an air compressor helps remove most of the water, it’s still recommended to sanitize your RV’s water system before your next camping trip. Tiny amounts of moisture and potential contaminants can still remain.
Sanitizing is a simple process that involves flushing your system with a bleach solution, followed by a thorough rinsing. This ensures that your water is fresh and safe for drinking and cooking. You can easily find instructions and guidance on how to sanitize your RV water system online or in your RV’s owner’s manual.
The Bottom Line
Now you’re armed with the knowledge to find the best air compressors to blow out RV water lines and wave goodbye to those winterizing worries! Think of the peace of mind knowing your plumbing is protected, ready to go when adventure calls. No more stressing about potential bursts or frozen pipes – you’ve got this! Get out there and find the perfect compressor that fits your needs and budget; you’re taking a proactive step towards carefree travels.
Choosing the right air compressor is more than just a practical task; it’s an investment in your RV’s longevity and your travel freedom. Don’t be intimidated by the options; you’ve got the insights to pick a winner. Go ahead, select your champion from the list and get ready to confidently tackle winterizing, season after season! Your RV will thank you.