So, you’ve just embarked on a woodworking project, maybe a charming birdhouse or a stylish bookshelf. Everything is going smoothly, the cuts are precise, the wood is beautifully grained, and then… disaster strikes! The glue you grabbed at the last minute just isn’t holding. Suddenly, your dream creation is teetering precariously, and frustration sets in. We’ve all been there, struggling to find the right adhesive that can truly bond wood surfaces together seamlessly. That’s why we’ve put together this comprehensive guide to help you navigate the often confusing world of wood glues.
Choosing the best adhesives for wood doesn’t have to be a daunting task. Whether you’re a seasoned craftsman or a weekend DIY enthusiast, understanding the different types of wood glues and their specific applications is key to achieving strong, durable, and professional-looking results. In this article, we’ll dive deep into the various options available, providing detailed reviews and a handy buying guide to help you select the perfect adhesive for your next woodworking adventure.
Before moving into the review of the best adhesives for wood, let’s check out some of the relevant products from Amazon:


Last update on 2026-01-03 / #ad / Affiliate links / Images from Amazon Product Advertising API
Choosing the Right Glue: A Woodworker’s Sticky Situation
Ever felt lost in a sea of glue bottles at the hardware store? You’re not alone! Finding the best adhesives for wood can feel like deciphering a secret code. There’s yellow glue, white glue, epoxy, polyurethane – the list goes on. It’s enough to make any woodworker, from the seasoned pro to the weekend hobbyist, feel a bit overwhelmed. But fear not, consider this your friendly guide to navigating the sticky world of wood glue!
Woodworking projects are all about precision and durability, and the glue you choose plays a massive role in both. Think about it: that beautiful dovetail joint or intricately carved tabletop relies on the bond created by your adhesive. The global adhesives market is projected to reach over $70 billion by 2028, which speaks volumes about the importance of strong and reliable bonds in various industries, including woodworking. Choosing wisely ensures your projects stand the test of time and aren’t destined to fall apart at the first sign of stress.
So, how do you pick the perfect adhesive for your project? Well, it starts with understanding the different types of glues available and their unique characteristics. Each adhesive has its strengths and weaknesses, making it suitable for specific applications. We’ll dive into the pros and cons of each type, covering everything from work time and clamp time to water resistance and gap-filling abilities.
By the end of this guide, you’ll be well-equipped to choose the best adhesives for wood for your specific needs, whether you’re building furniture, crafting smaller projects, or tackling home repairs. We’ll help you cut through the confusion and empower you to create strong, lasting bonds that will make your woodworking projects shine. Let’s get started!
Best Adhesives For Wood – Reviews
Titebond III Ultimate Wood Glue
Titebond III is a real workhorse in the woodworking world, and for good reason. It boasts impressive strength, offering a bond that’s often stronger than the wood itself. What truly sets it apart is its waterproof nature. This isn’t just water-resistant; it’s actually waterproof after curing, making it ideal for outdoor projects or anything that might be exposed to moisture. Think outdoor furniture, cutting boards, or even boat repairs!
Beyond its strength and waterproof capabilities, Titebond III is also incredibly user-friendly. It has a relatively long open time, giving you ample opportunity to position your pieces precisely. Cleanup is a breeze with just water while it’s still wet. It’s also FDA approved for indirect food contact, adding to its versatility for projects around the kitchen. It can be a bit more expensive than some other options, but the peace of mind and durability it provides make it a worthwhile investment.
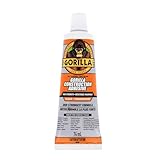
Gorilla Wood Glue
Looking for a glue that’s incredibly strong and sets quickly? Gorilla Wood Glue could be your new best friend. Known for its tenacious grip, it’s fantastic for projects requiring a reliable hold in a shorter timeframe. It’s also sandable and paintable, making it easy to seamlessly integrate into any project. Plus, it’s a PVA glue, meaning cleanup is simple with just water.
However, while Gorilla Wood Glue offers incredible strength, it’s not completely waterproof like Titebond III. It’s water-resistant, so it can handle some moisture exposure, but it’s best suited for indoor projects or outdoor projects with adequate protection. It also tends to foam slightly as it dries, so you might need to be a bit more careful about clamping and clean-up to prevent squeeze-out from becoming too noticeable. Still, for general woodworking and tight bonds, it’s a solid choice.
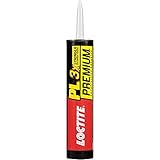
Loctite PL Premium Polyurethane Construction Adhesive
Loctite PL Premium is the king of tough jobs and heavy-duty bonding. This isn’t just for wood; it’s a construction adhesive, meaning it’s designed to bond just about anything to anything. Think bonding wood to concrete, metal, or even plastic. It creates a bond that is incredibly strong, flexible, and waterproof. It can handle extreme temperatures and vibrations, making it ideal for projects that need to withstand a lot of abuse.
While its strength and versatility are impressive, Loctite PL Premium is definitely not your average wood glue. It’s a polyurethane adhesive, which means it expands as it cures, filling gaps and imperfections. This can be both a blessing and a curse. On one hand, it’s great for uneven surfaces. On the other hand, cleanup can be messy, and it requires mineral spirits. It also takes longer to cure fully compared to PVA glues. However, for projects that demand ultimate strength and durability, it’s hard to beat.
Elmer’s Carpenter’s Wood Glue
Elmer’s Carpenter’s Wood Glue is the classic, reliable choice that’s been around for ages, and for good reason. It’s an all-purpose PVA glue that’s affordable, readily available, and easy to use. It creates a strong bond on most wood types, making it perfect for general woodworking projects around the house. Plus, cleanup is a breeze with just water, which is always a bonus.
While Elmer’s Carpenter’s Wood Glue is a great all-around glue, it’s important to note that it’s not waterproof or even particularly water-resistant. It’s best suited for indoor projects that won’t be exposed to moisture. Also, its strength might not be as high as some of the other specialized wood glues on the market. However, for everyday woodworking tasks and simple repairs, it’s a fantastic and budget-friendly option.
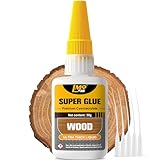
Starbond EM-150 Medium Premium CA Glue
Need a super-fast bond? Starbond EM-150 is your answer. This is a cyanoacrylate (CA) glue, also known as super glue, but formulated specifically for woodworking. It’s perfect for those situations where you need an instant hold, like assembling small parts, filling gaps, or making quick repairs. It’s also great for stabilizing wood that’s prone to cracking or splitting.
While Starbond EM-150 is incredibly fast and convenient, it’s important to remember that it’s not the strongest option for structural bonding. It’s also brittle and can be prone to cracking under stress. Additionally, cleanup can be tricky, and it’s essential to wear gloves and eye protection when working with CA glue. It does require a well-ventilated work area due to its fumes. For quick fixes and detail work, though, it’s an invaluable addition to any woodworker’s arsenal.
Why People Need to Buy Adhesives for Wood
Imagine building a beautiful bookshelf, carefully cutting each piece of wood and envisioning the final product holding your treasured novels and family photos. Now, imagine relying solely on nails or screws. While they offer some hold, they can split the wood, leave unsightly holes, and lack the seamless, professional finish you desire. This is where the best adhesives for wood come into play. They create a strong, invisible bond, distributing stress evenly across the joint, minimizing the risk of splits and providing a far more aesthetically pleasing result.
Think about crafting a delicate wooden toy for your child. You wouldn’t want any sharp edges or visible fasteners that could pose a safety hazard, would you? Using the best wood glue allows you to create smooth, rounded edges, seamlessly joining pieces without any protruding hardware. This not only enhances the toy’s appearance but also ensures your child’s safety. Moreover, certain adhesives are specifically formulated to be non-toxic, providing peace of mind knowing your project is safe for your loved ones.
Beyond aesthetics and safety, wood adhesives offer superior strength and durability compared to mechanical fasteners alone. Whether you’re repairing a wobbly chair leg, assembling a sturdy garden planter, or constructing intricate woodworking projects, the right adhesive will ensure a long-lasting bond that can withstand stress, moisture, and temperature fluctuations. Choosing the best adhesives for wood means investing in the longevity of your creations, preventing future repairs and saving you money in the long run.
Ultimately, buying adhesives for wood isn’t just about sticking pieces together; it’s about creating strong, beautiful, and lasting projects. It’s about achieving professional results that showcase your craftsmanship and bring your woodworking visions to life. From simple repairs to complex constructions, having the right wood adhesive in your toolkit empowers you to tackle any woodworking challenge with confidence and create pieces that will be cherished for years to come.
Understanding Wood Glue Types: A Practical Guide
Think of wood glue like ingredients in a recipe – using the wrong one can ruin the whole dish, or in this case, the woodworking project. Yellow glue, or aliphatic resin, is your everyday workhorse. It’s affordable, strong enough for most indoor projects like building shelves or assembling furniture, and cleans up easily with water. However, remember that it’s not water-resistant, so outdoor applications are a no-go.
Polyurethane glue is like the duct tape of wood adhesives. It bonds almost anything to anything, including wood, metal, and plastic. It’s waterproof, making it great for outdoor projects like building a picnic table or repairing a leaky birdhouse. Be warned: it expands as it cures, so clamp your pieces tightly and be ready to scrape away the excess squeeze-out.
Epoxy is your heavy-duty adhesive when you need the strongest bond possible and gap-filling capabilities. It’s great for demanding projects like repairing a boat or restoring antique furniture where joints might not be perfectly fitted. Unlike other glues, it’s a two-part system – a resin and a hardener that must be mixed precisely. Mixing ratios are critical, so follow the manufacturer’s instructions religiously.
Contact cement isn’t technically a glue for structural bonding, but it’s invaluable for applying veneers or laminates to wood surfaces. It’s applied to both surfaces, allowed to dry, and then brought together. Because it bonds on contact, precise alignment is crucial. A common use case is re-veneering an old dresser, giving it a fresh, updated look.
Preparing Surfaces for Optimal Bonding
Surface preparation is the unsung hero of successful wood gluing. Imagine trying to paint a dusty car – the paint won’t stick properly, right? Similarly, dirt, grease, or old finish can prevent glue from forming a strong bond with the wood. Always start by cleaning the wood surfaces with a clean cloth and mineral spirits or denatured alcohol to remove any contaminants.
Sanding is your next best friend. Smooth, even surfaces provide more contact area for the glue to adhere to. Use progressively finer grits of sandpaper, starting with something like 120-grit to remove imperfections and finishing with 220-grit for a smooth surface. If you’re gluing end grain, which is notoriously difficult to bond, scoring the surface lightly with a knife or coarse sandpaper can provide a better “tooth” for the glue to grab onto.
A good fit is paramount. Glue isn’t designed to fill large gaps. If your joints are sloppy, the glue joint will be weak, and the project will be unstable. Take your time and ensure your pieces fit together snugly. If gaps are unavoidable, consider using a gap-filling epoxy or a shim. You can think of gluing like a perfect relationship – the better the fit, the stronger the bond.
Moisture content matters, too. Wood expands and contracts with changes in humidity. Gluing together pieces with vastly different moisture content can lead to joint failure as the wood acclimates. Ideally, the wood should be around the same moisture content before gluing. Consider acclimating the wood in the same environment as your project will live in for a few days prior to assembly.
Clamping Techniques for Strong Joints
Clamping isn’t just about holding things together; it’s about applying consistent pressure to ensure a tight bond as the glue cures. Think of it like giving a firm handshake – you want to convey strength and stability. Start by using a variety of clamps to distribute pressure evenly across the joint. Bar clamps are great for long pieces, while pipe clamps can apply a lot of force. Spring clamps are handy for smaller, delicate projects.
Protect your wood from clamp marks! Place scrap wood pieces between the clamp jaws and your project to prevent dents and impressions. Softer woods are especially susceptible to damage, so use wider scrap pieces for better protection. You don’t want to spend hours carefully assembling a piece of furniture only to mar the finish with unsightly clamp marks.
Don’t overtighten the clamps. Applying too much pressure can squeeze out too much glue, leaving a “starved” joint that is weak. A thin, even layer of glue is what you’re aiming for. The ideal amount of pressure will depend on the type of glue and the wood being used, but a good rule of thumb is to tighten the clamps until you see a small bead of glue squeeze out along the joint line.
Consider the clamping time recommended by the glue manufacturer. Each type of glue has a recommended clamping time, which is the minimum amount of time the glue needs to be under pressure to form a strong bond. Leaving the clamps on for longer than recommended won’t hurt, but removing them too soon can compromise the joint’s integrity. Be patient, resist the urge to rush, and allow the glue to cure fully.
Troubleshooting Common Wood Glue Problems
Glue starvation, where there’s not enough glue in the joint, is a frequent culprit behind weak bonds. This can happen if the glue is applied too thinly, if the wood is too porous and absorbs the glue too quickly, or if the clamps are overtightened and squeeze out too much glue. Always apply a generous, even layer of glue, and consider using a glue size on porous woods to seal the surface before applying the final coat of glue.
Glue squeeze-out is inevitable, but excessive squeeze-out can be a sign of too much glue or too much clamping pressure. While a little squeeze-out is good (it indicates a well-saturated joint), too much can make cleanup a hassle. Wipe away the excess glue with a damp cloth before it dries, or scrape it off carefully with a chisel or scraper after it hardens.
Curing issues can arise from temperature and humidity fluctuations. Most wood glues require a specific temperature range to cure properly. If the temperature is too cold, the glue may not cure fully, resulting in a weak bond. Conversely, high humidity can slow down the curing process. Try to maintain a stable temperature and humidity level in your workspace during the curing period.
Joint failure after assembly is the woodworking equivalent of a nightmare. If your joints are failing, revisit your entire process. Were the surfaces properly prepared? Was the right type of glue used? Was sufficient clamping pressure applied? Did the glue have enough time to cure? Identifying the root cause of the failure is crucial to preventing it from happening again. Sometimes, it may be necessary to disassemble the joint, clean off the old glue, and start over.
Finding Your Perfect Match: A Buying Guide to the Best Adhesives for Wood
Hey there, fellow woodworker! Picking the right glue for your woodworking projects can feel like navigating a jungle of options. From simple household repairs to intricate furniture builds, the strength and durability of your adhesive are paramount. We’ve all been there – a seemingly solid joint failing weeks after completion, leaving you frustrated and starting over. This guide is here to help you choose the best adhesives for wood, ensuring your creations stand the test of time and your projects turn out exactly as envisioned. Think of me as your friendly neighborhood wood glue expert, ready to share some knowledge and help you make the right decision!
Understanding Your Project’s Needs: Matching Glue to Task
Before diving into specific adhesive types, it’s crucial to consider the intended use of your project. Are you building a robust outdoor deck that will be exposed to the elements, or are you crafting a delicate jewelry box for indoor display? The demands placed on the bond will drastically influence the ideal glue choice. Consider the type of wood being used, the intended load-bearing capacity, and the overall aesthetic you’re aiming for. A mismatch between glue and project requirements can lead to premature failure, wasted materials, and a lot of unnecessary headaches.
Think of it like this: you wouldn’t use a tiny tack to hang a heavy picture frame, would you? Similarly, a weak wood glue won’t hold up under the stresses of an outdoor environment. Spending a little time upfront to analyze your project’s specific needs will save you time, money, and frustration in the long run. Identify the weaknesses and stresses on the joint. Once you have a good understanding of your project needs, you will be able to pick the best adhesives for wood for your needs.
Strength is Key (But Not the Only Thing!)
Let’s face it: when it comes to wood glue, strength is a major player. You want your joints to hold tight and withstand the test of time. Different adhesives offer varying levels of strength, measured in pounds per square inch (PSI). Higher PSI values generally indicate a stronger bond, but it’s not always a simple “more is better” scenario. Consider the type of stress your joint will endure – shear, tension, or compression – and choose an adhesive rated appropriately.
Don’t fall into the trap of thinking that the strongest glue is always the best choice. Sometimes, flexibility and impact resistance are more important than sheer strength, especially in projects that will experience movement or vibrations. For example, a flexible adhesive might be better suited for building a rocking chair than a rigid, high-strength one. The best adhesives for wood are strong, but also take into account any additional requirements, such as flexibility.
Open Time vs. Set Time: Your Working Pace Matters
Open time refers to the amount of time you have to position and clamp your pieces together after applying the adhesive. Set time is how long the glue takes to initially grab and hold the pieces in place. These two factors are important for considering your experience and pace in woodworking. If you are working on a complex assembly that requires precise alignment, a glue with a longer open time will be your best friend. On the other hand, if you need a quick turnaround on a small project, a fast-setting adhesive might be preferable.
Imagine trying to assemble a complicated puzzle with glue that dries in seconds – chaos! Conversely, waiting hours for glue to set on a simple box can be a real time-killer. Pay attention to the open time and set time specifications of the adhesive you’re considering and choose one that aligns with your working style and project complexity. Consider how long you have to work, and the best adhesives for wood will be apparent.
Water Resistance: Indoor vs. Outdoor Projects
If your woodworking project will be exposed to moisture, water resistance becomes a crucial factor. Adhesives are typically classified as either water-resistant or waterproof. Water-resistant glues can withstand occasional exposure to moisture, such as humidity or spills, but they are not suitable for prolonged submersion or outdoor use. Waterproof glues, on the other hand, can withstand constant exposure to water without losing their bonding strength.
Building a birdhouse that will sit outdoors in the rain? You’ll definitely need a waterproof adhesive. Constructing a bookshelf for your living room? A water-resistant glue should suffice. Remember, choosing the wrong type of glue can lead to delamination and eventual failure of your project. Always err on the side of caution and select an adhesive with a higher level of water resistance than you think you need, especially for outdoor projects. The best adhesives for wood for outdoor use need to be waterproof.
Cleanup Crew: Ease of Use and Clean-Up
Let’s be honest, nobody enjoys spending hours scrubbing glue off their tools and workbench. The ease of use and cleanup of an adhesive is a factor worth considering, especially if you value a clean and efficient workspace. Some glues are easily cleaned up with water, while others require solvents. Consider the mess potential and your preferred cleaning methods when making your selection.
A water-based glue might be ideal for beginners due to its ease of cleanup. Solvent-based adhesives can be a bit more challenging to work with but often offer superior strength and water resistance. Factor in the time and effort required for cleanup, as well as the environmental impact of the cleaning agents, to make an informed decision. The best adhesives for wood don’t just perform well, they are relatively easy to clean up.
Gap Filling Ability: Imperfections Happen
Even with the best woodworking skills, imperfections can creep into your joints. A glue’s gap-filling ability refers to its capacity to bridge small gaps between surfaces and still maintain a strong bond. Some adhesives are designed to fill gaps, while others require perfectly tight-fitting joints. If you anticipate minor imperfections in your project, a gap-filling adhesive can be a lifesaver.
Imagine trying to glue together two pieces of wood with a slight warp – a gap-filling glue can help bridge the void and create a solid connection. However, it’s important to note that gap-filling adhesives typically don’t achieve the same level of strength as those used on tight-fitting joints. They are best suited for situations where perfect precision is difficult to achieve. The best adhesives for wood for your needs might be dependent on the gaps that need filling.
Cost vs. Value: Finding the Sweet Spot
While price shouldn’t be the only determining factor, it’s certainly a consideration. Adhesives vary significantly in cost, and it’s important to strike a balance between price and performance. Cheaper glues may seem appealing at first, but they might compromise strength, durability, or water resistance, ultimately costing you more in the long run.
Think of it as an investment in your project. Spending a bit more on a high-quality adhesive can ensure the longevity and stability of your work, saving you from potential repairs or replacements down the road. Research different brands, read reviews, and compare prices to find the sweet spot between cost and value that aligns with your budget and project requirements. Weigh the benefits of each brand and consider the price point to get the best adhesives for wood at a price you are comfortable paying.
Frequently Asked Questions
What types of wood glue are best for different projects?
That’s a great question! The best glue really depends on what you’re building. For general woodworking, like furniture or cabinets, yellow woodworking glue (like aliphatic resin) is a solid, all-around choice. It’s strong, affordable, and easy to use. If you’re working outdoors or with projects that will be exposed to moisture, you definitely want to go with a waterproof glue like polyurethane or epoxy.
For more specialized projects, you might consider other options. Hide glue is fantastic for antique restoration because it’s reversible, which is essential for preserving historical pieces. Construction adhesive, on the other hand, is ideal for bonding wood to other materials like concrete or metal, and it offers excellent gap-filling capabilities. Think about the specific needs of your project – strength, water resistance, gap filling, and reversibility – and you’ll find the perfect match!
How do I properly prepare the wood surface before applying glue?
Proper surface preparation is absolutely key to a strong and lasting bond! You’ll want to make sure the wood is clean, dry, and free from any dust, dirt, oil, or grease. Use a clean cloth or tack cloth to wipe away any debris. If the wood is particularly oily, you might need to clean it with mineral spirits or a similar degreasing agent.
For best results, you should also ensure the surfaces are smooth and even. Lightly sanding the wood with medium-grit sandpaper (around 120-grit) will create a slightly roughened surface that the glue can really grip onto. Just be sure to wipe away the sanding dust before applying the glue. Remember, a little prep work goes a long way in ensuring a rock-solid bond!
How much glue should I apply? Is there such a thing as too much?
Applying the right amount of glue is important. Generally, you want to apply a thin, even layer to both surfaces you’re joining. The goal is to have enough glue to completely coat the wood fibers, but not so much that it creates a thick, gloppy mess. Too much glue can actually weaken the joint because it can prevent the wood fibers from coming into close contact.
Think of it like this: you want a continuous film of glue, not a pool of it. When you clamp the pieces together, you should see a slight squeeze-out of glue along the joint line. This indicates that you’ve applied enough glue and that it’s properly filling the gaps. Wipe away any excess glue immediately with a damp cloth to avoid staining or a difficult cleanup later.
How long should I clamp the wood after applying glue?
Clamping time is crucial! The recommended clamping time will vary depending on the type of glue you’re using and the specific conditions (temperature, humidity). Always refer to the manufacturer’s instructions on the glue bottle for the most accurate information.
As a general guideline, most yellow woodworking glues require a minimum of 30 minutes to an hour of clamping time, but it’s often best to leave it clamped for several hours, or even overnight, for maximum strength. For polyurethane glues, which expand as they cure, longer clamping times are usually recommended. Remember, patience is a virtue when it comes to woodworking!
What’s the best way to clean up excess glue?
Nobody likes a sticky mess, right? Cleaning up excess glue is easiest when the glue is still wet. A damp cloth or sponge is usually all you need to wipe away excess glue along the joint line. Be sure to rinse the cloth frequently to avoid spreading the glue around.
If the glue has already dried, you might need to use a scraper or chisel to remove it. Be careful not to damage the wood surface while scraping. For stubborn dried glue, you can try softening it with a damp cloth or a heat gun before scraping. Mineral spirits can also help to soften and remove some types of dried glue, but always test it in an inconspicuous area first to make sure it doesn’t damage the wood finish.
Are there any safety precautions I should take when working with wood glue?
Absolutely, safety first! While most wood glues are relatively safe, it’s always a good idea to take a few precautions. Always work in a well-ventilated area to avoid inhaling fumes. Some glues, especially polyurethane glues, can release isocyanates, which can be irritating to the respiratory system.
Wearing gloves is also a good idea to protect your skin from prolonged contact with the glue. If you get glue in your eyes, flush them immediately with plenty of water and seek medical attention if necessary. Always read and follow the manufacturer’s safety instructions on the glue bottle. And of course, keep glue out of reach of children and pets.
How do I store wood glue to keep it from drying out?
Proper storage is essential to keep your wood glue in tip-top shape! The most important thing is to seal the container tightly after each use to prevent the glue from drying out. Make sure the lid is properly closed and that there are no gaps that could allow air to enter.
Store the glue in a cool, dry place, away from direct sunlight and extreme temperatures. Avoid storing glue in freezing temperatures, as this can damage the glue and make it unusable. If you notice that your glue has become thick or lumpy, it’s probably dried out and needs to be replaced. A little care in storage will help your glue last longer and perform its best!
Final Thoughts
Alright, you’ve got the lowdown on choosing the best adhesives for wood for your next project. From the quick grab of cyanoacrylate to the gap-filling power of polyurethane, you’re equipped to tackle any woodworking challenge that comes your way. Think of the incredible things you can create – furniture that will last generations, intricate inlays that showcase your skill, or simple repairs that bring beloved pieces back to life. Now, go forth and create something amazing!
The power of wood joinery is now in your hands! Don’t be afraid to experiment, try out different adhesives, and discover what works best for your specific style and preferences. Remember, every master woodworker started somewhere. With the right knowledge and the best adhesives for wood, you’re well on your way to crafting projects you can be truly proud of. Get building and enjoy the process!