Remember that time you tried hanging that beautiful new mirror, only to end up with a lopsided disaster and a wall full of unnecessary holes? I certainly do! After far too many frustrating afternoons spent blindly hammering and hoping, I realized there had to be a better way to locate studs. That’s when I dove into the world of stud finders, specifically the ones with clear and easy-to-read displays. The good news is, there are many amazing options out there that take the guesswork out of finding those elusive wooden supports.
Choosing the right stud finder can feel overwhelming, especially with all the different features and models available. That’s why I’ve compiled this guide to help you find the best LCD stud finders for your needs. We’ll explore the top-rated models, discuss key features to consider, and answer frequently asked questions to ensure you make an informed decision. Say goodbye to wall damage and hello to perfectly hung décor!
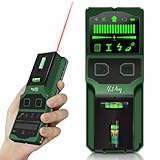
Before moving into the review of the best lcd stud finders, let’s check out some of the relevant products from Amazon:


Last update on 2026-05-26 / #ad / Affiliate links / Images from Amazon Product Advertising API
Finding Studs: A Modern-Day Treasure Hunt
Ever tried hanging a heavy picture or mounting a shelf, only to drill into thin air? We’ve all been there! Finding a stud can feel like a frustrating treasure hunt sometimes, leading to unnecessary holes and a whole lot of patching. But don’t despair! Technology has come to our rescue, transforming this chore into a much simpler task. We’re talking about stud finders, specifically those equipped with LCD screens.
Gone are the days of relying solely on tapping and guesswork. LCD stud finders use electronic sensors to detect changes in wall density, indicating the presence of a stud behind drywall, plaster, or even thicker materials. These gadgets offer a visual representation of the stud’s location, reducing the chance of errors. According to a recent survey, accuracy is the number one feature homeowners look for in a stud finder, and LCD models consistently rank high in user satisfaction for that very reason.
Why choose an LCD stud finder over other types? The clear display offers multiple benefits. Many models not only pinpoint the stud’s edges but also indicate its center, making drilling or nailing even more precise. Plus, the best lcd stud finders often feature additional functionalities, such as detecting live AC wires and metal pipes, turning them into versatile tools for any DIY enthusiast or professional contractor. This added functionality can help avoid costly and potentially dangerous mistakes.
So, if you’re ready to ditch the frustration and embrace a more accurate and efficient way of finding studs, you’re in the right place. This guide will help you navigate the world of stud finders, focusing specifically on the best lcd stud finders available today, ensuring your next home improvement project is a success from start to finish.
Top 5 Best Lcd Stud Finders
Zircon StudSensor HD55
Looking for a stud finder that’s reliable and easy to use? The Zircon StudSensor HD55 is a solid choice! This stud finder boasts a simple interface, making it a breeze to locate the edges of studs behind walls. It features two scanning modes: StudScan and DeepScan, allowing you to find studs through different wall thicknesses. The bright LCD screen clearly displays the stud’s edge and direction, reducing guesswork.
This model is particularly praised for its accuracy on standard drywall and consistent performance. The SpotLite Pointer shines a beam onto the wall to clearly indicate the target. The HD55 offers a solid foundation for your DIY projects, providing the confidence you need to hang pictures, shelves, and more without worrying about hitting a stud.
Franklin Sensors ProSensor 710+
The Franklin Sensors ProSensor 710+ stands out with its unique multi-sense technology. Unlike traditional stud finders that rely on a single sensor, this model uses an array of sensors to detect studs. This innovative approach provides a wider sensing area, identifying the entire stud at once rather than just the edges. The result is faster and more accurate stud detection, especially beneficial for larger projects.
With its large, easy-to-read display that illuminates the entire stud, it eliminates any ambiguity. The ProSensor 710+ is exceptionally effective at finding studs behind various wall types, including lath and plaster, where traditional stud finders can struggle. Its ease of use and advanced sensing technology make it a great choice for both homeowners and professionals.
Bosch DMS40 Digital Multi-Scanner
The Bosch DMS40 Digital Multi-Scanner is a versatile tool for detecting studs, metal, and live wires. This scanner offers a range of modes, allowing you to tailor its performance to the specific material you’re trying to locate. The illuminated display is clear and provides easy-to-understand information, including a visual indication of the object’s location and depth.
What sets the DMS40 apart is its ability to differentiate between different materials, helping to avoid false positives. It gives readings for wood, metal, and live AC wiring. Its robust construction and user-friendly interface make it a valuable addition to any toolbox. If you’re looking for a comprehensive scanning solution, the Bosch DMS40 is an excellent option.
CH Hanson Magnetic Stud Finder
The CH Hanson Magnetic Stud Finder is a simple yet effective tool that relies on magnets to locate metal fasteners within studs. Its compact design makes it easy to carry around, and it requires no batteries, ensuring it’s always ready to use. This stud finder works by detecting the nails or screws used to attach drywall to the studs.
This magnetic stud finder is known for its reliability and simplicity. The strong magnet holds firmly to the wall once it finds a fastener, clearly indicating the stud’s location. While it may not work on all wall types (especially those without metal fasteners), it’s a durable and affordable option for basic stud finding tasks.
AccuMaster 7140 Pro Digital Stud Finder
The AccuMaster 7140 Pro Digital Stud Finder is a feature-rich tool designed for accuracy and ease of use. This stud finder boasts multiple scanning modes, including stud scan, deep scan, and metal scan, allowing it to locate different materials behind walls. The large LCD display clearly shows the location, direction, and relative width of the stud.
The AccuMaster 7140 is particularly effective at filtering out false positives. It has the useful feature of identifying the center of the stud, as well as the edges. The audible tone along with the visual display makes finding studs even simpler. Whether you’re a seasoned DIYer or a professional contractor, the AccuMaster 7140 can help you complete your projects with precision.
Why You Need an LCD Stud Finder
Ever tried hanging a heavy mirror or mounting a TV, only to have your nail or screw meet empty space, leaving a frustrating hole in your wall? That’s where an LCD stud finder becomes your best friend! These nifty devices quickly and accurately locate the wooden or metal studs behind your drywall, providing a solid anchor for your projects. Imagine the peace of mind knowing your carefully placed shelf is securely attached and won’t come crashing down in the middle of the night. Forget the guesswork and potential wall damage, a stud finder takes the stress out of decorating and home improvement.
The “best LCD stud finders” go beyond simply locating studs. They offer features like AC wire detection to avoid accidentally drilling into electrical wiring, potentially saving you from a shocking experience (literally!). They also often have edge and center finding capabilities, allowing for precise placement, which is crucial when installing cabinets or creating perfectly aligned gallery walls. Plus, the easy-to-read LCD screen clearly displays the stud location, eliminating any ambiguity and ensuring accurate results, even for novice DIYers.
Think about the time you’ll save and the potential repairs you’ll avoid. No more haphazardly hammering nails hoping to hit something solid, or patching up unnecessary holes. With a reliable LCD stud finder, you can confidently tackle any hanging or mounting project, big or small. From installing grab bars in the bathroom for added safety to mounting a new soundbar for an immersive home theater experience, the possibilities are endless.
Investing in a quality LCD stud finder is an investment in your home and your peace of mind. It’s a small tool that offers significant benefits, saving you time, money, and frustration in the long run. So ditch the trial-and-error method and empower yourself with the precision and accuracy of an LCD stud finder. Your walls (and your sanity) will thank you!
Understanding Stud Finder Accuracy and Limitations
Okay, let’s be honest, no stud finder is perfect. You’re not going to get pinpoint accuracy every single time, especially when dealing with older homes or unusual wall construction. Sometimes, pipes or wiring can throw off the readings, and even the density of the drywall itself can impact performance. Remember, these devices are using sensors to detect changes in density, so anything that creates a similar signature can potentially trigger a false positive.
Think about that time you were hanging a heavy mirror and the stud finder kept beeping in different spots. Frustrating, right? That’s likely because you encountered something other than a stud. So, it’s crucial to understand that a stud finder is a tool, and like any tool, it requires a bit of finesse and understanding of its limitations to be used effectively. Don’t just rely on the beep; use your other senses and a little common sense.
One common mistake is assuming the edge of the stud is exactly where the stud finder first indicates. Often, the sensor is detecting the beginning of the density change, not the exact center. Consider making multiple passes over the same area and marking several potential locations. This will give you a better sense of the stud’s actual width and center.
Also, remember to calibrate your stud finder according to the manufacturer’s instructions before each use. Calibration ensures that the device is properly adjusted to the specific wall material you’re working with. A properly calibrated stud finder will significantly improve accuracy and reduce the likelihood of false readings.
Choosing the Right Lcd Technology for Your Needs
The LCD screen on your stud finder is more than just a fancy display. It’s your window into what the sensor is “seeing” inside the wall. Different LCD technologies offer varying levels of clarity and detail, which can significantly impact how easily you can interpret the readings. Some LCDs simply show a bar graph, while others display arrows, icons, or even simulated images of the stud’s location.
Imagine trying to hang shelves in a dimly lit closet. A stud finder with a poorly illuminated LCD screen would make the task much harder. You’d be squinting and straining to see the readings, increasing the chances of errors. Look for models with backlit LCDs or adjustable brightness settings to ensure good visibility in all lighting conditions.
Furthermore, consider the type of information the LCD provides. Does it simply indicate the presence of a stud, or does it also show the stud’s edges and center? Some advanced models even display the type of material being detected, such as wood, metal, or live electrical wiring. This extra information can be invaluable for avoiding potential hazards and ensuring a secure and accurate installation.
Think about the scale of your typical projects. If you frequently work on complex projects with a lot of wiring or plumbing behind the walls, a more advanced LCD with detailed information would be a worthwhile investment. However, if you primarily use a stud finder for simple tasks like hanging pictures, a basic LCD with clear and easy-to-understand readings may suffice.
Tips for Achieving Accurate Readings Every Time
Before you start drilling holes all over your walls, let’s talk about how to get the most accurate readings from your LCD stud finder. First and foremost, proper technique is key. Hold the device flat against the wall and move it slowly and steadily. Avoid jerky movements or lifting the stud finder off the surface, as this can disrupt the readings and lead to false positives.
Remember that wall composition makes a big difference. Thick drywall, wallpaper, or textured surfaces can interfere with the stud finder’s ability to accurately detect studs. If you’re working with a particularly challenging wall, try using a thinner piece of cardboard or paper between the stud finder and the wall. This can help improve contact and reduce interference.
Ever tried finding a stud through a thick layer of mirrors or tile? It’s near impossible, but understanding construction materials can help you get a better read. If the wall’s surface is something that you can’t penetrate with the stud finder, consider using a strong magnet. Drag the magnet slowly across the wall. The magnet may be attracted to the drywall screws that are screwed into the studs behind the wall. This trick can help you accurately locate wall studs in the thickest of situations.
Finally, always double-check your readings with a manual test. Once you’ve located a potential stud, use a small nail or pin to gently probe the wall. If you encounter solid resistance, you’ve likely found a stud. If the nail goes straight through, you’ve probably missed it. It’s always better to be safe than sorry when it comes to drilling into your walls.
Troubleshooting Common Stud Finder Issues
Even with the best LCD stud finder, you’re bound to encounter some issues from time to time. One common problem is inconsistent readings. The device might beep in one spot and then not beep again when you repeat the scan. This could be due to a number of factors, such as uneven wall surfaces, interference from wiring or plumbing, or simply a weak battery.
Another frequent issue is false positives. The stud finder might indicate the presence of a stud when there’s nothing there. This is especially common in older homes where the wall construction may be less consistent. To troubleshoot this, try recalibrating the device, checking the battery level, and scanning the area multiple times from different angles.
Have you ever had the stud finder give off constant readings without moving? This could be due to the type of wall the stud finder is scanning. If a wall is a wet, damp, or has metal components behind it, the stud finder may give off a continuous signal, which can be confusing. Try moving the stud finder to a different wall type and seeing if the results change.
Sometimes, the problem might not be the stud finder itself, but the user. Make sure you’re holding the device correctly, moving it slowly and steadily, and following the manufacturer’s instructions. If you’re still having trouble, consult the user manual or search online for troubleshooting tips specific to your model. A little research can often save you a lot of frustration and prevent unnecessary holes in your walls.
Buying Guide: Best LCD Stud Finders
Hey there, fellow DIY enthusiast! So, you’re looking to hang that awesome new picture, mount your TV, or maybe finally tackle that shelf project you’ve been dreaming about? Fantastic! But before you grab your hammer and nails, let’s talk about finding those elusive studs hiding behind your walls. Forget guessing and patching holes – the key to a secure and damage-free project lies in using a good stud finder. And since you’re here, you’re probably considering one of the best LCD stud finders on the market.
This guide is here to help you navigate the world of stud finders and pick the perfect one for your needs. We’ll break down the key factors to consider, so you can be confident you’re making the right choice. Let’s dive in!
Accuracy: Hitting the Mark Every Time
Let’s be real, the whole point of a stud finder is accuracy, right? If it’s constantly giving you false positives or missing studs altogether, you might as well be throwing darts at the wall. Nobody wants a wall full of unnecessary holes! A good stud finder should be able to consistently and reliably locate the edges of studs. Pay attention to reviews and look for models with advanced sensors and calibration features, which often translate to better precision. A stud finder with high accuracy saves you time, money (on patching!), and a whole lot of frustration.
Think of it this way: imagine trying to bake a cake without an accurate recipe. You might end up with something vaguely edible, but it probably won’t be the masterpiece you envisioned. Similarly, using a subpar stud finder can lead to unstable installations and damaged walls. Look for reviews that specifically mention the accuracy of the stud finder on different types of walls (drywall, plaster, etc.). You want a tool that performs well in the real world, not just in a controlled laboratory setting.
Depth of Detection: Peeking Behind the Surface
The depth of detection refers to how far into the wall the stud finder can “see.” This is especially important if you have thicker walls, such as those with paneling or tile backsplashes. If your walls are unusually thick, a standard stud finder might not be able to penetrate deep enough to accurately locate the studs. This can lead to false negatives and a whole lot of guesswork.
Imagine you’re trying to find a lost key under a pile of blankets. If you can only lift the top layer, you might miss the key entirely. Similarly, a stud finder with limited depth of detection might fail to locate studs hidden behind thick walls. Check the product specifications carefully to ensure that the stud finder you choose has a depth of detection that is appropriate for your walls. Some of the best LCD stud finders are specifically designed for deep scanning.
LCD Display Clarity and Information
An LCD display is what sets these stud finders apart from the more basic models. A clear and informative display makes a huge difference in usability. You want a screen that’s easy to read in various lighting conditions and provides clear indications of stud location, edge detection, and any additional features the stud finder might have, like wire warnings or deep scan mode.
Think about trying to read a map in the bright sunlight on your phone with low brightness. It’s almost impossible! A dim or cluttered LCD screen can lead to misinterpretations and inaccurate readings. Look for models with backlit displays and intuitive icons that are easy to understand at a glance. Some of the best LCD stud finders even offer graphical representations of the stud, making it even easier to pinpoint the exact center.
Material Detection Capabilities: More Than Just Studs
Many of the best LCD stud finders aren’t just limited to finding wood studs. They can also detect metal, electrical wiring, and sometimes even pipes. This is a huge advantage because it helps you avoid accidentally drilling into something you shouldn’t, like a live wire or a water pipe. Seriously, trust me, you don’t want that kind of surprise.
Imagine you’re renovating your bathroom and need to drill into the wall to install a new shower fixture. Accidentally hitting a water pipe could cause serious water damage and a hefty repair bill. A stud finder with metal and wiring detection can alert you to the presence of these hidden dangers, allowing you to adjust your plans accordingly and prevent costly mistakes. Always double-check for live wires before you start any project.
Calibration: Getting it Right From the Start
Proper calibration is crucial for accurate stud finding. Most LCD stud finders require calibration before each use. Calibration essentially sets the tool to the specific density of your wall, ensuring that it can accurately differentiate between studs and empty space. Look for stud finders that have automatic calibration features or clear instructions on how to calibrate manually.
Think of it like tuning a musical instrument. If the instrument isn’t properly tuned, it will sound out of key. Similarly, if a stud finder isn’t properly calibrated, it will give you inaccurate readings. A stud finder with automatic calibration simplifies the process and minimizes the risk of user error. If the stud finder requires manual calibration, make sure the instructions are clear and easy to follow. Don’t skip this step; it’s essential for accurate results!
Ease of Use and Ergonomics: Comfort and Convenience
Let’s face it, even the most accurate stud finder is useless if it’s a pain to use. Consider the ergonomics of the device: does it feel comfortable in your hand? Are the buttons easy to reach and press? Is the LCD screen easy to see from different angles? A well-designed stud finder will make your projects more enjoyable and less tiring.
Imagine trying to paint a ceiling with a brush that’s too heavy and awkward to hold. You’d probably get tired quickly and the results wouldn’t be as good. Similarly, a stud finder that’s uncomfortable to hold or difficult to operate can make your projects more frustrating and time-consuming. Look for models with a comfortable grip, intuitive controls, and a lightweight design. Some even have features like a built-in level or a marking tool to make your life easier. The best LCD stud finders feel natural in your hand.
Durability and Build Quality: Built to Last
Finally, consider the overall durability and build quality of the stud finder. Is it made from sturdy materials that can withstand the occasional bump or drop? Will it hold up to regular use over time? A well-built stud finder is an investment that will pay off in the long run, saving you money on replacements.
Think of it like buying a car. You want something that’s reliable and built to last, not something that’s going to break down after a few years. Similarly, a stud finder should be able to withstand the rigors of everyday use. Look for models with a solid construction and a reputation for durability. Check for customer reviews that mention the build quality of the stud finder. A little extra investment upfront can save you a lot of headaches down the road. This is especially true if you are frequently looking for the best LCD stud finders for your various projects.
FAQs
How do LCD stud finders work? Are they different from other types?
LCD stud finders use electronic sensors to detect changes in density behind your walls. They typically measure the dielectric constant, which is affected by the presence of wood, metal, or electrical wiring. The LCD screen then displays a visual representation of the stud’s location, usually with indicators showing the center and edges.
Compared to traditional magnetic stud finders, LCD stud finders are more versatile. Magnetic finders only detect metal fasteners, while LCD finders can detect wood studs, metal studs, and sometimes even live electrical wires. They also tend to be more accurate and provide more detailed information about the stud’s location than simpler magnetic options.
Are LCD stud finders accurate for all wall types?
While LCD stud finders are generally accurate, their performance can be affected by certain wall types. For example, walls with thick textures, multiple layers of drywall, or metal lath can sometimes interfere with the sensor readings. The type of material behind the wall plays a role, too!
However, many higher-end LCD stud finders have adjustable sensitivity settings that can help you overcome these challenges. By experimenting with different settings, you can often improve accuracy on tricky wall surfaces. Always remember to double-check the reading with a nail or screw in an inconspicuous area to confirm the stud’s location before committing.
What features should I look for in an LCD stud finder?
When choosing an LCD stud finder, consider features like multi-mode functionality (detecting wood, metal, and electrical wiring), adjustable sensitivity, and deep scanning capabilities. The type of scanning makes a difference. Also, look for a clear and easy-to-read LCD screen that provides detailed information about the stud’s location.
Beyond the basics, features like auto-calibration, target spotting, and a backlight can make your work easier and more efficient. Consider models with audible alerts to supplement the visual display. Ultimately, the best features for you will depend on the types of projects you typically work on and your personal preferences.
How do I calibrate an LCD stud finder?
Most LCD stud finders have an auto-calibration feature, which means they automatically adjust to the density of the wall you’re scanning. For models that require manual calibration, simply hold the device flat against the wall, away from any known studs or electrical wiring, and press the calibration button.
Refer to the device’s instructions for specific calibration steps. If you’re unsure whether the calibration is successful, try scanning a known stud and see if the device accurately identifies its location. Recalibrating is always a good idea if you move to a different wall or surface type.
How deep can an LCD stud finder scan?
The scanning depth of an LCD stud finder varies depending on the model. Basic models typically scan up to ¾ inch deep, while more advanced models can scan up to 1 ½ inches or even deeper. Some specialized models even have a deep scan mode for reaching studs hidden behind thicker walls.
Consider the thickness of your walls when choosing a stud finder. If you frequently work with walls that are thicker than standard, a model with a deep scanning capability is a must. Remember that the actual scanning depth can also be affected by the wall material and any obstructions behind the wall.
What does it mean when my stud finder detects live AC wiring?
A stud finder that detects live AC wiring is indicating the presence of electrical wires running behind the wall. This is a very important safety feature! Exercise extreme caution in these areas, as drilling or nailing into live wires can be extremely dangerous and potentially fatal.
Before starting any work, turn off the power to the circuit in the area you’re working in. Use a non-contact voltage tester to confirm that the wires are indeed de-energized before proceeding. If you’re unsure about the location of electrical wiring, it’s best to consult with a qualified electrician. Safety first!
My LCD stud finder isn’t working properly. What can I do?
First, make sure the batteries are fresh and properly installed. Low battery power can often lead to inaccurate readings or even a complete failure to operate. Also, double-check that the device is calibrated correctly for the wall type you’re scanning.
If the problem persists, try cleaning the scanning surface of the stud finder with a soft, dry cloth. Dust or debris can sometimes interfere with the sensor readings. If you’ve tried these steps and the device is still not working properly, consult the user manual or contact the manufacturer for further assistance. A warranty claim may be in order.
Conclusion
So, there you have it! We’ve explored the landscape of stud finding, armed you with the knowledge of what to look for in the best LCD stud finders, and hopefully, pointed you towards the perfect tool for your next project. Remember, every great creation starts with a solid foundation, and in this case, that means finding those studs with confidence.
Now go forth and conquer those walls! Don’t be intimidated by your to-do list, or those mounting tasks waiting to be done. Pick out your new LCD stud finder, grab your tools, and bring your vision to life. With a little preparation and the right gear, anything is possible. You’ve got this!