So, you’re relaxing on your porch, enjoying a cup of coffee, when suddenly – tap, tap, tap! There it is again, that telltale sign of a woodpecker turning your beautiful home into their personal buffet. Those pesky holes are not only unsightly, but they can also lead to serious structural damage if left untreated. Finding the right solution can be overwhelming, with countless products promising to be the best. Don’t worry, you’re not alone. Many homeowners face this frustrating issue, and luckily, there’s a straightforward answer: the best wood filler for woodpecker holes.
We understand the frustration of dealing with woodpecker damage, which is why we’ve put together this comprehensive guide. We’ll walk you through everything you need to know to choose the right product, from different types of fillers to essential application tips. Say goodbye to those annoying holes and hello to a woodpecker-proof home! Let’s dive in and find the perfect solution to restore your home’s beauty and integrity.
Before moving into the review of the best wood filler for woodpecker holes, let’s check out some of the relevant products from Amazon:


Last update on 2026-02-16 / #ad / Affiliate links / Images from Amazon Product Advertising API
The Uninvited Guests: Woodpeckers and What They Leave Behind
Alright, let’s talk about those feathered drummers in our neighborhoods – woodpeckers. They’re fascinating to watch, pecking away with incredible speed and precision. But if they’ve decided your home’s siding or trim looks like a tasty snack or the perfect place to build a nest, you know firsthand the frustration (and damage!) they can cause. We’re talking about creating holes that not only look unsightly but can also invite moisture, insects, and a whole host of other problems into your home’s structure.
These pesky holes aren’t just cosmetic. Studies have shown that even small woodpecker holes can significantly reduce the insulation value of your siding, leading to higher energy bills. And let’s be honest, nobody wants to deal with that! The good news is that you don’t have to resign yourself to a woodpecker-pocked house. With the right approach and a little elbow grease, you can repair the damage and prevent future avian invasions.
The secret weapon in this battle against beak-induced destruction? Finding the best wood filler for woodpecker holes. Not just any filler will do. You need something that’s durable, weather-resistant, and capable of filling those irregular shapes and sizes that woodpeckers so artfully create. Think of it as a patch job that needs to hold up against the elements and the persistent pecking of these determined birds.
So, whether you’re dealing with a few small exploratory holes or a more significant case of woodpecker damage, we’re here to guide you through the process. We’ll explore the different types of wood fillers available, highlight the qualities to look for in the best wood filler for woodpecker holes, and provide step-by-step instructions on how to effectively repair the damage. Let’s get those holes filled and your home looking beautiful (and woodpecker-resistant!) once again.
Best Wood Filler For Woodpecker Holes – Reviews
3M Bondo Wood Filler
Bondo Wood Filler isn’t just for cars; it’s a champion for wood too! This stuff is seriously tough, setting rock-hard and incredibly durable. It’s perfect for woodpecker damage because it resists shrinking and cracking, even in the face of weather extremes. Plus, it’s sandable in just 15 minutes, letting you get on with painting or staining sooner. Just be prepared for a bit of a pungent smell during application!
While Bondo is fantastic for larger, deeper holes, it’s worth noting that its quick-drying nature can be a double-edged sword. You need to work fast, and precise color matching can be tricky. However, its strength and ability to withstand the elements make it a prime contender for repairing woodpecker damage, especially on exterior surfaces.
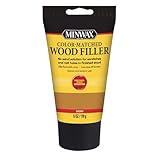
Minwax Wood Filler
Minwax Wood Filler is a classic for a reason. This readily available filler is easy to work with, making it a great choice for DIYers of all skill levels. It accepts stains beautifully, which is crucial for achieving a seamless repair on wood surfaces. Its consistency is smooth, making it simple to apply and feather into the surrounding wood.
Though not as rock-solid as some epoxy-based fillers, Minwax provides ample strength for typical woodpecker damage. For very large or structural repairs, an additional brace is recommended. Its water-based formula makes cleanup a breeze, and its affordability sweetens the deal. This is a dependable option for smaller holes and surfaces where stain-matching is a top priority.
DAP Plastic Wood-X All Purpose Wood Filler
DAP Plastic Wood-X is a reliable, all-around wood filler known for its excellent adhesion and durability. It can be used both indoors and outdoors, making it versatile for woodpecker damage in various locations. It’s formulated to resist shrinking and cracking, ensuring a long-lasting repair that will hold up against the elements.
This filler is paintable and stainable, providing a smooth surface for finishing. It sands easily, allowing for a seamless blend with the surrounding wood. While it might require a bit more drying time than some other options, its overall performance and resilience make it a solid choice for filling woodpecker holes and restoring the integrity of the wood.
Abatron WoodEpox
If you’re dealing with extensive or structural woodpecker damage, Abatron WoodEpox is a heavy hitter. This two-part epoxy filler is incredibly strong and designed to restore rotted or deteriorated wood. It’s lightweight, making it easy to work with even on vertical surfaces, and it won’t sag or shrink.
WoodEpox can be molded and shaped, which is fantastic for replicating intricate details or filling oddly shaped holes. While it requires mixing and a longer curing time, the resulting repair is exceptionally durable and resistant to moisture and decay. It can be sanded, shaped, painted, or stained, ensuring a seamless restoration. If you want a repair that lasts a lifetime, WoodEpox is a fantastic investment.
Elmer’s ProBond Wood Filler
Elmer’s ProBond Wood Filler is a reliable and easy-to-use option that provides strong adhesion and durability. It’s designed to resist shrinking and cracking, ensuring a long-lasting repair for woodpecker holes. Its smooth consistency makes it easy to apply and sand, creating a seamless blend with the surrounding wood.
This water-based filler is paintable and stainable, allowing you to customize the finish to match the existing wood. Cleanup is a breeze with soap and water, making it a convenient choice for DIY projects. While it may not be as robust as some epoxy-based options for severely damaged wood, Elmer’s ProBond offers a solid balance of performance and ease of use for general woodpecker hole repairs.
“`html
Why You Need Wood Filler for Those Pesky Woodpecker Holes
“`
Woodpeckers, with their impressive drumming skills, can sometimes turn our homes into unintended instruments. Those small holes they create might seem insignificant at first, but neglecting them can lead to bigger problems down the road. Think of it like ignoring a tiny crack in your windshield – it might not bother you initially, but over time, it can spread and compromise the entire structure. Similarly, woodpecker holes leave your home vulnerable to water damage, insect infestations, and even structural instability. Imagine a heavy rainstorm seeping into those unprotected holes, causing rot and mold to flourish within your walls.
The good news is, there’s a simple solution: wood filler. Specifically, the best wood filler for woodpecker holes offers a durable and weather-resistant barrier against the elements and unwanted critters. It’s like giving your house a protective bandage, sealing those vulnerabilities and preventing further damage. Think about the peace of mind knowing you’ve taken proactive steps to safeguard your home from potential issues that could cost you significantly more in the long run.
Choosing the right wood filler is crucial for a lasting repair. The best wood filler for woodpecker holes isn’t just any filler; it’s one designed to withstand outdoor conditions, resist shrinking and cracking, and blend seamlessly with your home’s exterior. Many options are paintable and stainable, ensuring a flawless finish that restores your home’s curb appeal. Imagine patching those holes and then painting over them to match your existing siding, leaving no trace of the woodpecker’s visit.
Ultimately, investing in wood filler for woodpecker holes is an investment in the longevity and value of your home. It’s a small price to pay for the protection and peace of mind it provides. Don’t let those little holes turn into big headaches – take action now and keep your home safe and sound.
Understanding the Enemy: Woodpecker Behavior
Woodpeckers aren’t just randomly pecking at your house for fun! They’re usually after something. Most commonly, they’re either searching for insects burrowing in the wood, trying to create a nesting cavity, or drumming to attract a mate or establish territory. Knowing why they’re targeting your house can help you not only choose the right filler but also address the underlying issue that’s attracting them in the first place. For example, if you suspect insects, it might be worth consulting with a pest control expert.
Think of it like this: you wouldn’t just patch a leaky roof without figuring out where the water is coming from, right? Same goes for woodpecker damage! Understanding the woodpecker’s motivation can guide your repair strategy. Are they after carpenter bees? Are they trying to nest in that perfect spot under your eaves? Tackling the root cause could save you from having to fill holes again and again.
Sometimes, woodpeckers simply like the sound their drumming makes on a particular surface. In this case, deterrents might be more effective than constant patching. Consider hanging shiny objects or using bird repellent sprays. Remember, woodpeckers are protected under the Migratory Bird Treaty Act, so you can’t harm them! Your goal is to humanely discourage them from choosing your house as their personal drum set.
Finally, assess the overall health of your wood. Woodpeckers often target weakened or decaying areas because they’re easier to excavate and more likely to harbor insects. If you find extensive damage, it might be necessary to replace the affected wood entirely before filling any holes. Filling weak wood is like putting a band-aid on a broken leg – it won’t solve the underlying problem and the damage will likely return.
Preparing for Battle: Assessing the Damage
Before you even think about applying wood filler, you need to thoroughly assess the damage caused by the woodpeckers. How many holes are there? How deep are they? Are they concentrated in one area or scattered across your siding? This initial assessment will help you determine how much filler you’ll need and what kind of application tools will be most effective. Don’t just jump in – a little planning goes a long way.
Think of it as diagnosing a car problem. You wouldn’t blindly start replacing parts without first figuring out what’s wrong, would you? Similarly, you need to understand the extent of the woodpecker damage before you can effectively repair it. Look for signs of rot or insect infestation around the holes, as these issues will need to be addressed before you can properly fill the gaps.
Grab a ladder and get up close and personal with the affected areas. Use a small tool, like a screwdriver, to gently probe the holes and check for any loose or crumbling wood. This will help you determine the stability of the surrounding area and identify any areas that need to be reinforced before filling. Remember, a solid foundation is key to a long-lasting repair.
Document the damage with photos or a quick sketch. This will not only help you track your progress but also serve as a valuable reference point if you need to consult with a professional or file an insurance claim. Sometimes, what looks like a minor issue can actually be a sign of a larger underlying problem. Being thorough in your assessment will help you avoid costly surprises down the road.
Application Techniques for a Flawless Finish
Applying wood filler isn’t just about slapping it on and hoping for the best. Proper technique is crucial for creating a seamless and durable repair. Start by thoroughly cleaning the area around the holes. Remove any loose wood, debris, or old paint that could interfere with the filler’s adhesion. A clean surface is essential for a strong bond and a smooth finish.
Imagine you’re a sculptor, carefully shaping and molding the filler to perfectly match the surrounding wood. Use a putty knife or a small trowel to apply the filler in thin layers, pressing it firmly into the holes to eliminate any air pockets. Build up the filler gradually, allowing each layer to dry completely before adding the next. This will prevent the filler from shrinking or cracking as it dries.
Once the filler is dry, sand it smooth using fine-grit sandpaper. Feather the edges of the filled area to blend it seamlessly with the surrounding wood. Be patient and take your time – a smooth, even surface is essential for a professional-looking repair. You want to make it look like the woodpeckers were never there in the first place.
Finally, prime and paint the filled area to match the rest of your siding or trim. Use a high-quality exterior paint that is specifically designed for wood. This will protect the filler from the elements and help it last for years to come. Remember, proper painting is the final touch that will transform your repair from a quick fix into a lasting solution.
Preventative Measures: Keeping Woodpeckers Away
After all that hard work filling those woodpecker holes, the last thing you want is for them to come back and start all over again. Luckily, there are several preventative measures you can take to deter woodpeckers from targeting your home in the future. Think of it as building a fortress to protect your house from these feathered invaders.
One of the most effective methods is to use visual deterrents. Hang shiny objects, such as aluminum foil strips, Mylar balloons, or reflective tape, near the affected areas. The movement and reflection of these objects will startle the woodpeckers and discourage them from landing on your house. It’s like putting up scarecrows, but for birds with a penchant for pecking wood.
Another option is to use bird repellent sprays. These sprays contain ingredients that irritate woodpeckers, making your siding or trim less appealing to them. Apply the spray regularly, especially after rain, to maintain its effectiveness. Think of it as creating an invisible shield that deters woodpeckers from even approaching your home.
Address any underlying issues that may be attracting woodpeckers in the first place. If you suspect insects are present, consult with a pest control expert to eliminate them. If woodpeckers are using your house for nesting, consider removing any potential nesting sites. By addressing the root cause of the problem, you can significantly reduce the likelihood of future damage. Remember, woodpeckers are creatures of habit, so breaking their routine is key.
Best Wood Filler For Woodpecker Holes: A Comprehensive Buying Guide
Hey there, fellow homeowner! Pesky woodpeckers, right? They can turn your beautiful siding into a Swiss cheese nightmare in no time. But don’t despair! You don’t have to live with those unsightly holes. With the right approach and, most importantly, the best wood filler for woodpecker holes, you can restore your home’s beauty and protect it from further damage. Choosing the right wood filler can feel overwhelming, so let’s break it down. This guide will walk you through everything you need to know to make the best choice, saving you time, money, and a whole lot of frustration. Think of me as your friendly neighborhood expert, here to help you navigate the world of wood fillers.
1. Durability and Weather Resistance: Will it Stand the Test of Time (and Rain)?
Let’s be real, you’re patching up woodpecker holes on the outside of your house. That means the filler is going to be exposed to the elements – rain, sun, snow, the whole shebang. You don’t want to use something that will crack, shrink, or crumble after just a few months. Look for fillers specifically designed for exterior use and labeled as weather-resistant or waterproof. These are formulated to withstand the harsh conditions and maintain their integrity, ensuring your repair lasts for years to come.
Think about it – you wouldn’t wear a flimsy t-shirt in a blizzard, right? Similarly, you need a wood filler that’s tough enough to handle the environmental challenges it will face. Check product descriptions carefully for claims about UV resistance, freeze-thaw cycles, and water repellency. These factors directly impact the longevity of your repair and minimize the need for future touch-ups. Picking the best wood filler for woodpecker holes depends heavily on its ability to withstand the rigors of outdoor life.
2. Shrinkage: How Much Will it Reduce After Drying?
Imagine filling a woodpecker hole perfectly, only to find a noticeable indentation a few days later because the filler shrank as it dried. Annoying, right? Many wood fillers shrink to some degree, but the key is to find one with minimal shrinkage. Excessive shrinkage can lead to cracks around the patch and weaken the repair, making it vulnerable to water damage and further woodpecker attacks.
Look for fillers that are formulated with non-shrinking polymers or that are specifically designed for large repairs. These typically contain additives that help maintain their volume as they cure. If you’re dealing with particularly deep or wide woodpecker holes, you might need to apply the filler in multiple layers, allowing each layer to dry completely before applying the next. This technique minimizes shrinkage and ensures a strong, stable repair that will stay flush with the surrounding wood surface. It’s worth taking the extra time to apply multiple coats if it means achieving a more durable and aesthetically pleasing result with the best wood filler for woodpecker holes.
3. Paintability and Stainability: Will it Blend In?
Okay, let’s talk aesthetics. You want your repairs to look as seamless as possible, right? That means the wood filler needs to be paintable or stainable so you can match it to the existing color of your siding or trim. Check the product label to make sure it’s compatible with the type of paint or stain you plan to use. Some fillers are specifically formulated for either painting or staining, while others are versatile enough to handle both.
Keep in mind that some fillers might require a primer before painting to ensure proper adhesion and a uniform finish. It’s always a good idea to test the filler with your chosen paint or stain on a small, inconspicuous area before applying it to the entire repair. This will allow you to check the color match and adhesion and avoid any unpleasant surprises. You want the repaired area to look like the woodpeckers never even visited, and choosing a paintable and stainable option is key to achieving that goal with the best wood filler for woodpecker holes.
4. Ease of Application: Can You Actually Use It Without a Headache?
Let’s face it, not everyone is a professional carpenter. You want a wood filler that’s easy to apply, even if you’re a DIY novice. Look for fillers that have a smooth, workable consistency and can be easily spread with a putty knife or similar tool. Avoid fillers that are too thick or crumbly, as these can be difficult to work with and may not fill the holes properly.
Consider the drying time as well. Some fillers dry quickly, which is convenient if you’re in a hurry, while others require a longer drying time. Quick-drying fillers might require you to work faster, but they also reduce the risk of the filler sagging or running before it sets. Read the instructions carefully and follow them to the letter to ensure the best possible results. The best wood filler for woodpecker holes should not only perform well but also be simple and straightforward to use.
5. Sandability: Will it Create a Smooth Finish?
After the filler has dried, you’ll likely need to sand it down to create a smooth, even surface that blends seamlessly with the surrounding wood. Choose a filler that is easy to sand without being too soft or crumbly. A filler that’s too soft might gum up your sandpaper, while one that’s too hard might be difficult to sand evenly.
Test the sandability on a small, inconspicuous area before applying the filler to the entire repair. Use a fine-grit sandpaper and sand in the direction of the wood grain to avoid scratching the surface. Once you’ve achieved a smooth, even finish, you can then prime and paint or stain the area to match the surrounding wood. A smooth, sandable surface is crucial for achieving a professional-looking repair that effectively conceals the woodpecker damage using the best wood filler for woodpecker holes.
6. Adhesion: Will It Stick and Stay Put?
This is a big one! You need a wood filler that will bond strongly to the existing wood and stay in place for the long haul. Poor adhesion can lead to the filler cracking, peeling, or even falling out of the holes, defeating the entire purpose of the repair. Look for fillers that are specifically formulated for exterior use and that have strong adhesive properties.
Before applying the filler, make sure the surface is clean, dry, and free of any loose debris. You might even consider lightly sanding the edges of the woodpecker holes to create a better bonding surface. Some fillers also require the use of a primer or bonding agent to enhance adhesion. Read the product instructions carefully and follow them to ensure the best possible bond. Choosing the best wood filler for woodpecker holes means choosing one with superior adhesion to withstand the elements and the test of time.
7. Wood Type Compatibility: Is it Right For Your Siding?
Different types of wood have different properties, and some wood fillers are better suited for certain types of wood than others. For example, a filler that works well on softwoods like pine might not be the best choice for hardwoods like oak. Consider the type of wood your siding is made of and choose a filler that is specifically formulated for that type of wood.
If you’re unsure of the wood type, you can usually find this information in your home’s documentation or by contacting the builder or contractor who installed the siding. You can also consult with a local hardware store or woodworking expert for advice. Using the wrong type of filler can lead to poor adhesion, cracking, or other problems, so it’s important to choose the right one for your specific needs. The best wood filler for woodpecker holes needs to be compatible with the type of wood you are trying to repair.
FAQs
What kind of wood filler is best for woodpecker holes?
That’s a great question! When it comes to filling woodpecker holes, you want something that’s both durable and weather-resistant. After all, you need it to stand up to the elements and deter those persistent birds from coming back. Epoxy-based wood fillers are generally considered the best choice for this task. They offer superior strength, excellent adhesion, and are much less prone to shrinking or cracking over time.
However, keep in mind that epoxy can be a bit more challenging to work with than other types of fillers. For smaller holes, or if you’re on a tight budget, a high-quality exterior-grade wood filler can also do the trick. Just make sure it’s paintable and can withstand outdoor conditions. Ultimately, the best choice depends on the size of the holes and your personal preferences!
How do I prepare the area before applying wood filler?
Preparation is key to getting a long-lasting and professional-looking repair! Start by removing any loose or damaged wood from around the woodpecker holes. You can use a small chisel, putty knife, or even a screwdriver to carefully scrape away any debris. This ensures the filler has a clean, solid surface to adhere to.
Next, give the area a good cleaning. Use a brush or cloth to remove any dirt, dust, or cobwebs. If the wood is particularly dirty or greasy, you can use a mild soap and water solution, but be sure to let it dry completely before applying the filler. A clean surface allows the wood filler to bind properly and prevents future problems like peeling or cracking.
Can I paint over wood filler after it dries?
Absolutely! Most wood fillers, especially those designed for exterior use, are paintable. This is essential for blending the repaired area seamlessly with the rest of your wood surface. However, before you start painting, it’s important to sand the filler smooth to create a level surface.
Use a fine-grit sandpaper (around 220-grit is a good starting point) and gently sand down any bumps or ridges. Wipe away any sanding dust before applying primer and paint. Make sure the filler is completely dry before painting, and use an exterior-grade paint that is appropriate for your wood type to protect the repair from the elements.
Will the wood filler attract woodpeckers again?
This is a valid concern, as you don’t want to go through all the work of repairing the holes only to have the woodpeckers return! The good news is that wood filler itself is unlikely to attract woodpeckers. They’re usually drawn to wood for insects, nesting, or drumming purposes, not the filler material itself.
However, to deter them from returning to the same spot, it’s a good idea to implement some bird deterrent strategies. These can include things like hanging shiny objects (like aluminum foil strips or pie tins) near the repaired area, using bird netting, or applying a bird repellent spray. Combining a solid repair with effective deterrents will give you the best chance of keeping those woodpeckers away.
How long does wood filler take to dry?
Drying time can vary depending on the type of wood filler you use, the temperature, and the humidity. Most wood fillers will have drying time instructions listed on the product label. Typically, you can expect a drying time of anywhere from 2 to 24 hours.
It’s important to let the filler dry completely before sanding or painting. If you try to rush the process, you might end up with a sticky or uneven finish. To speed up the drying time, you can try using a fan to circulate air around the repaired area or choose a filler specifically designed for faster drying. Just always refer to the manufacturer’s instructions for the most accurate information.
What if the woodpecker holes are very deep?
Deep woodpecker holes can be a bit tricky, but definitely manageable! It’s generally best to fill them in layers rather than trying to fill the entire hole in one go. This allows each layer to dry properly and prevents the filler from shrinking or cracking.
Apply a layer of filler, let it dry completely, then add another layer until the hole is filled to the desired level. For extremely large or deep holes, you might consider using a backing material, like a small piece of wood or foam, to support the filler and reduce the amount needed. This will also prevent the filler from sagging inwards while it dries.
Can I use wood filler in cold weather?
Using wood filler in cold weather can present some challenges, as it can affect the drying and curing process. Many wood fillers are designed to work best within a certain temperature range, typically between 50°F and 90°F (10°C and 32°C). If the temperature is too low, the filler might take much longer to dry or may not cure properly, leading to a weak or brittle repair.
If you need to use wood filler in cold weather, try to warm the area slightly before applying the filler. You can use a heat lamp or portable heater to raise the temperature of the wood and the filler itself. Choose a filler that is specifically formulated for cold-weather application, if available, and allow for extra drying time. Always follow the manufacturer’s instructions carefully, as they may have specific recommendations for cold-weather use.
Final Words
Alright, you’ve now got the lowdown on tackling those pesky woodpecker holes! You’ve seen the contenders, weighed the pros and cons, and hopefully have a clearer picture of which wood filler aligns with your project and budget. Remember, choosing the best wood filler for woodpecker holes is about more than just patching things up; it’s about restoring the beauty and integrity of your home. Don’t let those little peckers win!
Think of it this way: you’re not just fixing a hole; you’re making a statement. A statement that says, “I care about my property, and I’m not afraid to take matters into my own hands.” Now go forth, armed with your newfound knowledge and the perfect wood filler, and reclaim your wood! You’ve got this!