Remember that camping trip last summer? The one where you were finally going to get a good night’s sleep, elevated off the hard ground on your trusty air bed? Yeah, well, about halfway through the night, the “trusty” part became questionable. A slow leak turned into a full-on deflate, and you were left staring up at the stars…from ground level. That’s when I realized the importance of being prepared! A tiny hole can ruin your sleep, your trip, and maybe even your back. Let’s face it; punctures happen, and having the best air bed patch kit on hand can be a total lifesaver.
But with so many options on the market, how do you choose the right one? Don’t worry, I’ve been there! This guide is here to take the guesswork out of finding the best air bed patch kit for your needs. We’ll dive into the top-rated kits, compare their features, and give you all the information you need to make an informed decision. So you can say goodbye to sleepless nights and hello to comfortable camping (or guest room hosting!) once and for all.
Before moving into the review of the best air bed patch kit, let’s check out some of the relevant products from Amazon:

Last update on 2026-05-25 / #ad / Affiliate links / Images from Amazon Product Advertising API
The Unsung Hero: Rescuing Your Sleep with the Best Air Bed Patch Kit
Let’s face it, waking up on the floor because your air mattress decided to deflate in the middle of the night is never a fun experience. We’ve all been there, haven’t we? That slow sinking feeling, the gradual incline towards the hard ground, and the inevitable grumpy morning that follows. Air beds are fantastic for guests, camping, or even temporary furniture solutions, but they’re not immune to the occasional puncture or leak. The good news is, you don’t have to toss your beloved air bed at the first sign of trouble.
The solution, my friend, often comes in the form of a humble little package: the air bed patch kit. Think of it as a first-aid kit for your inflatable haven. Instead of panicking and rushing out to buy a brand new mattress (which, let’s be honest, is a hassle), you can quickly and easily repair the damage yourself. In fact, studies show that with proper application of a quality patch, an air bed can be repaired up to 90% of the time! That’s a statistic worth remembering.
Choosing the best air bed patch kit is key. Not all kits are created equal. Some come with flimsy adhesives that peel off after a few uses, while others contain patches that are too small or inflexible. A quality kit will have durable, waterproof patches, a strong adhesive that creates a lasting bond, and clear instructions for easy application. You’ll want to make sure the kit is designed for the type of material your air bed is made from, whether it’s PVC, flocked, or some other synthetic.
So, whether you’re a seasoned camper, a frequent host, or simply someone who appreciates a comfortable night’s sleep, having the best air bed patch kit on hand is a smart move. It’s a small investment that can save you a lot of money, time, and most importantly, a good night’s rest. Let’s dive in and explore what makes a truly exceptional air bed patch kit and how to choose the right one for your needs.
5 Best Air Bed Patch Kit
HH-66 Vinyl Cement
Ever been in a situation where your air mattress sprung a leak in the middle of the night? Not fun, right? HH-66 Vinyl Cement is a lifesaver for those unexpected inflatable emergencies. This adhesive is known for its incredible strength and flexibility, creating a durable bond that can withstand the pressure and movement of an air mattress. It’s not just for airbeds either; think pool liners, inflatable boats, and even bouncy houses.
The best part is how easy it is to use. Just clean the surface, apply a thin layer of HH-66 to both the patch and the damaged area, let it dry for a few minutes, and then firmly press them together. Boom! Your air mattress is back in action. Plus, it’s waterproof, so you don’t have to worry about the patch peeling off if things get a little damp. This stuff truly sets the gold standard for vinyl repair.
TEAR-AID Repair Patch Type A
Tear-Aid Repair Patch Type A is like having a superhero in your repair kit. These transparent patches are incredibly versatile and can adhere to a wide range of materials, including vinyl, canvas, rubber, and even leather. So, whether it’s an air mattress, a camping tent, or a favorite inflatable toy, Tear-Aid has got you covered. Its unique adhesive creates a strong, airtight seal that’s resistant to tears and punctures.
What sets Tear-Aid apart is its durability. These patches are resistant to abrasion, moisture, and extreme temperatures, meaning they can withstand the rigors of outdoor use. Plus, they’re incredibly easy to apply – just peel, stick, and go. No messy glues or complicated instructions. And because they are clear, they blend seamlessly with most surfaces, making the repair virtually invisible.
3M Scotch Permanent Outdoor Repair Tape
When you need a quick and reliable fix for your inflatable gear, 3M Scotch Permanent Outdoor Repair Tape is your go-to solution. This tape is engineered for outdoor use, so it can handle whatever Mother Nature throws your way. It’s weather-resistant, UV-resistant, and incredibly strong, making it perfect for repairing tears and punctures in air mattresses, pool floats, and other inflatable items.
The beauty of this repair tape is its simplicity. No need for extra adhesives or complicated steps. Just cut the tape to the desired size, peel off the backing, and apply it to the damaged area. The aggressive adhesive creates a permanent bond that will hold up under pressure and keep your inflatable items in good working order. It’s the ultimate hassle-free repair solution.
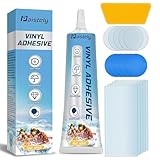
Loctite Vinyl, Fabric & Plastic Flexible Adhesive
Loctite Vinyl, Fabric & Plastic Flexible Adhesive is your best friend when dealing with tricky repairs that require flexibility and durability. This adhesive is specifically designed to bond to a variety of materials, including vinyl, fabric, and plastic, making it ideal for fixing air mattresses, inflatable pools, and even car interiors. Its flexible formula ensures that the bond won’t crack or peel, even under stress or movement.
One of the standout features of this adhesive is its waterproof nature. You can confidently use it to repair items that will be exposed to moisture without worrying about the bond failing. The application is straightforward, and it dries clear, ensuring that your repairs are as discreet as possible. This is a great option for those looking for a long-lasting and reliable fix.
Intex Repair Patch Kit
For Intex air mattress owners, the Intex Repair Patch Kit is an absolute must-have. Designed specifically for Intex products, these patches are made from the same high-quality vinyl as the air mattresses themselves, ensuring a perfect match and a seamless repair. These kits usually come with multiple patches, providing you with plenty of backup for future mishaps.
The convenience of this kit is unmatched. The patches are pre-cut and ready to use, eliminating the need for measuring or cutting. Simply clean the area around the puncture, peel off the backing, and apply the patch. The adhesive is strong and reliable, creating an airtight seal that will keep your air mattress inflated and ready for a good night’s sleep. It’s an easy, affordable way to extend the life of your Intex inflatable.
Why You Need an Air Bed Patch Kit: A Breath of Fresh Air (and Sleep)!
Let’s face it, nobody plans for a slow leak in the middle of the night. You’re sound asleep, dreaming of faraway lands, when suddenly you feel a gradual sinking sensation. Panic sets in – your inflatable mattress is deflating! Suddenly, that camping trip becomes a soggy disaster, or your overnight guests are waking up on the floor. Don’t let a tiny puncture ruin your comfort! A reliable air bed patch kit is an absolute essential, acting as your inflatable mattress’s first aid kit for those unexpected emergencies.
Imagine this: you’re hosting friends for a weekend getaway, and you’ve lovingly prepared the guest room with a comfy air bed. But just as everyone is settling in, a rogue button or sharp corner strikes, causing a hiss of escaping air. Instead of scrambling to find a last-minute replacement or offering your own bed (awkward!), you can whip out your handy patch kit. With just a few minutes of effort, you’ve saved the day, ensuring your guests have a restful night’s sleep and you maintain your reputation as the perfect host.
Think of the cost-effectiveness! Instead of replacing an entire air mattress (which can be expensive), a patch kit allows you to extend its lifespan significantly. It’s a sustainable and economical choice, preventing unnecessary waste and saving you money in the long run. Plus, the best air bed patch kit is compact and easily stored, making it perfect for camping trips, guest rooms, or even keeping in your car for unexpected inflatable needs.
Ultimately, investing in an air bed patch kit is an investment in peace of mind. Knowing you’re prepared for any potential inflatable mishaps allows you to relax and enjoy your adventures, host your guests with confidence, and sleep soundly knowing that a minor puncture won’t turn into a major inconvenience. Don’t wait for the dreaded slow leak – be proactive and grab the best air bed patch kit today!
Understanding Different Types of Air Bed Patches
Ever woken up in the middle of the night feeling like you’re slowly sinking into the floor? It’s not a pleasant experience, and understanding the different types of patches available can help you avoid it in the future. Think of it like understanding the different types of tires for your car – each serves a purpose and is better suited for different situations.
First, we have the classic adhesive patches. These are your go-to, usually made of PVC or flocked material, and they stick directly onto the air bed surface. They’re great for small punctures and pinholes, like if your cat decides your air mattress is a scratching post. Just clean the area, peel, and stick. Easy peasy!
Then there are the more robust, heat-activated patches. These require a heat source, like an iron (on a low setting!), to bond to the air bed. They create a much stronger seal, making them ideal for larger tears or areas that experience a lot of stress. Imagine your rambunctious kids jumping on the air bed – a heat-activated patch is your best bet for those situations.
Finally, some kits come with liquid PVC or sealant. These are more like filling a crack in a wall than applying a patch. You apply the liquid to the puncture, and it dries to form a flexible, airtight seal. These are fantastic for hard-to-reach areas or irregular punctures where a traditional patch just won’t lie flat. Picture trying to patch a tear near a seam – liquid PVC can be a lifesaver!
Essential Tools for a Successful Air Bed Repair
So, you’ve got your patch kit, but do you have everything else you need for a successful repair? It’s like having all the ingredients for a cake but realizing you’re missing a mixing bowl – frustrating! Having the right tools on hand will make the repair process smoother and more effective, saving you time and ensuring a lasting fix.
First and foremost, you’ll need something to clean the area around the puncture. Think of it like prepping a wall before painting – you want a clean, smooth surface for the patch to adhere to. Isopropyl alcohol and a clean cloth work wonders for removing dirt, oils, and any lingering grime. Imagine trying to stick a patch on a muddy air mattress after a camping trip – it’s just not going to work!
Next, a good pair of scissors or a sharp utility knife is essential for cutting the patch to the right size. Don’t just rip it off the sheet – a clean, precise cut will help prevent the edges from peeling up later. Picture trying to cut a patch with dull scissors – you’ll end up with jagged edges and a frustrating mess.
Finally, consider having a seam roller or a small, smooth object to apply pressure to the patch after it’s applied. This helps to ensure a strong bond between the patch and the air bed surface. Imagine trying to smooth out a wallpaper seam with just your hands – a roller makes a huge difference!
Step-by-Step Guide to Patching Your Air Bed
Alright, let’s get down to business! You’ve identified the leak, chosen your patch, and gathered your tools. Now it’s time to actually patch your air bed. Think of this like following a recipe – each step is important for the final outcome. Rushing through it or skipping a step could result in a leaky repair.
First, deflate your air bed completely. This is crucial because trying to patch an inflated air bed is like trying to put a bandage on a moving target. It’s just not going to work effectively. Once deflated, locate the puncture. Sometimes it’s obvious, sometimes you need to listen closely for a hiss or use soapy water to find it.
Next, thoroughly clean the area around the puncture with isopropyl alcohol and a clean cloth. Allow it to dry completely before proceeding. This step is non-negotiable! A clean surface ensures a strong bond. Think of it like preparing wood before staining – cleanliness is key.
Now, cut your patch to the appropriate size, making sure it’s slightly larger than the puncture. Peel off the backing (if it’s an adhesive patch) and carefully apply it to the cleaned area, centering it over the hole. Press firmly, working from the center outwards to remove any air bubbles. If it’s a heat-activated patch, follow the specific instructions for using heat. Finally, wait the recommended drying time before re-inflating your air bed.
Extending the Life of Your Air Bed and Patches
So, you’ve successfully patched your air bed. Great job! But the work doesn’t stop there. Think of patching your air bed like fixing a leaky roof – you’ve addressed the immediate problem, but you also want to take steps to prevent future leaks and damage. Taking care of your air bed and your patches will extend their lifespan and save you money in the long run.
First, store your air bed properly when not in use. This means deflating it completely, folding it neatly, and storing it in a cool, dry place away from direct sunlight and sharp objects. Imagine leaving your air bed crumpled in a hot garage all summer – the material will degrade and become more prone to punctures.
Also, protect your air bed from punctures in the first place. Use it on a smooth, clean surface, and avoid placing it near sharp objects or rough terrain. Consider using a fitted sheet or mattress protector to add an extra layer of protection. Think of it like putting a case on your phone – it’s a simple way to prevent scratches and dents.
Finally, inspect your patches regularly and replace them if they show signs of wear or peeling. A loose or damaged patch is just an invitation for another leak. It’s like checking the tread on your tires – regular maintenance helps prevent bigger problems down the road.
Best Air Bed Patch Kit: A Buyer’s Guide to Sweet Dreams
So, you’ve got a leaky air bed, huh? Don’t worry, it happens to the best of us! Whether it’s a slow leak discovered in the middle of the night, or a puncture you found while packing it away, an air bed patch kit is your best friend. But with so many options out there, how do you choose the right one? Fear not! This guide will walk you through the key things to consider, ensuring you find the best air bed patch kit and get back to enjoying comfortable sleep in no time. Let’s dive in!
Understanding the Patch Kit Materials
Think of the patch material as the bandage for your air bed’s wound. You wouldn’t put just any old sticky note on a scrape, right? The same principle applies here. The material needs to be strong, flexible, and compatible with the material of your air bed. Vinyl is common, but some air beds might use TPU or other specialized fabrics.
Look for kits that explicitly state compatibility with your air bed’s material. A patch made of the wrong stuff might not adhere properly, leading to a failed repair and another deflated night. Consider kits that use similar material to the original air bed, usually high quality PVC. Doing a little research here can save you from a lot of frustration later. Some kits even come with different sized patches for different sizes of leaks!
The Adhesive: Stick With a Winner
The adhesive is arguably the most crucial component of any air bed patch kit. It’s the glue that holds everything together, literally. A weak or incompatible adhesive will result in a patch that peels off easily, defeating the whole purpose of the repair. Look for adhesives that are specifically designed for flexible materials like vinyl or TPU.
Consider adhesives that are waterproof and resistant to temperature changes. Air beds can be used in various environments, from a warm guest room to a slightly chilly camping tent. A robust adhesive will maintain its bond regardless of the conditions. Pay attention to reviews as users will often report on how well the adhesive held up over time and under different circumstances, helping you find the best air bed patch kit for your situation.
Ease of Application: Keep It Simple
Let’s be honest, nobody wants to spend hours wrestling with a complicated patch kit, especially if you’re dealing with a deflated air bed at 2 AM. A user-friendly kit with clear instructions is a lifesaver. Look for kits that include everything you need, such as applicator tools or cleaning wipes.
Consider kits that utilize peel-and-stick patches or come with detailed instructions on how to properly apply the adhesive. The simpler the process, the less chance of making mistakes. Some kits offer video tutorials which can be a major bonus. If you are someone who dislikes messy situations, be sure to go for a patch kit with pre-glued patches. This will make patching a lot faster and easier.
Size and Quantity of Patches: Be Prepared
Think about the types of punctures your air bed is likely to encounter. A small pinhole leak requires a different sized patch than a larger tear. Having a variety of patch sizes in your kit ensures you’re prepared for any eventuality. Don’t underestimate the power of having more than you think you need.
Consider the overall number of patches included in the kit. A single patch might be enough for one repair, but what if you have multiple leaks or need to make repairs in the future? Opting for a kit with a generous supply of patches will give you peace of mind knowing you’re covered for multiple situations. Plus, you can always use the extras for other inflatables like pool toys or rafts.
Durability and Longevity: A Lasting Fix
A temporary patch job is just that, temporary. You want a repair that lasts, not something that starts peeling after a few uses. Look for patches that are made from durable materials and designed to withstand the wear and tear of regular use. Read user reviews to get a sense of how well the patches hold up over time.
Consider patches that are reinforced with extra layers or have a textured surface for added grip. These features can significantly improve the patch’s durability and prevent it from detaching under pressure. Investing in a high-quality patch kit now can save you money and hassle in the long run. The best air bed patch kit should offer a permanent fix.
Portability and Storage: Keep It Handy
An air bed patch kit is most useful when you need it, so it’s important that it’s easy to store and transport. Look for kits that come in a compact container or pouch. This will help you keep all the components organized and prevent them from getting lost.
Consider kits that are lightweight and easy to pack. Whether you’re storing it in your camping gear or keeping it in a drawer at home, a portable kit ensures you’re always prepared for unexpected leaks. A small size also encourages you to bring it on camping trips!
User Reviews and Reputation: Hear From Others
Before making a purchase, take the time to read reviews from other users. This is a valuable source of information that can provide insights into the real-world performance of the patch kit. Pay attention to what people are saying about the adhesive strength, durability, and ease of application.
Consider both positive and negative reviews. Look for patterns or recurring themes. If multiple users are reporting the same issue, it’s a red flag. However, don’t dismiss a kit based on a single negative review. Focus on the overall consensus and look for kits that have consistently high ratings and positive feedback. A product with a good reputation is often the best air bed patch kit.
FAQs
What kind of damage can a patch kit fix?
Think of a patch kit as a first-aid kit for your air bed! Generally, a good patch kit can handle small punctures, pinholes, and even minor tears. It’s fantastic for those pesky leaks that slowly deflate your bed overnight. Most kits work well on common air bed materials like PVC and flocked surfaces, so you’re pretty well covered for everyday wear and tear.
However, it’s important to be realistic. Patch kits aren’t miracle workers. They might not be the best solution for large rips, seam separations, or damage to the internal structure of your air bed. In those cases, you might unfortunately need to consider a replacement. But for those little annoyances, a patch kit can really extend the life of your air bed!
How do I find the leak in my air bed?
Finding the leak is often the trickiest part! The classic method is the soapy water test. Mix a bit of dish soap with water in a spray bottle and gently spray down sections of your air bed. Watch closely for bubbles to form; that’s where the air is escaping! Do this slowly and methodically to ensure you don’t miss anything.
Another helpful trick is to listen closely. In a quiet room, you might be able to hear the faint hiss of air escaping. You can also try running your hand close to the surface of the air bed to feel for any air currents. Sometimes, the leak is near a seam or valve, so pay extra attention to those areas.
Are patch kits easy to use, even for a beginner?
Absolutely! Most air bed patch kits are designed with ease of use in mind. They typically come with clear, step-by-step instructions that anyone can follow. The process usually involves cleaning the area around the leak, applying the adhesive, and pressing the patch firmly into place.
Don’t be intimidated if you’ve never patched anything before. It’s a pretty straightforward process. Just take your time, follow the instructions carefully, and you’ll be surprised at how easy it is to repair your air bed. A little bit of patience can save you a lot of money on a replacement!
How long does it take for a patch to dry and be ready to use?
The drying time can vary depending on the type of adhesive in your patch kit and the environmental conditions (like humidity). However, most kits recommend waiting at least a few hours, and ideally overnight, to ensure the adhesive has fully cured and formed a strong bond.
Rushing the drying process could result in the patch failing and the leak returning. To be safe, it’s always best to err on the side of caution and allow ample drying time. This will help you achieve a more durable and long-lasting repair.
Can I use any kind of glue for an air bed patch?
While it might be tempting to grab whatever glue you have lying around, it’s generally not a good idea to use just any adhesive on your air bed. Air beds are often made of specific materials like PVC or flocked fabric, and not all glues are compatible. Using the wrong glue could damage the material or create a weak bond that won’t hold.
Instead, stick to adhesives specifically designed for air beds or inflatable products. These adhesives are formulated to create a strong, flexible, and waterproof bond that will stand up to the pressure and movement of the air bed. The patch kits in our guide are specifically chosen for their compatibility with common air bed materials, offering a reliable and safe solution.
Will the patch kit work on a flocked air bed?
Yes, most good quality air bed patch kits are designed to work on flocked surfaces! Flocking adds a soft, velvety texture, but it can sometimes make patching a bit trickier. However, the key is to ensure the kit includes an adhesive that can penetrate the flocking and bond securely to the underlying material.
When patching a flocked surface, it’s often helpful to gently remove some of the flocking directly around the leak before applying the patch. This will allow the adhesive to make better contact with the base material and create a stronger seal. Our recommended kits are selected with flocked air beds in mind, so you can rest assured they’ll offer a reliable fix.
How long will a patched air bed last?
That’s a great question, and it depends on a few factors! If the patch is applied correctly using a high-quality kit and the damage wasn’t too extensive to begin with, a patched air bed can last for quite a while – sometimes even years. Think of it like fixing a flat tire on a car; if done right, it can last the life of the tire.
However, remember that air beds are still subject to wear and tear. Continued use, extreme temperatures, and improper storage can all impact the lifespan of both the patch and the air bed itself. It’s best to properly store your air bed when not in use and avoid placing it on rough surfaces to prolong its life. A good patch will buy you time, but proper care is key for long-term use!
Verdict
So, there you have it! Finding yourself with a deflated air bed doesn’t have to mean the end of a good night’s sleep, or scrapping your camping trip altogether. Armed with the knowledge from our reviews and buying guide, you’re now equipped to choose the best air bed patch kit for your needs. No more panicking! No more lumpy sleeping surfaces!
Now go forth and conquer those pesky leaks! With the right patch kit in hand, you’re not just fixing an air bed; you’re investing in comfort, convenience, and peace of mind. Get ready to embrace worry-free adventures and sweet dreams, knowing you’re prepared for anything life throws your way (or punctures in your air bed, for that matter!). You’ve got this!