Remember when my back felt like a perpetually angry question mark? Hours hunched over my desk, fueled by caffeine and the burning desire to meet deadlines, were taking their toll. I knew something had to change, and fast. After experimenting with everything from ergonomic chairs to elaborate stretching routines, the answer, surprisingly, wasn’t a fancy gadget or a magic potion. It was a monitor bracket. Seriously! Suddenly, my screen was at eye level, my posture improved, and my back started thanking me. If you’re nodding along, wondering if a simple mount could be the key to unlocking your own ergonomic paradise, you’re in the right place.
This article is all about helping you find the best monitor brackets for your specific needs. We’ll delve into the different types available, discuss the key features to consider, and share our top picks based on rigorous testing and real-world feedback. Whether you’re a gamer seeking the perfect multi-monitor setup, a creative professional needing precise screen positioning, or just someone looking to boost their workspace comfort, our reviews and buying guide will equip you with the knowledge to choose the ideal bracket and finally say goodbye to neck pain and hello to a more productive and comfortable you.
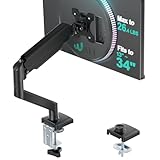
Before moving into the review of the best monitor brackets, let’s check out some of the relevant products from Amazon:


Last update on 2026-01-19 / #ad / Affiliate links / Images from Amazon Product Advertising API
Why Your Monitor Needs a Wingman: An Intro to Monitor Brackets
Ever feel like your desk is a battleground between tangled cables, a hunched-over posture, and a monitor stubbornly rooted to its factory stand? You’re not alone! Many of us spend countless hours at our desks, and a poorly positioned monitor can wreak havoc on our neck and back. But there’s a simple solution: monitor brackets. Think of them as the unsung heroes of ergonomic bliss.
So, what exactly are these wondrous things? Monitor brackets, sometimes called monitor arms or mounts, are devices that attach your monitor to your desk or wall, freeing up valuable space and allowing you to position your screen exactly where you need it. In fact, studies show that using a monitor arm can increase desk space by up to 40% and reduce neck strain by as much as 30%. That’s a significant improvement!
Choosing among the best monitor brackets can seem daunting at first. There are gas spring arms, fixed mounts, single and dual monitor options… it’s a lot to consider. But the potential benefits for your posture, productivity, and overall desk organization are well worth the research. We’ll walk you through everything you need to know, from understanding VESA compatibility to choosing the right type of bracket for your needs.
Consider this guide your friendly companion on the quest for the perfect monitor setup. We’ll help you cut through the jargon and find the best monitor brackets to transform your workspace from a cluttered mess into an organized, comfortable haven. Let’s dive in!
The Best Monitor Brackets
Ergotron HX Desk Monitor Arm
The Ergotron HX is a real powerhouse of a monitor arm, built for the discerning user who demands the absolute best. Forget flimsy plastic – this thing is all sturdy aluminum, capable of supporting ultrawide monitors up to 49 inches or even dual monitors up to 20 lbs total. Its smooth, fluid motion makes adjusting your screen effortless, whether you need to switch from sitting to standing or share your screen with a colleague. Plus, the integrated cable management keeps your desk looking clean and organized.
This bracket might be an investment, but it’s one that pays off in terms of ergonomics and build quality. The HX’s versatility is impressive; it can handle a wide range of monitor sizes and weights, and its adjustability allows you to dial in the perfect viewing angle for any task. If you’re serious about optimizing your workspace and want a monitor arm that will last for years, the Ergotron HX is hard to beat.
Amazon Basics Single Monitor Stand – Height Adjustable
Looking for a reliable and affordable monitor arm? The Amazon Basics Single Monitor Stand is a solid choice. It gets the job done without breaking the bank. This mount offers a decent range of height and tilt adjustment, allowing you to find a more comfortable viewing position and reduce neck strain. Installation is also pretty straightforward, which is always a plus!
While it might not have the premium feel or the ultra-smooth movement of some of the higher-end options, it’s a fantastic value for the price. It is ideal for smaller to medium-sized monitors. It also does a great job of freeing up desk space by lifting your monitor off the surface. If you’re on a budget but still want the benefits of a monitor arm, this is a great option.
Humanscale M2.1 Monitor Arm
The Humanscale M2.1 Monitor Arm blends sleek design with exceptional functionality. It supports a wide range of monitors and offers effortless adjustability, allowing you to find the perfect ergonomic position. Its innovative counterbalance mechanism provides smooth and stable movement. The integrated cable management system helps keep your workspace clutter-free.
The M2.1 is designed with sustainability in mind, using minimal parts and eco-friendly materials. It’s not the cheapest option on the market. However, its combination of style, performance, and environmental consciousness makes it a worthwhile investment for those who value both form and function. If you want a monitor arm that looks as good as it performs, the Humanscale M2.1 is a top contender.
North Bayou Monitor Desk Mount Stand
For those seeking a robust and flexible monitor mount without an exorbitant price tag, the North Bayou Monitor Desk Mount Stand delivers. This gas spring arm provides full articulation, allowing you to easily adjust your monitor’s height, tilt, swivel, and rotation for optimal viewing comfort. The sturdy construction ensures stability, even with larger monitors.
The North Bayou stand is known for its impressive range of motion and ease of adjustment. This makes it ideal for users who frequently switch between sitting and standing or need to share their screen with others. It might not have the same level of polish as some of the premium brands. Still, its performance and affordability make it a popular choice for home and office use.
EleTab Dual Monitor Mount Stand
Need to support two monitors without sacrificing desk space? The EleTab Dual Monitor Mount Stand is an excellent solution. This heavy-duty stand is designed to hold two screens side-by-side, allowing you to create a more productive and immersive workspace. It offers adjustable height, tilt, and swivel, so you can customize the viewing angle for each monitor independently.
Installation is relatively simple, and the included cable management clips help keep your desk organized. While it may not have the most advanced features, the EleTab Dual Monitor Mount Stand provides a reliable and cost-effective way to upgrade your dual-monitor setup. If you’re looking to maximize your screen real estate and improve your ergonomics, this stand is a solid choice.
Why Do People Need To Buy Monitor Brackets?
Ever feel like your desk is perpetually cluttered, even after a “clean”? Or maybe you’re constantly craning your neck to see your monitor, leading to nagging aches and pains? Many of us accept these as unavoidable parts of modern life, but there’s a simple solution: a monitor bracket! Think of it as giving your monitor superpowers. It’s not just about freeing up desk space (though that’s a huge perk!).
Imagine working from home and needing to switch between a landscape view for spreadsheets and a portrait view for coding or reviewing documents. A high-quality, adjustable monitor bracket makes this a breeze! The best monitor brackets aren’t just static holders; they offer incredible flexibility, allowing you to tilt, swivel, and extend your monitor to the perfect viewing angle, regardless of your posture or the time of day.
Beyond ergonomics, a monitor bracket can dramatically improve your workspace aesthetics. Those bulky monitor stands? Gone! Now you have a clean, minimalist look that enhances focus and productivity. This is particularly helpful if you have multiple monitors; with a well-chosen bracket, you can create a seamless multi-monitor setup that maximizes screen real estate and minimizes visual clutter.
Ultimately, investing in a good monitor bracket isn’t just about buying a piece of hardware; it’s about investing in your comfort, health, and productivity. It’s about creating a workspace that supports you, rather than hinders you. So, reclaim your desk space, banish neck strain, and elevate your entire work experience with the best monitor brackets available. You’ll wonder how you ever managed without one!
Understanding Monitor Bracket Types: Which One Suits Your Setup?
So, you’re diving into the world of monitor brackets – great! But before you get lost in the specs and features, let’s talk types. Imagine you’re decorating your home; you wouldn’t use the same furniture for every room, right? Same with monitor brackets. There’s a fixed bracket, perfect for simplicity, a tilting bracket for ergonomic adjustments, a swivel bracket for sharing your screen, and even full-motion brackets that offer maximum flexibility.
A fixed monitor bracket is your “set it and forget it” option. It mounts your monitor directly to the wall or desk, providing a clean, low-profile look. Think of it like hanging a picture frame. This is ideal for situations where you know your viewing angle and don’t need to make frequent adjustments, perhaps a dedicated gaming setup where your chair and posture are always the same.
Tilting monitor brackets allow you to adjust the vertical angle of your monitor. This can be incredibly useful for reducing glare or improving ergonomics. Imagine you’re working in a brightly lit office; a slight downward tilt can eliminate reflections and reduce eye strain. These are also great if you occasionally switch between sitting and standing.
Full-motion monitor brackets are the most versatile. They offer tilt, swivel, and rotation, allowing you to position your monitor exactly where you need it. Envision a collaborative workspace where you need to quickly share your screen with colleagues or a dynamic home office where you switch between multiple tasks requiring different monitor positions. These brackets are a game-changer for flexibility and efficiency.
Choosing the Right Monitor Size and Weight Capacity
Choosing a monitor bracket isn’t just about the features; it’s also about compatibility. You wouldn’t try to fit a size 12 shoe on a size 8 foot, would you? Similarly, your monitor bracket needs to be able to handle your monitor’s size and weight. Overlooking this can lead to instability, damage, or even a complete mounting failure.
First, check your monitor’s size. Most brackets are designed to accommodate a range of sizes, like 17-inch to 32-inch monitors. But you want to make sure your monitor falls within that range. Imagine buying a bracket only to find out it’s too small – frustrating, right? Double-check those specifications!
Next, and even more critically, is the weight capacity. Your monitor bracket needs to be able to safely support the weight of your monitor. You can usually find the weight listed on the monitor’s box or in its specifications. Think of it like loading up a shelf – too much weight, and it collapses. Choose a bracket with a weight capacity slightly higher than your monitor’s weight for extra safety.
What happens if you ignore the weight capacity? Well, at best, the bracket might sag or be difficult to adjust. At worst, it could fail completely, sending your monitor crashing down. Remember the lesson about building things to code to prevent calamities? It’s the same principle here. Safety first! Always choose the right size and weight capacity monitor bracket to prevent any potential mishaps!
Desk Mount vs. Wall Mount: Which is Right for You?
So, you’ve figured out the bracket type and the size/weight capacity. Now comes the big question: Desk mount or wall mount? Think of it like choosing between a freestanding bookshelf or a built-in one – each has its own set of pros and cons depending on your space and needs.
Desk mount monitor brackets attach directly to your desk, typically using a clamp or a grommet mount. These are ideal if you want flexibility and don’t want to drill holes in your wall. Imagine you’re a student living in a dorm room; a desk mount allows you to easily adjust your setup without damaging the walls and potentially facing those penalties.
Wall mount monitor brackets, on the other hand, attach to your wall. These offer a clean, space-saving look, but require more installation effort and can’t be easily moved. Think of setting up a home theater. You’d probably want to wall-mount your TV for a sleek, permanent setup. Wall mounts are ideal for situations where you have a dedicated space and want to maximize desk space.
Choosing between a desk mount and a wall mount ultimately comes down to your individual needs and preferences. Consider your desk space, your willingness to drill holes in the wall, and how often you plan to adjust your monitor’s position. There’s no one-size-fits-all answer; it’s about finding the solution that works best for your specific situation. And remember: Measure twice, drill once!
Installation Tips and Best Practices for Secure Mounting
Alright, you’ve picked the perfect bracket, measured everything twice, and are ready to install. But before you grab that drill, let’s go over some installation tips and best practices. You wouldn’t build a house without a solid foundation, right? Similarly, a secure and properly installed monitor bracket is crucial for safety and stability.
First, always read the manufacturer’s instructions carefully. It sounds obvious, but skipping this step can lead to serious headaches. Each bracket is different, and the instructions will guide you through the specific steps for your model. Think of it like assembling IKEA furniture – trying to wing it rarely ends well. Follow the instructions, and you’ll be much more likely to succeed.
When drilling into walls, be sure to locate studs. Wall studs provide the necessary support to hold the weight of your monitor and bracket. Using a stud finder will help you locate the studs behind your drywall. Imagine mounting a heavy painting only to have it fall off the wall because you didn’t use a stud – that’s the same principle at play.
Finally, double-check all screws and connections to ensure they are tight and secure. Loose screws can cause instability and, over time, lead to failure. Imagine a wobbly table – tightening the screws makes all the difference. Regularly inspect your monitor bracket to ensure everything is still tight and secure, and you will be safe!
Choosing the Best Monitor Brackets: A Friendly Guide
Hey there! So, you’re thinking about upgrading your workspace with a monitor bracket? Awesome! It’s a surprisingly impactful change that can seriously boost your comfort and productivity. But with so many options out there, finding the best monitor brackets for your needs can feel a bit overwhelming. Don’t worry, though! I’m here to walk you through the key things you should consider before making a purchase. Think of me as your friendly guide, here to help you declutter the confusion and find the perfect bracket for your setup.
Let’s dive in and find the best monitor brackets for you!
1. Compatibility is King: VESA Mounts and Monitor Size
First and foremost, you need to make sure the bracket you’re eyeing is actually compatible with your monitor. This all boils down to VESA (Video Electronics Standards Association) compatibility. VESA is basically a standardized mounting interface that most monitors adhere to. You’ll typically find a square or rectangular pattern of screw holes on the back of your monitor. The distance between these holes (in millimeters) is your VESA size. Common sizes include 75x75mm, 100x100mm, and 200x100mm, but larger monitors might have even bigger VESA patterns.
Before you even think about the cool features, grab a ruler (or consult your monitor’s manual) and measure that VESA pattern! Then, double-check the bracket’s specs to ensure it supports that size. Also, pay attention to the monitor size and weight limits specified by the bracket manufacturer. Trying to mount a behemoth of a monitor on a bracket designed for a lightweight screen is a recipe for disaster (and potentially a broken monitor!). So, take this step seriously – it’s the foundation for a successful monitor mounting experience. Finding the best monitor brackets starts with compatibility.
2. Desk Type and Mounting Options: Clamp, Grommet, or Wall?
Alright, next up is figuring out how you want to attach the bracket to your workspace. There are typically three main options: clamp mounts, grommet mounts, and wall mounts. Clamp mounts are super popular because they’re easy to install and don’t require any permanent modifications to your desk. They simply clamp onto the edge of your desk, making them a great option for renters or anyone who likes to rearrange their setup frequently.
Grommet mounts, on the other hand, require a hole in your desk (either pre-existing or one you drill yourself). They offer a more secure and stable attachment than clamp mounts, but they’re also a bit more permanent. Finally, wall mounts are the most permanent option, as they involve drilling directly into the wall. These are ideal for creating a super clean and minimalist setup, especially if you want to free up desk space entirely. The best monitor brackets for you will depend on your desk and room layout. Consider your options!
3. Range of Motion: Tilt, Swivel, and Rotation
Now, let’s talk about flexibility! One of the biggest benefits of using a monitor bracket is the ability to adjust your monitor’s position for optimal comfort and ergonomics. That’s where tilt, swivel, and rotation come in. Tilt allows you to adjust the monitor up or down, reducing glare and neck strain. Swivel lets you turn the monitor left or right, which is great for sharing your screen with someone sitting next to you.
Rotation allows you to rotate the monitor from landscape (horizontal) to portrait (vertical) orientation. This is especially useful for programmers, writers, and anyone who works with long documents or websites. Consider how you typically use your monitor and choose a bracket that offers the range of motion that will best suit your needs. If you frequently switch between landscape and portrait, make sure the bracket offers easy and smooth rotation. Some of the best monitor brackets out there offer all three.
4. Build Quality and Materials: Sturdy and Reliable
This one’s all about peace of mind. You want a monitor bracket that’s built to last and can safely support your monitor. Pay attention to the materials used in the bracket’s construction. Steel is generally the most durable option, but aluminum can also be a good choice, especially for lighter monitors. Look for brackets with a solid and sturdy feel. Read reviews and see what other users have to say about the bracket’s build quality.
A wobbly or flimsy bracket is a recipe for disaster (and a potential monitor casualty!). Also, check the weight capacity of the bracket and make sure it exceeds your monitor’s weight by a comfortable margin. It’s always better to err on the side of caution when it comes to supporting your valuable electronics. Investing in the best monitor brackets that are well-made will save you headaches in the long run.
5. Cable Management: Keeping Things Tidy
Let’s be honest: cables are the bane of many workspaces. They can quickly turn a clean and organized desk into a tangled mess. Luckily, many monitor brackets come with built-in cable management features to help you keep things tidy. These can include cable clips, channels, or even integrated cable sleeves that run along the arm of the bracket.
These features allow you to route your monitor cables neatly and discreetly, preventing them from dangling all over the place and creating a visual distraction. If you value a clean and organized workspace, definitely look for a bracket with good cable management features. It’s a small detail that can make a big difference in the overall aesthetics and functionality of your setup. The best monitor brackets often include well-designed cable management systems.
6. Adjustment Mechanisms: Smoothness and Ease of Use
How easy is it to actually adjust the bracket? This is a factor that often gets overlooked, but it’s crucial for a good user experience. Look for brackets with smooth and easy-to-use adjustment mechanisms. You want to be able to tilt, swivel, and rotate your monitor with minimal effort and without having to loosen or tighten any screws constantly.
Some brackets use gas springs or counter-balance mechanisms to provide smooth and effortless adjustments. These types of brackets are generally more expensive, but they can be worth the investment if you frequently adjust your monitor’s position. Read reviews and see what other users have to say about the bracket’s adjustment mechanisms. A smooth and easy-to-use bracket will make your life much easier in the long run. Investing in the best monitor brackets means investing in ergonomic ease.
7. Budget and Features: Finding the Right Balance
Last but not least, let’s talk about budget. Monitor brackets range in price from relatively inexpensive to quite pricey, depending on the features and build quality. It’s important to set a budget before you start shopping and then find a bracket that offers the best combination of features and value within that price range.
Don’t automatically assume that the most expensive bracket is always the best choice. There are plenty of excellent mid-range brackets that offer a great balance of features and performance. Focus on the features that are most important to you (such as VESA compatibility, range of motion, and build quality) and then find a bracket that meets those needs without breaking the bank. The best monitor brackets don’t have to be the most expensive. It’s all about finding the right fit for your needs and budget.
FAQs
What’s the difference between a monitor arm and a monitor stand?
Think of a monitor stand as a stationary platform for your monitor. It typically sits directly on your desk and offers limited adjustability, mostly just tilt or a slight height increase. It’s a simple and affordable option if you just need a little lift, but it won’t drastically change your viewing experience.
A monitor arm, on the other hand, is more like a robotic extension for your monitor. It clamps to your desk and offers a wide range of motion: up, down, left, right, tilt, swivel, and even rotate! This gives you far more ergonomic flexibility and helps free up valuable desk space. While generally more expensive, the increased comfort and desk real estate often make it worthwhile for many users.
How do I know if a monitor bracket will be compatible with my monitor?
Great question! The key here is VESA compatibility. VESA (Video Electronics Standards Association) has standardized mounting patterns for monitors. Look on the back of your monitor, and you’ll likely see a square pattern of screw holes. Measure the distance between these holes in millimeters (e.g., 75x75mm, 100x100mm).
Once you know your monitor’s VESA size, check the specifications of the monitor bracket you’re interested in. Most brackets clearly state which VESA sizes they support. As long as your monitor’s VESA pattern is listed, you’re good to go! If you’re unsure, double-check the product description or contact the seller – they’re usually happy to help!
Will a monitor arm really help with my neck and back pain?
Absolutely, it can make a significant difference! Think about it: most of us slouch or crane our necks to look at our monitors, which puts a lot of strain on our bodies. A monitor arm lets you position your monitor at the perfect height and distance for your body, promoting better posture.
By allowing you to maintain a more ergonomic posture – head level, shoulders relaxed – a monitor arm can reduce strain on your neck, back, and even your eyes! It’s not a magic bullet, but it’s a fantastic tool for creating a more comfortable and healthier workspace, especially if you spend long hours in front of a screen.
How much weight can monitor brackets typically hold?
Most monitor brackets specify a maximum weight capacity, so always check the product description! The range can vary quite a bit, but you’ll generally find brackets that can hold monitors from around 17 pounds all the way up to 30 pounds or even more for heavy-duty models.
It’s crucial to choose a bracket that can comfortably support the weight of your monitor. Exceeding the weight limit is risky and could damage the bracket, your monitor, or even your desk. Weigh your monitor (without the stand) before you buy, just to be safe. A little extra wiggle room in the weight capacity is always a good idea!
Are gas spring monitor arms better than mechanical spring arms?
This really depends on your needs and preferences! Gas spring arms generally offer smoother, more fluid adjustments. They use compressed gas to counterbalance the weight of the monitor, making it easier to reposition with minimal effort. They often feel more premium.
Mechanical spring arms, on the other hand, use coiled springs to provide support. They tend to be more affordable but might require a bit more force to adjust. They’re perfectly functional, though. Gas spring arms may be preferred if you anticipate making frequent adjustments throughout the day, while mechanical arms are a solid choice for a more budget-friendly option.
What tools will I need to install a monitor bracket?
Good news, you probably already have most of what you need! Most monitor brackets come with the necessary screws and Allen wrenches for assembly and installation. You’ll typically need a Phillips head screwdriver to attach the VESA plate to the back of your monitor.
Beyond that, a level can be helpful to ensure your monitor is perfectly straight. Depending on the type of desk mount (clamp or grommet), you might also need a wrench to tighten the clamp securely or drill a hole (grommet mount). If you’re drilling, make sure you know what is underneath the desk! Always read the instructions carefully before you begin, and don’t hesitate to watch a video tutorial if you’re unsure about any steps.
What are the benefits of using a dual monitor bracket?
The biggest benefit is increased productivity! Having two monitors side-by-side allows you to multitask more efficiently. You can have one application open on each screen, reducing the need to constantly switch between windows. It’s a game-changer for many professionals.
Beyond productivity, dual monitor brackets also offer the same ergonomic benefits as single monitor arms, allowing you to position both monitors at the ideal height and angle for comfortable viewing. Plus, they free up a significant amount of desk space compared to using two separate monitor stands, creating a cleaner and more organized workspace.
Final Verdict
So there you have it! You’re now armed with the knowledge to choose the best monitor brackets for your needs, transforming your workspace into an ergonomic and productive haven. Remember, the perfect setup is unique to you, so consider your priorities, measure your space, and don’t be afraid to experiment. Finding the right balance between comfort, efficiency, and aesthetics is key.
Now go forth and conquer your cable chaos and reclaim your desk space! You’ve got the insights, the reviews, and the buyer’s guide – all you need is a little inspiration and a click to purchase. Picture yourself in a streamlined, organized workspace, feeling more focused and comfortable than ever before. You’ve got this! Happy mounting!