Remember that one time you were cruising down the open road, sun on your face, wind in your hair… but your favorite song was barely audible over the roar of your engine? Yeah, that’s the worst! We’ve all been there, desperately trying to crank up the volume, only to be met with distortion and disappointment. That’s exactly why we decided to dive deep into the world of motorcycle audio and create this comprehensive guide. We understand the struggle of wanting to enjoy high-quality sound while riding, which is why we’re focusing on the best ways to amplify your listening experience.
This guide is designed to help you find the perfect solution: the best 4 channel motorcycle amplifiers for your specific needs. Whether you’re a seasoned biker looking to upgrade your existing system or a newbie trying to build your sound setup from scratch, we’ve got you covered. We’ve compiled detailed reviews of top-rated models, highlighting their key features, pros, and cons, along with a handy buying guide to help you make an informed decision. Let’s turn your motorcycle rides into epic sound journeys!
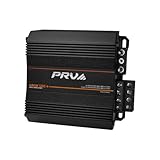
Before moving into the review of the best 4 channel motorcycle amplifiers, let’s check out some of the relevant products from Amazon:


Last update on 2026-01-29 / #ad / Affiliate links / Images from Amazon Product Advertising API
Crank Up the Volume: Finding Your Perfect 4-Channel Motorcycle Amp
Let’s face it, wind noise and engine rumble can quickly turn your favorite tunes into a muffled mess when you’re out on the open road. You’ve probably experienced that moment when your music fades into the background, leaving you wishing for a sonic boost. Enter the world of motorcycle amplifiers! They’re not just about getting louder, they’re about experiencing your music with clarity and power, no matter the conditions. More and more riders are upgrading their audio systems, with the motorcycle audio market projected to reach over $500 million by 2027.
Now, if you’re looking to seriously upgrade your bike’s sound system, a 4-channel amplifier might just be the sweet spot. Why 4 channels? Well, it offers flexibility. You can power speakers in your fairing and rear pods or even add some saddlebag speakers for a truly immersive listening experience. Plus, with the right amp, you can bridge channels to dedicate more power to fewer speakers for a bolder sound.
But with so many options available, how do you find the best 4 channel motorcycle amplifiers for your specific needs? It can feel overwhelming sifting through the specs and features, trying to decipher which amp truly delivers on its promises. Power output, weather resistance, size, and of course, price, are all factors that need careful consideration.
Don’t worry, that’s where we come in! We’re here to help you navigate the world of motorcycle audio and find the perfect amp to transform your riding experience. We’ll explore top contenders, break down the key features, and provide you with the knowledge you need to choose the amp that will have you rocking down the highway in no time. So, buckle up and let’s get started!
The Best 4 Channel Motorcycle Amplifiers
Rockford Fosgate TMS400X4ad
Looking for a powerful amplifier that can handle the harsh elements of the road? The Rockford Fosgate TMS400X4ad is a fantastic choice. This Class AD amplifier delivers a clean 100 watts per channel at 2 ohms, meaning you’ll have plenty of power to crank up your tunes, even at highway speeds. Plus, it’s designed specifically for motorcycles, so it’s compact, efficient, and built to withstand vibrations, dust, and moisture.
One of the standout features of the TMS400X4ad is its Element Ready design. This means it’s been treated with conformal coatings and other protective measures to resist corrosion and damage from the elements. It’s also equipped with C.L.E.A.N. technology, which helps optimize the input signal and minimize distortion, resulting in a crystal-clear sound quality. Easy to install and even easier to enjoy, it makes those long rides all the better.
Aquatic AV AQ-AD600.4
The Aquatic AV AQ-AD600.4 is a real powerhouse designed for audiophiles who demand the best sound, even when cruising down the open road. With 150 watts per channel at 2 ohms, this amplifier packs a serious punch, ensuring your music is loud and clear, even over the rumble of your engine and the wind noise. Its marine-grade construction means it’s ready to take on the challenges of the motorcycle environment, from rain to sun.
Beyond its robust power and durability, the AQ-AD600.4 boasts excellent sound quality. It reproduces music with impressive clarity and detail, making every ride an enjoyable audio experience. Its compact size makes it relatively easy to install in various motorcycle configurations, and the included features like adjustable crossovers and gain controls allow for fine-tuning the sound to your personal preferences.
Soundstream Picasso Nano PN4.1000D
Need a lot of power in a tiny package? The Soundstream Picasso Nano PN4.1000D might be just the ticket. Don’t let its small size fool you. This Class D amplifier kicks out 250 watts per channel at 2 ohms, giving you plenty of headroom to push your speakers to their limits. Its efficient design minimizes heat generation, making it a reliable choice for long rides.
The Picasso Nano PN4.1000D is surprisingly versatile despite its diminutive dimensions. It features a full range of adjustments to get the perfect sound. High-pass and low-pass crossovers are also on hand. Easy to mount due to its size, it is built to stand up to the vibrations of the road.
Kenwood Excelon X801-5
While technically a 5-channel amplifier, the Kenwood Excelon X801-5 is often used as a high-powered 4-channel solution with the fifth channel powering a subwoofer. It delivers a solid 75 watts per channel to the main speakers. It’s a reliable and versatile option for those looking to upgrade their motorcycle audio system with added bass. The Kenwood brand is a well-known and highly regarded name in car audio, giving confidence in reliability.
The Excelon X801-5 is known for its clean and accurate sound reproduction. The built-in variable crossover network and bass boost allow you to fine-tune the audio to your liking. With its quality construction and reputation for longevity, this Kenwood amplifier is a smart investment for anyone wanting a full, rich sound on their motorcycle, even with the added challenge of wind and engine noise.
Wet Sounds HTX4
The Wet Sounds HTX4 is purpose-built for marine and powersports applications. This amplifier is designed to withstand the elements, delivering clean power and reliable performance, even in harsh conditions. It’s capable of delivering 125 watts per channel at 2 ohms, more than enough to get your tunes pumping on your motorcycle.
What sets the HTX4 apart is its rugged construction and marine-grade components. It’s built to resist corrosion, moisture, and vibration, ensuring long-lasting performance. The sound quality is clear and powerful, making it a great choice for those who demand the best audio experience, regardless of the environment. The Wet Sounds brand has a strong reputation in the marine audio world, so it makes sense that it works great on a motorcycle.
Why Do People Need to Buy 4 Channel Motorcycle Amplifiers?
Imagine cruising down the open road, the wind in your hair, the sun on your face…but the only sound you hear is the roar of your engine and the wind whipping past your ears. While the feeling of freedom is exhilarating, wouldn’t it be even better with your favorite tunes blasting clearly and powerfully? That’s where a 4-channel motorcycle amplifier comes in. It’s not just about getting louder music; it’s about experiencing a richer, fuller sound that cuts through the ambient noise, transforming your ride into a private concert on wheels.
Consider this: you’re leading a group ride, and everyone wants to hear the same playlist. With a 4-channel amp, you can power not only your front fairing speakers but also add speakers to your saddlebags or even rear pods. This creates a surround sound effect that engulfs you and your passengers in music, making the ride more enjoyable for everyone. No more struggling to hear the lyrics or missing out on the bass line. The best 4-channel motorcycle amplifiers offer enough power to drive multiple speakers without distortion, ensuring a clean and crisp listening experience even at high speeds.
Beyond group rides, a 4-channel amplifier provides flexibility. Perhaps you want to upgrade your speakers in the future? A 4-channel amp gives you the headroom to do so without needing to replace the entire system. Maybe you initially only install front speakers but later decide to add some in the rear. A 4-channel amp has you covered. It’s an investment in your audio experience, allowing you to customize and expand your sound system as your needs and preferences evolve.
Ultimately, investing in the best 4-channel motorcycle amplifier is about enhancing your riding experience. It’s about turning a simple commute or a weekend getaway into an immersive auditory adventure. It’s about clarity, power, and the ability to share your favorite music with others. So, ditch the muffled sound and embrace the open road with a soundtrack that matches the thrill of the ride. You’ll wonder how you ever rode without it.
Understanding Power and Impedance: Matching Your Amp to Your Speakers
Okay, let’s talk tech. When picking out your 4-channel amp, you can’t just grab the first shiny thing you see. You need to understand power (measured in Watts) and impedance (measured in Ohms). Think of it like this: your amp is the engine, and your speakers are the wheels. If the engine is way too powerful for the wheels, you’ll spin out and potentially damage something. Similarly, if the engine is too weak, you won’t get enough oomph to move.
Matching impedance is crucial. Your amp will have a recommended impedance range, usually 2 or 4 Ohms. Your speakers will also have an impedance rating. Ideally, you want to match them. Mismatched impedance can lead to overheating, distortion, or even damage to your amp or speakers. Imagine trying to run a marathon in shoes that are three sizes too big. Not fun, and definitely not efficient.
So how do you figure this out in the real world? Let’s say you have four speakers rated at 4 Ohms each. If you wire them in parallel to two channels (two speakers per channel), you effectively lower the impedance. Conversely, wiring them in series increases the impedance. There are plenty of wiring diagrams online to help you visualize this. It’s like setting up a complex train track; you need to know which way the power is flowing.
Don’t be intimidated by the technical jargon! There are plenty of online calculators and resources that can help you determine the correct wiring configuration for your specific setup. Most importantly, check the specifications of your amplifier and speakers carefully before making any connections. Remember, a little planning now can save you a lot of headaches (and money) later. A blown amp or speaker is a surefire way to ruin a perfectly good ride.
Installation Tips and Tricks: Making the Process Smooth Sailing
Installing a motorcycle amplifier isn’t rocket science, but it does require some planning and patience. Before you even touch a wire, make sure you have a clear understanding of your bike’s electrical system and the amplifier’s wiring diagram. Think of it like following a recipe; you need to understand the ingredients and the steps before you start cooking. Rushing into it will likely result in a burnt dinner (or a fried amp).
First, safety first! Disconnect the negative terminal of your battery before you start any wiring. This prevents accidental shorts and potential damage to your bike’s electrical system. Next, find a suitable location for your amplifier. Consider factors like airflow, accessibility, and protection from the elements. You don’t want to mount it somewhere where it will overheat or get soaked in the rain. Imagine trying to work in a cramped, poorly lit space – you’ll be much less efficient and more likely to make mistakes.
When running wires, be sure to use high-quality connectors and secure them properly. Vibration is a constant companion on a motorcycle, so loose connections are a recipe for intermittent audio problems. Use zip ties to keep the wires neat and organized, preventing them from rubbing against sharp edges or getting tangled. Think of it like organizing your toolbox; a well-organized system will make it easier to find what you need and prevent accidents.
Finally, double-check all your connections before you reconnect the battery. A simple mistake in wiring can cause serious damage. Once everything is connected, test the system thoroughly to ensure that all speakers are working properly and that the amplifier is producing clean, distortion-free sound. It’s like proofreading an important document; a careful review can catch errors that you might have missed the first time around. A successful installation is a satisfying experience, leaving you with crisp, clear audio for all your future rides.
Optimizing Sound Quality: Achieving Audio Nirvana on Two Wheels
Getting the best sound from your motorcycle audio system isn’t just about having the loudest amp. It’s about tuning and optimizing the sound to match your bike, your speakers, and your personal preferences. Think of it like baking a cake; you need the right ingredients (quality components), but you also need to adjust the recipe (EQ settings) to get the perfect flavor.
Start with your amplifier’s gain settings. Gain isn’t volume; it’s the input sensitivity. Too much gain can cause distortion, even at low volume levels. Adjust the gain until the sound is clean and clear, even when you crank it up a bit. Imagine trying to paint a masterpiece with too much paint on your brush – you’ll end up with a messy, blurry result.
Next, experiment with the equalizer (EQ) settings. Most amplifiers have at least a basic EQ that allows you to adjust the bass, midrange, and treble frequencies. Experiment with these settings to find a sound that you enjoy. Remember, there’s no one-size-fits-all EQ setting. What sounds great to one person might sound terrible to another. Think of it like adjusting the colors on your TV; you need to find a setting that looks natural and pleasing to your eye.
Consider the acoustics of your motorcycle. Wind noise, engine noise, and the shape of your fairing can all affect the sound quality. You might need to compensate for these factors by adjusting the EQ or adding sound deadening material to certain areas of your bike. Imagine trying to have a conversation in a noisy restaurant; you might need to speak louder or move to a quieter table.
Finally, don’t be afraid to experiment! The best way to optimize your sound quality is to try different settings and listen to how they affect the music. Take your bike for a ride and listen to your favorite songs. Adjust the EQ and gain settings until you find a sound that you love. Just like learning to ride a motorcycle, it takes practice and patience to master the art of audio optimization. The reward is a truly immersive and enjoyable listening experience on the open road.
Maintenance and Troubleshooting: Keeping Your System Running Smoothly
Like any piece of machinery, your motorcycle audio system needs regular maintenance to keep it running smoothly. A little bit of preventative care can save you a lot of headaches (and money) down the road. Think of it like taking your motorcycle in for regular oil changes; it’s a simple task that can prevent major engine problems.
Periodically check all your wiring connections to ensure that they are still secure. Vibration can cause connections to loosen over time, leading to intermittent audio problems or even a complete system failure. Inspect the wires for any signs of damage, such as frayed insulation or corrosion. Imagine neglecting the tires on your motorcycle; eventually, they will wear out and could cause a dangerous accident.
Keep your amplifier clean and free of dust and debris. Dust can accumulate inside the amplifier and cause it to overheat, potentially damaging the internal components. Use a soft brush or a can of compressed air to remove any dust that has accumulated. Think of it like cleaning the filter in your air conditioner; a clean filter will allow the unit to run more efficiently.
If you experience any problems with your audio system, such as distortion, weak sound, or a complete lack of audio, start by checking the basics. Make sure that all your connections are secure, that the amplifier is powered on, and that the volume is turned up. If you’re still having problems, consult the amplifier’s troubleshooting guide. It’s like checking the fuse box when the lights go out; often, the problem is a simple fix.
If you’re not comfortable troubleshooting the problem yourself, take your bike to a qualified audio technician. They have the tools and expertise to diagnose and repair more complex issues. Remember, a small problem that is left unaddressed can often turn into a much bigger (and more expensive) problem down the road. Just like with your motorcycle, regular maintenance and prompt repairs will keep your audio system running smoothly for years to come.
Choosing the Best 4 Channel Motorcycle Amplifiers: A Buyer’s Guide
Hey there, fellow rider! So, you’re looking to upgrade your motorcycle’s sound system with a 4-channel amplifier? Awesome! Getting crisp, clear audio while cruising down the open road is a game-changer. It’s like adding a soundtrack to your adventures, making those long rides even more enjoyable. But with so many options out there, finding the best 4 channel motorcycle amplifiers can feel a bit overwhelming. Don’t worry, though; I’m here to help you navigate the world of motorcycle audio and choose the perfect amp for your needs.
This guide is designed to be your friendly companion, offering practical advice and insights to ensure you make an informed decision. We’ll break down the key factors you should consider, turning that confusing jargon into plain English, so you can confidently choose the best 4 channel motorcycle amplifiers and have your bike rockin’ in no time. So, let’s dive in and get you closer to that incredible audio experience you’ve been dreaming of!
Power Output: Cranking Up the Volume (Safely!)
When choosing the best 4 channel motorcycle amplifiers, power output is arguably one of the most crucial aspects. This refers to how much juice the amplifier can deliver to your speakers, measured in watts. You’ll see figures like “RMS power” and “Peak power.” Pay close attention to RMS power, as this represents the continuous power the amplifier can reliably provide. Peak power is just a momentary burst and doesn’t reflect the amplifier’s sustained capabilities. Matching the RMS power of your amplifier to the RMS power handling of your speakers is key to avoid distortion and damage.
Think of it like this: you wouldn’t put a tiny engine in a monster truck, right? Similarly, overpowering your speakers can blow them, while underpowering them will result in weak, distorted sound. So, check the power rating of your speakers, consider how loud you like to listen to your music, and choose an amplifier that provides the right amount of power to bring your audio to life without causing any harm. Remember, a little headroom (slightly more power from the amp than your speakers require) is always a good idea for dynamic range and cleaner sound at higher volumes.
Weather Resistance: Braving the Elements
Motorcycles are exposed to all sorts of weather conditions: rain, dust, sun, and even extreme temperatures. Therefore, weather resistance is a non-negotiable factor when selecting the best 4 channel motorcycle amplifiers. Look for amplifiers specifically designed for motorcycle use, as these are typically built with features like conformal coated circuit boards, sealed connections, and rugged enclosures to protect them from the elements.
Imagine investing in a powerful amp only to have it fail after the first rain shower. It’s a frustrating and potentially costly experience. Choosing an amplifier with a good IP (Ingress Protection) rating is crucial. This rating tells you how well the amp is protected against dust and water. Look for amplifiers with at least an IP65 rating, meaning they are protected against dust and low-pressure water jets. Investing in a weather-resistant amplifier ensures its longevity and keeps the music playing, no matter what Mother Nature throws your way.
Size and Mounting: Finding the Perfect Fit
Motorcycles often have limited space for aftermarket accessories, making size and mounting considerations vital when looking at the best 4 channel motorcycle amplifiers. You need to find an amplifier that not only fits physically but also allows for proper ventilation to prevent overheating. Measure the available space carefully and choose an amplifier that can be mounted securely and discreetly.
Think of where you plan to mount the amplifier: under the fairing, in a saddlebag, or perhaps in a custom enclosure? Each location has its own size constraints and mounting requirements. Some amplifiers are specifically designed with compact footprints and flexible mounting options, making them easier to integrate into your motorcycle’s existing setup. Consider the ease of access for adjustments and maintenance as well. A well-placed and properly mounted amplifier will not only look better but also perform more efficiently and last longer.
Connectivity: Integrating with Your System
Connectivity refers to the types of inputs and outputs the amplifier has, and it’s a crucial aspect when choosing the best 4 channel motorcycle amplifiers. Make sure the amplifier has the necessary connections to integrate seamlessly with your existing audio system, including your head unit, speakers, and any other accessories like subwoofers or equalizers.
Does your head unit have RCA outputs? If so, you’ll need an amplifier with RCA inputs. If your head unit only has speaker-level outputs, you’ll need an amplifier with speaker-level inputs or the ability to use a line output converter. Also, consider the number of speaker outputs. A 4-channel amplifier can power four speakers directly, or it can be bridged to power two speakers with more power. Think about your current setup and future expansion plans to ensure the amplifier you choose has the right connectivity options for your needs.
Sound Quality: Delivering the Sonic Goods
Of course, the ultimate goal is fantastic sound, so sound quality is paramount when considering the best 4 channel motorcycle amplifiers. Look for amplifiers with low distortion, high signal-to-noise ratio, and a wide frequency response. These specifications indicate that the amplifier will reproduce your music accurately and cleanly, with minimal unwanted noise or coloration.
Don’t be swayed by marketing hype; instead, look for amplifiers with solid technical specifications and positive reviews from other riders. Factors like the quality of the internal components, the design of the amplifier circuit, and the overall engineering play a significant role in determining sound quality. If possible, listen to the amplifier in person before you buy it. Even better, try to listen to it in a similar environment to your motorcycle, as ambient noise and wind can significantly affect perceived sound quality.
Efficiency: Conserving Your Battery’s Power
Motorcycles have limited electrical systems, so efficiency is a critical consideration when selecting the best 4 channel motorcycle amplifiers. A highly efficient amplifier will draw less current from your battery, leaving more power for other essential functions like lights and ignition. Class D amplifiers are known for their high efficiency, often converting over 80% of the input power into output power.
Imagine your battery draining unexpectedly on a long ride due to a power-hungry amplifier. It’s a scenario no rider wants to face. Choosing an efficient amplifier not only extends your battery life but also reduces the strain on your motorcycle’s charging system. Look for amplifiers that are specifically designed for motorcycle use, as these often incorporate advanced power management features to optimize efficiency and minimize power consumption.
Budget: Balancing Performance with Price
Let’s be real – budget is always a factor. While you naturally want the best 4 channel motorcycle amplifiers, you also want to stay within a reasonable price range. Set a budget before you start shopping and try to find an amplifier that offers the best combination of performance, features, and durability within your price range.
Don’t be tempted to go for the cheapest option, as this often leads to compromised performance and reliability. Instead, focus on finding a balance between quality and affordability. Read reviews, compare specifications, and consider brands with a proven track record of producing reliable motorcycle audio equipment. Remember, investing in a slightly more expensive amplifier upfront can save you money in the long run by providing better sound quality, longer lifespan, and fewer headaches. Sometimes spending a little more to get the best 4 channel motorcycle amplifiers means avoiding a replacement later.
Frequently Asked Questions
What exactly *is* a 4-channel motorcycle amplifier and why would I need one?
Think of a 4-channel motorcycle amplifier as a powerhouse for your audio! It’s basically an electronic device that boosts the relatively weak audio signal from your head unit (radio or smartphone, usually) before sending it to your speakers. The “4-channel” part means it has four independent output channels, allowing you to power four separate speakers.
Why might you need one? Well, those little speakers built into some motorcycles or even aftermarket ones powered directly by your head unit often lack the “oomph” to cut through wind noise and engine rumble. An amplifier provides the extra power needed to deliver a clearer, louder, and more enjoyable listening experience, especially at highway speeds. Plus, if you’re planning on adding more speakers to your bike, an amplifier is a must!
How do I know if a 4-channel amplifier is compatible with my motorcycle?
Compatibility really comes down to a few key factors. First, consider the size. Motorcycles have limited space, so make sure the amplifier’s dimensions will work within your bike’s fairing or other mounting location. Check the amplifier’s specs for its physical size and compare it to your available space.
Next, voltage is important. Motorcycles typically run on a 12-volt system, so you’ll want an amplifier designed for that voltage. Then, consider the power requirements and make sure your bike’s electrical system can handle the amplifier’s power draw without causing issues. Finally, look for an amplifier with appropriate input options (like RCA or speaker-level inputs) to match your head unit’s outputs. Don’t be afraid to consult with a professional installer if you’re unsure!
What wattage should I look for in a 4-channel motorcycle amplifier?
Wattage can be a bit confusing, but generally, you’ll want to match the amplifier’s RMS (Root Mean Square) power output to the RMS power handling of your speakers. RMS is a more accurate measurement of continuous power than peak power.
So, if your speakers are rated for 50 watts RMS each, you’d ideally want an amplifier that delivers around 50 watts RMS per channel. It’s okay to go slightly higher (say, 75 watts RMS) to provide some headroom, but avoid significantly overpowering your speakers, as that can lead to damage. A good match ensures you get the best sound quality and prevent blown speakers.
Are motorcycle amplifiers waterproof or weather-resistant?
This is a very important question! Motorcycle electronics are constantly exposed to the elements, so weather resistance is crucial. While “waterproof” is a strong claim and often overstated, look for amplifiers specifically designed for motorcycles and labeled as “weather-resistant” or “marine-grade.”
These amplifiers typically have features like conformal-coated circuit boards (which protect against moisture) and sealed connections to prevent water intrusion. However, even with these features, it’s always a good idea to mount the amplifier in a location with some protection from direct rain and splashes, if possible. Think inside a fairing or under a seat with a protective cover.
How difficult is it to install a 4-channel motorcycle amplifier myself?
The difficulty of installation really depends on your experience with electrical work and your comfort level with disassembling parts of your motorcycle. If you’re familiar with wiring, have basic tools, and can follow instructions carefully, you might be able to handle it.
However, motorcycle wiring can be complex, and making mistakes can lead to electrical problems or even damage to your bike. If you’re not comfortable with any of these aspects, it’s always best to seek professional installation. A qualified installer will ensure everything is wired correctly, the amplifier is properly grounded, and your bike’s electrical system is protected. Safety first!
What are the key features I should look for in a 4-channel motorcycle amplifier?
Beyond wattage and weather resistance, there are a few other features to consider. Adjustable gains are important for fine-tuning the amplifier’s output to match your speakers and head unit, preventing distortion. High-pass and low-pass filters allow you to direct specific frequencies to different speakers (e.g., high frequencies to tweeters, low frequencies to subwoofers), improving sound clarity.
Also, consider amplifiers with built-in protection circuits. These protect the amplifier and your speakers from things like overheating, short circuits, and overloads. Remote bass control is a nice-to-have feature that lets you adjust the bass level from the driver’s seat, which is especially useful on longer rides with varying road conditions.
What brands are known for producing high-quality motorcycle amplifiers?
There are definitely a few brands that stand out in the motorcycle audio world. Rockford Fosgate is a popular choice, known for their robust and reliable amplifiers with excellent sound quality. They have models specifically designed for motorcycle use.
Another strong contender is Aquatic AV. They specialize in marine-grade audio equipment, which is essentially built to withstand harsh environments, making them perfect for motorcycles. You might also want to consider brands like Kenwood and Hertz, both of which offer durable and well-performing amplifiers suitable for motorcycle applications. Be sure to read reviews and compare features before making your final decision!
Final Words
So, there you have it! You’re now armed with the knowledge to pick out the perfect audio companion for your rides. No more settling for muffled music or struggling to hear over the engine roar. Whether you’re after crystal-clear vocals or bone-rattling bass, one of these best 4 channel motorcycle amplifiers is sure to transform your riding experience.
Now it’s your turn to crank up the volume! Don’t overthink it; trust your gut, consider your needs, and choose the amp that speaks to you. Adventure awaits, and with the right soundtrack blasting through your speakers, every ride will be an unforgettable experience. Get ready to hit the road and make some noise!