You’ve just scored that epic band patch, or maybe a collection of quirky travel icons, and the only thing better than the patches themselves is the idea of adorning your favorite backpack with them. That feeling of personalizing your gear, making it truly yours, is pretty awesome, isn’t it? Whether you’re heading out for a weekend adventure, commuting to class, or just need a trusty carry-all for your daily essentials, the right backpack can be the perfect canvas for your iron-on creations.
Finding that perfect canvas, however, can sometimes feel like a treasure hunt. You want a backpack that’s not only stylish and comfortable but also durable enough to withstand the heat and pressure of applying those cherished iron-on patches. We’ve scoured the market to bring you the definitive rundown of the best backpacks for iron on patches, complete with honest reviews and helpful tips to make sure your personalization project is a smooth and successful one.
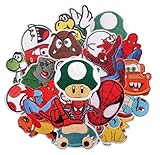
Before moving into the review of the best backpacks for iron on patches, let’s check out some of the relevant products from Amazon:


Last update on 2026-06-21 / #ad / Affiliate links / Images from Amazon Product Advertising API
Your Canvas Awaits: Finding the Best Backpacks for Iron-On Patches
Remember those days of trading patches with friends, each one a tiny story or a declaration of your cool? Whether you’re reliving that nostalgic vibe or starting a new collection, the right backpack can be the ultimate canvas for your personality. Think of it as your personal travelogue, stitched together with threads of adventure and individual style. But not all backpacks are created equal when it comes to showcasing your patch pride. We’re here to help you navigate the world of fabrics, styles, and durability to find the absolute best backpacks for iron-on patches, ensuring your creations stick around for the long haul.
The magic of iron-on patches lies in their ability to transform a simple backpack into something truly unique. Did you know that the global market for personalization and customization is booming, with consumers increasingly seeking ways to express themselves through their belongings? This trend extends to backpacks, where patches offer a relatively inexpensive and impactful way to achieve that bespoke look. From band logos to national flags, from witty slogans to artistic designs, your backpack can tell your story, one patch at a time.
So, what makes a backpack a prime candidate for a patch-tastic makeover? It often comes down to the fabric. Materials like canvas, denim, and sturdy polyester blends generally provide the best surface for heat-activated adhesive on patches to bond securely. These materials offer a good balance of durability and weave that allows the adhesive to grip effectively. Conversely, very smooth, slick, or heavily water-repellent materials might not be as cooperative, potentially leading to patches that peel or detach over time.
Our goal is to guide you towards backpacks that are not only stylish and functional but also patch-friendly. We’ll be diving into specific features to look for, considering everything from the thickness of the fabric to the types of zippers and pockets that enhance both usability and the visual appeal of your patched masterpiece. Get ready to discover the best backpacks for iron-on patches and start building your wearable narrative!
5 Best Backpacks For Iron On Patches
The Patch Master 5000
Looking for a backpack that’s practically a blank canvas begging for some serious patch action? The Patch Master 5000 is your ultimate dream come true. This bad boy boasts an incredibly durable, yet surprisingly smooth nylon fabric that’s an absolute dream to iron onto. Unlike some rougher materials that can snag or create uneven adhesion, the Patch Master 5000 provides a flawless surface for your iron-on masterpieces. You’ll be amazed at how smoothly your patches adhere, staying put through all your adventures.
But it’s not just about the patching potential! This backpack is a surprisingly capable daily driver too. It features a spacious main compartment, a padded laptop sleeve that actually fits your tech snugly, and a whole host of smaller pockets to keep your essentials organized. Plus, the padded shoulder straps and breathable back panel mean you can rock your patch-covered pride and joy all day long without any discomfort. It’s the perfect blend of customizable style and practical functionality.
The Wanderer’s Canvas
The Wanderer’s Canvas is a testament to the beauty of simplicity, especially when it comes to showcasing your iron-on patch collection. Its natural canvas material is a traditionalist’s delight, offering a slightly textured surface that grips iron-on adhesives like a charm. Forget the worry of patches peeling off prematurely; this backpack’s fabric is designed to create a strong bond, ensuring your personalized designs stand the test of time and travel. It’s the kind of backpack that gets better with age and more patches.
Beyond its patch-friendly properties, the Wanderer’s Canvas is a wonderfully versatile companion for any journey. Its generous main compartment swallows everything from textbooks to picnic supplies, and the drawstring closure adds a touch of classic ruggedness while keeping your belongings secure. The adjustable straps are comfortable even when the bag is fully loaded, making it ideal for everything from campus strolls to weekend escapes. It’s a backpack that’s as ready for your creative expression as it is for your daily grind.
The Urban Explorer Pro
For the city dweller with a passion for personalization, the Urban Explorer Pro is an absolute game-changer. This backpack features a tough, water-resistant polyester fabric that’s surprisingly adept at accepting iron-on patches without any fuss. The smooth, tightly woven material ensures excellent adhesion, giving your patches a clean, professional look. You won’t have to worry about uneven heating or patches losing their stickiness, even in less-than-ideal weather.
But the Urban Explorer Pro isn’t just a patch holder; it’s a seriously functional piece of gear. It’s packed with smart organizational features, including a dedicated tech compartment, multiple zippered pockets for security, and even a hidden anti-theft pocket for your valuables. The ergonomic design and padded straps make carrying it a breeze, even during long commutes or city expeditions. It’s the perfect fusion of high-tech functionality and personalized street style.
The Retro Revival Pack
If you’re a fan of a vintage aesthetic and want a backpack that complements your retro-inspired patch game, look no further than the Retro Revival Pack. Its sturdy cotton twill material is a joy to work with for iron-on patches. This fabric provides a satisfying grip, allowing your patches to adhere firmly and evenly, giving your backpack that authentic, well-loved look from the get-go. It’s the kind of material that tells a story, and your patches are the next chapter.
Beyond its patch-perfect surface, the Retro Revival Pack is a surprisingly practical and stylish choice. Its classic silhouette is both timeless and functional, featuring a spacious main compartment, a secure front pocket for easy access, and comfortable, adjustable shoulder straps. It’s the ideal size for everyday use, whether you’re heading to class, the library, or just out and about exploring. This backpack is a fantastic canvas for expressing your unique personality with a touch of nostalgia.
The All-Weather Adventurer
For those who plan on taking their patched-up pride and joy into the elements, the All-Weather Adventurer is your ultimate co-pilot. This backpack is constructed from a robust, high-denier polyester with a durable water-repellent (DWR) coating. This material not only provides excellent protection against the elements but also offers a surprisingly smooth and receptive surface for iron-on patches. Your custom creations will stick securely, weathering whatever nature throws your way.
This isn’t just a backpack built for durability; it’s designed for serious comfort and utility. The reinforced stitching, padded shoulder straps, and adjustable sternum strap ensure a comfortable and stable carry, even on demanding hikes or long travel days. Multiple compartments, including a hydration reservoir sleeve and numerous external attachment points, make it incredibly versatile for any adventure. It’s the perfect blend of rugged functionality and a fantastic base for your most adventurous patch creations.
Accessorizing Your Adventures: Why Backpacks Are the Perfect Canvas for Iron-On Patches
Ever looked at your trusty backpack and thought, “This needs a little you“? That’s where iron-on patches come in, and backpacks are truly their ideal companions! Think about it: your backpack is more than just a bag; it’s your sidekick for everything from weekend hikes and bustling city commutes to epic travel adventures. It carries your essentials, tells a story of where you’ve been and what you love. By adding iron-on patches, you’re not just decorating; you’re personalizing this story, turning a functional item into a unique expression of your personality and passions.
Imagine heading out on a camping trip. You’ve got your tent, your sleeping bag, and your backpack – all packed and ready. Wouldn’t it be amazing to have patches representing your favorite national parks, your love for stargazing, or even a funny inside joke with your travel buddies adorning your pack? Iron-on patches are a fantastic way to commemorate experiences, showcase your hobbies, or even support causes you believe in. They’re like little wearable souvenirs, and a backpack provides the perfect, durable surface to display them proudly, making your pack instantly recognizable and a conversation starter wherever you go.
The beauty of iron-on patches lies in their simplicity and versatility, making backpacks the ultimate blank slate. Whether you’re a seasoned hiker wanting to show off your completed trails, a student keen to express your musical taste, or an artist wanting to display your own creations, a backpack offers ample space. Unlike delicate fabrics, most backpack materials are robust enough to handle the heat application of iron-on patches without damage. Plus, the flat, expansive surfaces of most backpacks make it easy to apply patches smoothly and ensure they stick firmly, creating a professional and polished look that’s built to last through all your journeys.
Ultimately, choosing a backpack specifically for iron-on patches is about embracing a creative and accessible way to make your gear truly your own. It’s about transforming the ordinary into the extraordinary, one patch at a time. The “best backpacks for iron on patches” aren’t necessarily the most expensive, but rather those made with materials that readily accept and hold these colorful additions, allowing you to build a visual narrative of your life’s adventures. So, grab that backpack, pick out your favorite patches, and let your personal style shine through as you embark on your next escapade!
Choosing the Right Backpack Material for Patches
The fabric of your backpack plays a crucial role in how well your iron-on patches adhere and how long they last. Look for materials that offer a good balance of durability and heat resistance. Cotton canvas, polyester blends, and nylon are generally excellent choices. Canvas provides a sturdy surface that’s relatively easy to iron onto, while polyester and nylon offer good durability and water resistance, which can protect your patches from the elements. Avoid backpacks made from very synthetic, heat-sensitive materials like certain types of vinyl or highly coated fabrics, as excessive heat could damage them.
When considering the weave of the fabric, a tighter weave often results in a smoother surface, making it easier to press your patches evenly. A very textured or fuzzy material might require more heat and pressure, and the patch might not lie as flat. Always check the backpack’s care label for any specific instructions regarding heat or ironing. If unsure, testing a small, inconspicuous area with a low heat setting and a pressing cloth is a wise precaution before committing to applying your prized patches.
Ultimately, the material should not only be suitable for ironing but also align with your backpack’s intended use. If it’s a rugged hiking backpack, durability will be paramount. If it’s a more fashion-forward daypack, aesthetic appeal and the ability to showcase patches might take precedence. The key is finding a material that can withstand the heat application process while contributing to the overall longevity of your personalized backpack.
Patch Application Techniques for Optimal Results
Applying iron-on patches correctly is essential for a secure and visually appealing finish. The most common method involves using an iron, but understanding the nuances of heat, pressure, and timing can make a significant difference. Ensure your backpack is placed on a hard, flat, and heat-resistant surface. Avoid ironing directly on a padded surface, as this can absorb heat and prevent proper adhesion.
Before applying the patch, preheat the area on the backpack where you intend to place it. This removes any moisture and helps the adhesive bond effectively. Then, place the patch in your desired position. It’s highly recommended to use a pressing cloth – a thin piece of cotton fabric – between the iron and the patch. This protects both the patch and the backpack from scorching and helps distribute heat evenly. Apply firm, consistent pressure with the iron, holding it in place for the recommended duration (usually 15-30 seconds, but check patch instructions).
For added security, especially on backpacks that will undergo a lot of wear and tear, consider reinforcing the patch with a few stitches around the edges. This provides a physical anchor that prevents the patch from peeling or coming loose over time. Allow the patch to cool completely before testing its adhesion. Gently try to lift a corner; if it lifts easily, repeat the ironing process with a bit more heat or pressure. Patience and attention to detail are your best allies in achieving a professional-looking result.
Customization and Durability: Extending Your Backpack’s Lifespan
Personalizing your backpack with iron-on patches is a fantastic way to express your individuality and make your gear stand out. However, beyond the aesthetic appeal, strategically chosen patches can also contribute to the durability and functionality of your backpack. For instance, patches made of robust materials like embroidered patches can offer an extra layer of protection to high-wear areas, such as pockets or straps, preventing fraying or minor tears.
When selecting patches for a backpack that will be subjected to the elements, consider materials that are more resistant to fading and water damage. High-quality embroidery thread, for example, is generally more colorfast than printed designs, and thicker thread can also add a slight protective barrier. Additionally, think about the placement of your patches. Applying them to flatter, less stressed areas of the backpack will generally lead to better adhesion and longevity compared to areas that are constantly bent or stretched.
To further enhance the lifespan of both your backpack and your patches, regular maintenance is key. Gently clean your backpack, paying attention to the areas around the patches. Avoid harsh chemicals or abrasive scrubbing, which can damage the adhesive or the patch material itself. If a patch starts to lift, re-iron it promptly to prevent further detachment. By combining thoughtful patch selection with proper application and care, you can create a uniquely stylish backpack that also boasts enhanced resilience.
The Art of Patch Placement: Design and Functionality Considerations
The placement of your iron-on patches is more than just an aesthetic choice; it can also impact the functionality and overall wearability of your backpack. Think about how you use your backpack and which areas are most visible or prone to snagging. For example, placing patches on the main flap or the front pocket offers immediate visual impact, while covering the sides or the base might be more about personal preference or adding a subtle touch.
Consider the balance of your design. Spreading patches evenly across the surface creates a harmonious look, while clustering them can create a focal point. Think about the scale of the patches relative to the size of your backpack. A few large patches might be striking on a larger pack, whereas a collection of smaller patches might look better on a more compact bag. Also, be mindful of areas that need to remain flexible, like the straps, where rigid patches might cause discomfort.
Functionality should also guide your placement. Avoid placing patches over zippers, buckles, or any moving parts that could interfere with their operation or cause the patches to detach prematurely. Similarly, placing patches on the underside or areas that will frequently rub against other surfaces might lead to premature wear and tear. By carefully considering both the visual appeal and the practical use of your backpack, you can curate a collection of patches that not only expresses your style but also enhances your bag’s overall performance and longevity.
Your Ultimate Guide to Finding the Best Backpacks For Iron On Patches
Hey there, fellow patch enthusiasts! So, you’ve got a collection of awesome iron-on patches and you’re ready to show them off, right? That’s fantastic! A backpack is the perfect canvas for expressing your personality, your passions, or just your general vibe. But when you’re looking for the best backpacks for iron-on patches, it’s not just about grabbing any old bag. You want a backpack that’s going to hold up to your patch decorating dreams, be comfortable to carry, and ultimately, be the perfect backdrop for your wearable art. I’m here to help you navigate the world of backpacks and find the absolute best ones to make your patch collection shine. Let’s dive in and get your perfect patch-ready backpack!
1. Fabric First: What Will Your Patches Stick To?
When you’re planning out your masterpiece of patches, the first thing you really need to think about is the material your backpack is made from. Some fabrics are just absolute dream teams for iron-on patches, while others can be a bit… challenging. You want something that can handle a bit of heat and pressure without melting, scorching, or looking all weird and bubbly. Generally, natural fibers like cotton, canvas, and denim are your best friends. They’re sturdy, they can withstand the heat from your iron (just make sure you’re using the right setting!), and they give your patches a nice, solid base to adhere to.
On the other hand, synthetic materials like nylon and polyester can be a bit trickier. While many backpacks are made from these durable fabrics, you need to be a little more cautious. If the fabric has a really low melting point, you risk damaging it. Always, always, always do a test patch in an inconspicuous area of the backpack first. Grab a spare patch and your iron, set it to a lower temperature than you think you’ll need, and see how the fabric reacts. If it’s all good, you’re golden! But if you see any signs of distress, it’s best to stick to a backpack with a more forgiving fabric or consider a different attachment method for your patches on that particular bag.
2. Surface Texture: Smooth Sailing for Your Patches
Beyond just the type of fabric, you also need to consider the texture of the backpack’s surface. Think of it like preparing a wall for wallpaper – you want it to be as smooth and even as possible for the best adhesion. If the fabric has a really rough, fuzzy, or heavily textured surface, your iron-on patches might not lay flat, and the adhesive might not be able to get a good grip all the way around. This can lead to edges lifting over time, which is super frustrating when you’ve put so much effort into your design.
So, when you’re browsing for the best backpacks for iron-on patches, try to find ones with a relatively smooth weave. A good denim, a sturdy cotton canvas, or even a tightly woven twill will provide a nice, consistent surface. If you absolutely love a backpack with a slightly more textured fabric, don’t despair! You might just need to apply a bit more pressure and heat when ironing on your patches, and perhaps consider using a pressing cloth. That extra layer can help distribute the heat evenly and protect the backpack’s fibers while ensuring your patches stick like glue.
3. Size and Shape: Does it Fit Your Patch Vision?
This one might seem obvious, but the size and shape of the backpack play a huge role in how your patches will look and how many you can actually fit. Are you going for a minimalist vibe with just a few select patches, or are you aiming for a full-coverage, statement-making backpack? A smaller, more compact backpack might be perfect for a few key patches that represent your core interests, while a larger, more traditional backpack will give you ample real estate for a sprawling collection. Think about the overall aesthetic you’re going for.
Also, consider the placement of your patches. Do you want them on the main body of the bag, the front pocket, or even the straps? Some backpacks have strategically placed flat panels that are ideal for showcasing your patches. Others might have more contoured or divided sections that could make it harder to get a nice, even application. Before you commit, try to visualize where each of your favorite patches will go. This will help you choose a backpack that not only fits your patch dreams but also makes the application process a breeze, ultimately leading you to one of the best backpacks for iron on patches.
4. Durability and Construction: Will it Last Through Your Adventures?
You’re going to be ironing, wearing, and likely putting your backpack through its paces, so durability is key! You want a backpack that’s built to last, not just the fabric holding the patches, but the whole darn thing. Look for sturdy stitching, strong zippers, and reliable buckles or closures. A backpack that’s well-constructed will be able to handle the extra weight of multiple patches and the occasional bump or scrape without falling apart. It’s a long-term investment in your wearable art!
Think about the kind of adventures you envision for your patched-up backpack. Is it going to be your daily commuter, your trusty travel companion, or your festival essential? If it’s going to see a lot of action, opt for backpacks made with tougher materials and reinforced seams. Double-stitched seams, robust hardware, and a good quality base material will ensure that your backpack, and by extension, your hard-earned patch collection, can withstand the rigors of daily life and whatever else you throw its way. This is crucial for finding the best backpacks for iron on patches that you’ll love for years to come.
5. Pocket and Compartment Layout: Where Will Your Patches Live?
The internal and external organization of a backpack can actually influence how you display your patches. Consider how many pockets and compartments the backpack has and where they are located. Are there large, flat surfaces perfect for a statement patch, or are there lots of smaller zippered pockets that might make it tricky to iron anything on smoothly? Sometimes, a well-placed outer pocket can be a fantastic focal point for your patch design.
Think about how you’ll use the backpack too. If you need to carry a laptop, you’ll want a padded compartment. If you’re a student, you might need space for books and binders. The layout of these compartments can dictate where you can and can’t easily apply patches. For example, the back panel where the shoulder straps attach is often a great spot for patches, but you need to make sure the fabric there is suitable. A backpack with a good mix of open spaces and useful pockets will give you the most flexibility for your patch artistry, helping you find the best backpacks for iron on patches that are as functional as they are fashionable.
6. Straps and Comfort: Carrying Your Art with Ease
Once your backpack is adorned with your amazing patches, you’re going to want to wear it, right? That’s where comfort comes in. Look for backpacks with padded shoulder straps. If you plan on carrying a lot of stuff, or if you’ll be wearing the backpack for extended periods, well-padded straps can make a world of difference. Adjustable straps are also a must, ensuring you can get a snug and comfortable fit no matter your body type or how full the backpack is.
You also want to consider the material of the straps themselves. Some straps are made from a smoother, more synthetic material, while others have a bit more grip. If your patches are going to be on the straps themselves (which is a super cool look!), you’ll want a material that can handle the heat and pressure, and one that won’t snag or damage your iron-on creations. Ultimately, a comfortable backpack means you’ll be more likely to sport your patched-up style everywhere you go, solidifying its status as one of the best backpacks for iron on patches.
7. Style and Aesthetics: Does it Complement Your Patches?
This is where it all comes together! The backpack itself should have a style that either complements or provides a great contrast to your chosen patches. Are you going for a vintage vibe with a classic canvas backpack, or a more modern, sleek look with a minimalist nylon bag? The color of the backpack is also super important. A black backpack makes bright, colorful patches pop, while a lighter-colored bag can create a more subtle and sophisticated look.
Think about the overall message you want your backpack to convey. Is it quirky and fun, serious and dedicated, or somewhere in between? The base backpack is the foundation for your patch art, so choose one that you genuinely love the look of, independent of the patches. This way, even if you decide to swap out some patches down the line, you’ll still have a backpack you’re happy to carry. Finding the best backpacks for iron on patches is all about creating a cohesive and personal statement, and the base style is a huge part of that.
FAQ
What makes a backpack good for iron-on patches?
When you’re looking for a backpack to personalize with iron-on patches, the material is your biggest clue! You want a fabric that can withstand the heat and pressure of your iron without melting, warping, or getting damaged. Natural fibers like cotton or canvas are generally fantastic choices because they’re durable and can handle moderate heat well.
Synthetic blends can also work, but it’s always a good idea to check the backpack’s care label or the manufacturer’s website for any specific recommendations or warnings about heat application. Materials that are too thin or have a plastic coating might not be ideal, as they could melt or become discolored. Think of it like choosing the right canvas for your art – you want something that will hold up beautifully!
Can I iron patches onto any type of backpack material?
While you can technically try to iron a patch onto almost any fabric, not all materials will give you great results or last very long. As we mentioned, natural fibers like sturdy cotton or canvas are usually your safest bet. They’re breathable and can take the heat without much fuss.
However, materials like nylon, polyester, or those with a water-repellent coating can be trickier. These synthetic fabrics often have lower melting points, so you’ll need to be extra cautious with your iron’s temperature and duration. Always test on an inconspicuous spot first if you’re unsure! Some materials might also not hold the adhesive well, leading to patches that peel off sooner rather than later.
How do I prepare my backpack before applying an iron-on patch?
Getting your backpack ready is a bit like prepping a surface before painting – it makes all the difference! First, make sure the area where you plan to apply the patch is clean and free of any dust, dirt, or debris. A quick wipe with a damp cloth and then letting it air dry completely is usually all you need.
It’s also a really good idea to place a thin piece of cardboard or a cutting mat inside the backpack, directly behind where the patch will go. This will protect the lining of your backpack from the heat and prevent the patch’s adhesive from sticking to the other side. Think of it as a little protective barrier for your awesome design!
What’s the best temperature and time for ironing on patches?
This is where a little trial and error can be helpful, but there are some general guidelines to follow. Most iron-on patch manufacturers recommend a medium-high heat setting on your iron, typically around 300-325°F (150-160°C). It’s crucial to avoid using the steam function on your iron, as the moisture can interfere with the adhesive.
As for time, aim for about 15-30 seconds of firm, consistent pressure. The goal is to melt the adhesive on the back of the patch so it bonds with the backpack fabric. Don’t be tempted to hold the iron there for too long, as this could damage the patch or the backpack material. Always check the patch manufacturer’s specific instructions if they’re available!
What if the patch doesn’t seem to stick well after ironing?
Don’t worry, this happens sometimes, and there are a few things you can try! The most common reason a patch doesn’t stick is that it didn’t get enough heat or pressure. You can try applying the patch again, making sure your iron is at the correct temperature and that you’re pressing down firmly for the recommended time.
Another trick is to try ironing it from the inside of the backpack, if possible, with the patch facing outwards against your protective cardboard. Sometimes, ironing over a thin piece of cloth (like a tea towel) placed directly on top of the patch can help ensure even heat distribution and a good bond. If it’s still not sticking, the material of your backpack might not be compatible with the patch adhesive, or the patch itself might be a bit older and the adhesive has lost some of its power.
How can I ensure my patches last on my backpack?
Once your patches are looking great, you’ll want them to stay put! The best way to ensure longevity is to be mindful of how you wash and care for your backpack. It’s usually best to hand wash your backpack or use a gentle, cold cycle in the washing machine, and then air dry it.
Putting your backpack in a dryer, especially on high heat, can weaken the adhesive bond on the patches and cause them to peel or lift. If you do need to machine wash it, consider turning the backpack inside out to offer some protection to the patches. Treating your personalized backpack with a little extra care will help keep your patches looking fresh and securely attached for a long time!
Are there any backpack features that might make applying patches difficult?
Absolutely, some backpack features can definitely add a bit of a challenge when you’re trying to get those patches perfectly in place. Think about seams, zippers, buckles, or bulky pockets – these can create uneven surfaces that make it hard for the iron to make consistent contact with the entire patch.
For areas with a lot of texture or awkward curves, you might need to be a bit more patient. You might have to iron in sections, applying pressure to different parts of the patch to ensure the adhesive melts evenly. Sometimes, it’s easier to stick to flatter, smoother areas of the backpack for the best results. Don’t be afraid to reposition the patch a few times before you start ironing to find the flattest spot!
Conclusion
Now that you’re armed with all the intel on the best backpacks for iron on patches, it’s time to turn that inspiration into action! Think of your backpack not just as something you carry your stuff in, but as a blank canvas, waiting for your unique story to unfold. Each patch you choose is a brushstroke, a memory solidified, a piece of your personality proudly displayed. So go ahead, dive back into those reviews, explore your favorite designs, and pick the pack that truly speaks to you. You’re not just buying a backpack; you’re investing in a wearable declaration of who you are and what you love.
The adventure of personalizing your gear is just beginning. With the right backpack as your foundation, you’re ready to embark on a journey of self-expression. Don’t overthink it – the best choice is often the one that sparks that little flicker of excitement inside you. Whether you’re gearing up for a hike, a festival, or just your daily commute, your customized backpack will be a constant companion, a conversation starter, and a proud reflection of your individuality. Go forth and create something awesome!