You’re standing at the trailhead, pack cinched, and the whisper of adventure is already in the air. The only thing standing between you and that first glorious campsite is setting up your shelter. But the thought of shelling out hundreds for a tent makes your wallet do a nervous little dance. You want quality, durability, and the peace of mind that comes with a reliable home away from home, but without breaking the bank. It’s a common dilemma for anyone bitten by the backpacking bug – finding that sweet spot where performance meets affordability.
That’s exactly why we’ve dived deep into the world of budget-friendly shelters to bring you the definitive guide to the best backpacking tent under $200s. We know you’re not looking for a flimsy, throwaway option; you’re seeking value and a tent that can handle the elements and the miles. So, let’s cut through the clutter and get you equipped with a fantastic tent that’ll let you focus on the stunning views and unforgettable experiences, not on whether your shelter will hold up.
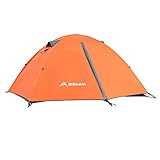
Before moving into the review of the best backpacking tent under $200s, let’s check out some of the relevant products from Amazon:


Last update on 2026-06-23 / #ad / Affiliate links / Images from Amazon Product Advertising API
Your Gateway to Adventure Without Breaking the Bank
So, you’ve got that itch, that undeniable pull towards the wild, the promise of crisp air, towering trees, and nights spent under a canopy of stars. You’re ready to ditch the city lights and embrace the trail. But then reality hits – that shiny new tent you eyed at the outdoor gear shop comes with a price tag that could fund your entire trip. Don’t let your budget be the boulder blocking your path to adventure! We’re here to tell you that experiencing the great outdoors doesn’t have to cost an arm and a leg.
Think of it this way: the perfect campsite is calling your name, and all you need is a reliable, comfortable shelter to rest your head after a day of hiking. The good news is, the market has truly stepped up its game. For years, finding a truly decent backpacking tent for less than $200 felt like searching for a unicorn. But thankfully, that’s changed dramatically. Manufacturers are now producing lightweight, durable, and surprisingly feature-rich tents that prove you can absolutely snag the best backpacking tent under $200s without compromising on quality or leaving your wallet significantly lighter.
We’ve scoured the trails, read countless reviews, and tested more seams and stakes than we care to admit, all to bring you the top contenders. We know that for many of you, the investment in backpacking gear is a careful balancing act. You need something that can handle a bit of rain, stand up to some wind, and offer enough space to stretch out without feeling cramped. This guide is designed to cut through the noise and highlight tents that offer exceptional value, proving that your dream of sleeping under the stars is well within reach.
Whether you’re a seasoned solo explorer, a duo venturing out for the first time, or a small group ready to share the experience, we’ve got options for you. We’ll be diving into the specifics of weight, durability, ease of setup, and crucial features like waterproofing and ventilation, all while keeping that all-important price point firmly in mind. Get ready to discover the shelters that will become your trusty companions on countless adventures, proving that the best backpacking tent under $200s is not just a myth, but a very attainable reality.
Best Backpacking Tent Under $200S – Reviewed
Coleman Sundome 2-Person Tent
For budget-conscious campers seeking reliable shelter, the Coleman Sundome 2-Person Tent is a standout performer. This tent boasts a surprisingly spacious interior for its price point, comfortably accommodating two adults with room for gear. Its WeatherTec system, featuring patented corner welds and inverted seams, provides impressive water resistance, keeping you dry even during unexpected downpours. Setup is a breeze, making it an excellent choice for beginners or those who prefer quick and easy campsite routines.
The Sundome’s robust fiberglass poles are designed for durability, and the included stakes and guy lines offer added stability in breezy conditions. While it might not be the lightest option for ultralight backpackers, its excellent value proposition makes it a fantastic choice for car camping, weekend trips, or anyone wanting a dependable tent without breaking the bank. The mesh windows and roof vent contribute to good ventilation, minimizing condensation inside.
Hyke & Byke Yosemite 2 Person Backpacking Tent
The Hyke & Byke Yosemite 2 Person Backpacking Tent offers a compelling blend of lightweight design and affordability, making it a top contender for backpackers on a budget. Weighing in at just over 3 pounds, this tent won’t weigh you down on those long treks. Its freestanding design allows for easy pitching on various terrains, and the included footprint protects the tent floor from punctures and abrasion, extending its lifespan.
Constructed with durable ripstop nylon and featuring robust zippers, the Yosemite is built to withstand the rigors of the trail. The dual doors and vestibules are a welcome feature, providing convenient access for both occupants and ample space for storing muddy boots and backpacks. The tent also offers excellent ventilation with its mesh panels and adjustable vents, ensuring a comfortable night’s sleep.
Kelty Late Start 2 Person Backpacking Tent
The Kelty Late Start 2 Person Backpacking Tent is a fantastic option for those looking for a no-frills, durable tent that punches above its weight class in terms of quality and ease of use. Kelty has a reputation for making solid gear, and this tent is no exception. It’s straightforward to set up, even for those who aren’t seasoned tent pitching experts. The color-coded poles and clips make the process intuitive and frustration-free.
This tent is a great all-arounder, suitable for various camping scenarios from backyard sleepovers to serious backcountry adventures. Its strong pole structure can handle moderate winds, and the fly provides good protection from rain. While it’s not the lightest tent available, its robust construction and user-friendly design make it a reliable companion for many camping trips to come.
Teton Sports Explorer 2 Person Tent
The Teton Sports Explorer 2 Person Tent is a budget-friendly powerhouse, delivering exceptional value and durability for its price. This tent is surprisingly roomy for a two-person model, offering enough space to stretch out and store your gear comfortably. The integrated rainfly provides excellent waterproof protection, and the mesh panels promote good airflow, helping to keep condensation at bay even in humid conditions.
Durability is a key selling point for the Explorer. The strong fiberglass poles and robust zippers are built to last, and the included stakes and guylines offer stability. While it might be a bit heavier than some ultralight options, its sturdy construction makes it a reliable choice for car camping, festivals, or beginner backpackers who prioritize toughness and ease of use over absolute minimal weight.
Alpinizmo Lightweight Backpacking Tent 2 Person
The Alpinizmo Lightweight Backpacking Tent 2 Person is an impressive offering for hikers who need a reliable shelter without a hefty price tag. This tent is designed with portability in mind, making it a solid choice for backpacking trips where every ounce counts. Its intuitive design and simple pole system ensure a quick and easy setup, so you can spend less time wrestling with fabric and more time enjoying the great outdoors.
Constructed from durable, water-resistant materials, the Alpinizmo provides good protection against the elements. The vestibule offers a decent amount of space for gear, keeping your sleeping area clear. While it might not boast the most advanced features of more expensive tents, its straightforward functionality, decent weather resistance, and lightweight profile make it a fantastic value for budget-conscious adventurers.
The Savvy Hiker’s Secret: Why a Great Backpacking Tent Under $200 is Essential
Embarking on a backpacking adventure is about experiencing the raw beauty of nature, the thrill of exploration, and the quiet satisfaction of self-sufficiency. Yet, for many aspiring and seasoned backpackers alike, the cost of essential gear can feel like a looming obstacle. That’s precisely where a high-quality backpacking tent in the under-$200 price range steps in as a hero. It’s not about settling for less; it’s about making a smart, budget-conscious decision that doesn’t compromise on your ability to enjoy the great outdoors. Think of that moment after a long day of hiking, the sun dipping below the horizon, and the promise of a cozy, dry shelter awaiting you. Having a reliable tent at an accessible price means more money for those crucial trail snacks or even that extra night under the stars, rather than draining your entire budget on a single piece of equipment.
Consider the novice backpacker, excited to hit their first trail but hesitant to invest heavily in gear they might not use extensively at first. A tent under $200 offers the perfect entry point, allowing them to test their passion without a significant financial commitment. It’s the ideal tool for those weekend warriors who crave a dose of nature without needing expedition-grade durability. Imagine planning a spontaneous trip with friends, knowing you can equip yourself or a companion with dependable shelter without breaking the bank. This affordability opens the doors to countless adventures, from sleeping under the desert sky to finding refuge from a sudden mountain shower, all while keeping your overall backpacking budget in check.
But this isn’t just about beginners. Experienced backpackers also recognize the immense value of a well-chosen tent in this price bracket. Often, the “best backpacking tent under $200s” offers a fantastic balance of weight, weather protection, and ease of setup – features that are paramount for any serious trekker. You can still find tents that are lightweight enough to comfortably carry, spacious enough for a good night’s sleep, and robust enough to handle moderate weather conditions. It allows you to allocate your budget towards other critical items like a quality sleeping bag, a sturdy backpack, or a reliable water filter, ensuring a well-rounded and functional gear setup for all your expeditions.
Ultimately, investing in a backpacking tent under $200 is a testament to smart planning and a pragmatic approach to outdoor recreation. It empowers you to chase sunsets on mountain peaks, wake up to the sounds of the forest, and create lasting memories without the burden of exorbitant costs. It’s about making the wilderness accessible, proving that adventure doesn’t have to come with a premium price tag. So, the next time you’re planning your next escape, remember that a fantastic, reliable backpacking tent awaits you, allowing you to focus on what truly matters: the journey itself.
Key Features to Consider in Budget Backpacking Tents
When venturing into the world of backpacking, your tent is your sanctuary. For those operating under a $200 budget, understanding the critical features that differentiate a good tent from a great one is paramount. Look for a strong denier rating for the fly and floor, indicating durability and resistance to tears and abrasion. The hydrostatic head (HH) rating is also crucial; a higher HH means better waterproofing, essential for staying dry during unexpected downpours. Ventilation is another key consideration, with mesh panels and strategically placed vents helping to minimize condensation buildup, a common issue in enclosed spaces.
Beyond the core materials, consider the tent’s design and weight. A freestanding design offers convenience, allowing you to pitch the tent without needing to stake it out immediately, which can be a lifesaver on rocky or difficult terrain. Conversely, non-freestanding tents are often lighter and pack down smaller, but require more careful setup. Pay close attention to the packed weight and dimensions – a lighter tent is always preferable for long treks, and a compact packed size will maximize space in your backpack.
Finally, don’t overlook the details that enhance your camping experience. Look for thoughtful features like interior pockets for organizing small items, gear lofts to hang headlamps or store electronics, and double-wall construction which provides an extra layer of protection against condensation and improves insulation. The type and quality of zippers and poles can also impact the tent’s longevity and ease of use. Even on a budget, these small touches can make a significant difference in your overall comfort and enjoyment.
Balancing Cost and Durability: What to Expect
The sub-$200 backpacking tent market is a dynamic one, offering a surprisingly wide array of options that can still serve you well on your adventures. However, it’s important to set realistic expectations regarding durability. While many tents in this price range utilize robust materials and solid construction, they may not withstand the extreme conditions or prolonged heavy use that more expensive counterparts can. This doesn’t mean they are inadequate, but rather that a little extra care and maintenance can go a long way in extending their lifespan.
You can expect good performance in moderate weather conditions, meaning protection from rain and wind is generally reliable. However, extremely high winds or torrential, prolonged rainfall might push the limits of some budget tents. Manufacturers often compromise on the highest-grade fabrics or the most advanced waterproofing treatments to keep costs down. This means while a tent might boast a good HH rating, the seam taping might be less robust, or the fabric might be slightly less UV resistant, which can lead to degradation over time with consistent exposure.
Despite these potential trade-offs, the value proposition for tents under $200 is undeniable for many backpackers. For casual campers, weekend warriors, or those just starting out, these tents provide an accessible entry point into the hobby without a massive financial outlay. With careful selection, proper use, and mindful upkeep, you can find a tent that offers dependable shelter and allows you to enjoy the outdoors without breaking the bank. It’s about finding the sweet spot where your budget meets your specific needs.
Choosing the Right Tent Size and Capacity
Selecting the appropriate size for your backpacking tent is a decision that directly impacts your comfort and the overall weight you’ll be carrying. While tents are typically marketed by capacity (e.g., 1-person, 2-person, 3-person), it’s crucial to understand that these are often snug fits. A 2-person tent, for instance, is often most comfortable for one person with gear, or two people who are very familiar and don’t mind close quarters. If you value extra space for sleeping, storing gear inside, or simply spreading out, it’s often wise to size up.
Consider your typical backpacking companions and the amount of gear you usually bring. If you’re a solo hiker who packs light, a 1-person or a spacious 2-person tent will likely suffice. If you plan on sharing your tent with a partner or a friend, a 2-person tent is the standard, but a 3-person tent might offer a more comfortable experience, especially if you have bulkier sleeping bags or expect to spend more time inside due to weather. Think about the dimensions of the tent floor and the peak height; these will give you a better idea of the usable space.
Don’t underestimate the importance of vestibule space. Vestibules are the covered areas outside the main tent body, typically created by the rainfly. These are invaluable for storing muddy boots, backpacks, or cooking gear, keeping the interior of your tent clean and dry. The size and number of vestibules can significantly impact the usability of a tent, especially for longer trips or in varied weather conditions. Prioritizing tents with adequate vestibule space will contribute to a more pleasant and organized camping experience.
Maintenance and Care for Extending Tent Lifespan
Proper maintenance is the key to ensuring your budget backpacking tent serves you reliably for many adventures to come. The most critical step after each use is to thoroughly dry your tent before storing it. Moisture trapped inside can lead to mildew and rot, significantly degrading the fabric and compromising its waterproofing. Set it up in your yard, on a clothesline, or even drape it over furniture indoors if weather permits, ensuring all surfaces are completely dry to the touch.
When packing your tent, avoid stuffing it into its stuff sack with excessive force. Instead, roll or fold it loosely. This helps to prevent premature wear and tear on the fabric and poles. Regularly inspect your tent for any signs of damage, such as small rips, tears, or loose seams. Invest in a good tent repair kit that includes seam sealer, fabric patches, and pole splints. Promptly addressing minor damage can prevent it from becoming a major issue in the field, saving you from an uncomfortable night.
Cleaning your tent should be done with mild soap and water, avoiding harsh detergents or abrasive cleaners that can strip away coatings and damage the fabric. For stubborn dirt, a soft brush can be used gently. Ensure all zippers are clean and lubricated with a silicone-based lubricant to prevent them from sticking or breaking. Proper storage, in a cool, dry place, away from direct sunlight and rodents, will further protect your tent’s materials and stitching. By following these simple care practices, you can significantly extend the lifespan of your budget-friendly backpacking tent.
Your Guide to Finding the Best Backpacking Tent Under $200s
Hey there, fellow adventurer! So, you’re looking to snag a solid backpacking tent without breaking the bank? That’s a smart move. Gear can get pricey fast, and for many of us, a budget-friendly but reliable tent is the sweet spot. Whether you’re hitting the trails for a weekend warrior trip or dreaming of longer expeditions, having a trustworthy shelter is non-negotiable. But with so many options out there, how do you sift through the noise and find the best backpacking tent under $200s that won’t leave you shivering in the rain? Don’t worry, I’ve got your back! Think of me as your gear guru, here to help you navigate the world of affordable backpacking shelters. We’ll cover all the important stuff, from how much it weighs to how well it can handle a storm, so you can make an informed decision and get out there enjoying nature.
Weight: Because Every Ounce Counts
When you’re strapping that tent onto your back for miles and miles, its weight becomes your best friend or your worst enemy. You want a tent that’s light enough that you don’t dread picking it up each morning, but not so light that it compromises durability or features. Think about your typical trip length and the terrain you’ll be covering. For shorter trips or easier hikes, you might tolerate a few extra ounces for more space or better weather protection. But for longer treks, shaving off even a pound can make a significant difference in your overall comfort and energy levels.
Seriously, imagine hiking uphill for hours with a pack that feels like it’s packed with rocks. Your tent is often one of the heavier items in your pack, so looking at the packed weight is crucial. While many budget tents might be a bit heavier than their ultralight counterparts, there are definitely some fantastic options under $200 that strike a good balance. Keep an eye out for tents that list their packed weight – this usually includes the tent body, rainfly, poles, and stakes. Knowing this number will help you compare apples to apples and ensure your pack stays manageable.
Capacity: How Many Can Actually Fit?
Tent manufacturers often have a slightly… optimistic view of how many people can comfortably squeeze into their tents. That “2-person” tent might feel more like a cozy embrace for two, which is great if you’re sharing with your significant other, but maybe not so much if you like spreading out or have gear to store inside. It’s always a good idea to consider whether you’ll be sharing the tent and how much personal space and gear storage you’ll need.
If you’re a solo hiker, a 2-person tent can be a luxurious choice, offering ample room for yourself and all your gear. If you’re hiking with a partner, really think about whether you prefer a snug fit or a bit more elbow room. For families or groups, you’ll definitely want to look at larger capacity tents, but remember that more people generally means more weight and a larger packed size. When you’re looking at the best backpacking tent under $200s, pay close attention to the interior dimensions and floor space to get a realistic idea of how many people and how much gear it can comfortably accommodate.
Durability & Weather Resistance: Standing Up to the Elements
Let’s be honest, nature can be unpredictable. One minute it’s sunshine and birdsong, the next it’s a torrential downpour or howling winds. Your tent needs to be a reliable shield against these elements. Look for tents made with ripstop nylon or polyester, which are generally more durable and tear-resistant. The denier (D) rating of the fabric is also a good indicator; a higher denier generally means thicker, more durable fabric, though it can also add weight.
The rainfly and floor material are particularly important for weather resistance. A higher hydrostatic head (HH) rating on the rainfly and floor means the fabric can withstand more water pressure before leaking. While many tents under $200 might not have the highest HH ratings available on the market, you can still find options that offer excellent protection for moderate to heavy rain. Pay attention to seam-taping as well; properly sealed seams are crucial to preventing leaks. You want a tent that will keep you dry and comfortable, even when the weather decides to throw a curveball.
Ease of Setup: Getting Camp Up Quickly
After a long day of hiking, the last thing you want is a wrestling match with your tent poles and fly. A good backpacking tent should be relatively easy and quick to set up, even for a single person. Many tents utilize color-coded poles and clips, which makes the process intuitive. Freestanding tents, which can stand on their own without being staked out, are generally easier to pitch.
Consider the design of the poles and the overall structure. Some tents have complex pole configurations that can be frustrating in windy conditions. Look for reviews or descriptions that mention how easy the tent is to pitch. If you’re new to backpacking, starting with a tent that has a straightforward setup will make your experience much more enjoyable. You want to be relaxing in your shelter, not struggling with it when the sun starts to dip below the horizon.
Ventilation: Avoiding That “Sweaty Tent” Feeling
This is a big one, folks! Even on a cool night, your body heat and respiration can create a surprising amount of condensation inside a tent. Good ventilation is key to preventing that clammy, damp feeling. Look for tents with mesh panels, roof vents, and adjustable vents on the rainfly. These features allow moist air to escape, keeping the interior drier and more comfortable.
Poor ventilation can lead to a stuffy interior and, worse, that dreaded condensation that can drip onto your sleeping bag. When you’re researching the best backpacking tent under $200s, pay attention to how the tent handles airflow. Some tents have clever designs that promote cross-ventilation even when the rainfly is fully deployed. This can make a huge difference in your overall comfort, especially during shoulder seasons or in humid environments.
Vestibules: Your Gear Storage Solution
Vestibules are those covered areas outside the main tent door, created by the rainfly. They are absolute lifesavers for keeping your gear organized and out of the main sleeping area. This is where you can stash your muddy boots, backpack, and cooking stove, keeping the inside of your tent clean and maximizing your living space. The size and number of vestibules can vary significantly between tents.
Think about how much gear you typically bring with you. If you have a large backpack or need space for multiple sets of gear, a tent with a larger or dual vestibule setup will be a significant advantage. Even a small vestibule is better than none! It’s a small feature that makes a big difference in the functionality of your tent and helps maintain a pleasant living environment in the backcountry.
Livability & Features: The Little Things That Matter
Beyond the basics, there are a few other things that contribute to a tent’s “livability.” This includes things like interior height (can you sit up comfortably?), the number and placement of interior pockets for organizing small items, and the general layout of the tent. Some tents also come with handy extras like gear lofts or footprint protection (though often sold separately).
When you’re aiming for the best backpacking tent under $200s, you might not get all the bells and whistles of a premium tent, but you can still find models that are well-designed and thoughtfully laid out. Think about how you like to organize your camp. Do you need a place to hang your headlamp? Are you someone who likes to keep their essentials within easy reach? These seemingly small details can really enhance your experience in the backcountry.
Frequently Asked Questions
What makes a tent good for backpacking?
A backpacking tent needs to strike a delicate balance between being lightweight and durable, all while providing comfortable shelter. Think about factors like packed size and how easily it sets up, especially after a long day on the trail. You’ll also want to consider its weather resistance to keep you dry and protected from the elements, and sufficient ventilation to prevent condensation buildup.
Ultimately, a good backpacking tent is one that you can rely on to keep you safe and sound without weighing you down. It should be intuitive to pitch, offer enough space for you and your gear, and be robust enough to handle various outdoor conditions. Focusing on these key features will help you choose a tent that enhances your backpacking adventures rather than becoming a burden.
How much weight should I expect from a backpacking tent under $200?
For tents in the under $200 price range, you can generally expect a two-person tent to weigh somewhere between 3 to 5 pounds. Some ultra-lightweight models might dip slightly below 3 pounds, while others that prioritize durability or include a bit more features could lean towards the higher end of that spectrum. It’s always a good idea to check the packed weight specifically, as this includes the tent, poles, stakes, and stuff sack.
While you might not find the absolute lightest tents on the market in this budget category, there are many excellent options that offer a great balance of weight and functionality. Keeping your overall pack weight in mind is crucial, so aim for a tent that feels manageable for you to carry comfortably, especially if you’re planning on covering a lot of miles.
What kind of weather can I expect a tent under $200 to handle?
Tents under $200 are typically designed for 3-season use, meaning they’ll perform well in spring, summer, and fall conditions. This usually includes protection from rain, moderate wind, and bugs. They’ll likely have a waterproof rainfly and floor, along with mesh panels for ventilation during warmer months.
However, it’s important to manage expectations; these tents might not be the best choice for harsh winter conditions or extreme winds. While they can often withstand a strong gust, sustained high winds or heavy snow loads might be too much for their materials and pole structure. For milder, three-season adventures, though, you’ll find plenty of reliable options within this budget.
Are there any significant differences between a 1-person and a 2-person tent in this price range?
You’ll definitely notice some differences when comparing 1-person and 2-person tents under $200. A 1-person tent will generally be lighter and pack down smaller, making it ideal if you’re a solo hiker prioritizing minimal weight. They usually offer just enough space for one person and essential gear.
On the other hand, a 2-person tent, while heavier and bulkier, provides more room to spread out, store gear inside, and potentially even offer a bit more comfort for longer trips. Some people even prefer a 2-person tent for solo use if they value that extra elbow room. The price difference between a 1-person and a 2-person tent in this budget range isn’t usually huge, so it often comes down to your personal needs and priorities.
What are common features I should look for in a backpacking tent under $200?
When browsing tents under $200, keep an eye out for features that enhance convenience and livability on the trail. Look for good ventilation options, like mesh panels and adjustable vents, to combat condensation. Consider vestibule space – the covered area outside the main tent door – as this is invaluable for storing muddy boots or wet gear, keeping your sleeping area clean.
Also, pay attention to the pole construction; aluminum poles are generally more durable and lighter than fiberglass. Easy setup is a big plus too, so look for tents with color-coded poles or a straightforward design. Double-wall construction (an inner mesh tent with a separate rainfly) is common and offers good breathability and weather protection.
How important is waterproofing, and what should I look for?
Waterproofing is absolutely critical for a backpacking tent, as you don’t want to wake up in a puddle! Look for tents with a rainfly and floor made from waterproof materials, often described with a hydrostatic head (HH) rating. For a decent 3-season tent, you’ll want an HH rating of at least 1,500mm for the rainfly and 2,000mm or higher for the floor.
Beyond the material itself, check that the tent has taped seams. This means the stitching points, which are potential entry points for water, have been sealed with waterproof tape. A well-designed bathtub-style floor, where the floor material extends up the sides of the tent, also helps prevent ground water from seeping in.
What if I encounter unexpected heavy rain or strong winds with a tent under $200?
While tents under $200 are generally built for 3-season use, it’s always wise to be prepared for the unexpected. If you anticipate potentially rougher weather, it’s a good idea to invest in some sturdy guylines and extra stakes. These can significantly improve your tent’s stability and wind resistance by allowing you to anchor it more securely to the ground.
You can also employ smart pitching techniques. Find a sheltered spot if possible, like behind a large rock or in a natural depression, to offer some buffer against the wind. Orienting your tent so the most aerodynamic side faces the wind can also make a noticeable difference. Remember, even a budget-friendly tent can perform much better with a little bit of care and preparation.
Conclusion
So, you’ve navigated the world of affordable adventure, armed with the knowledge to snag the best backpacking tent under $200s. Think of this not as an endpoint, but as the exciting starting line for countless nights under the stars. Whether you’re dreaming of misty mountain mornings or the quiet whisper of a forest breeze, the perfect shelter for your next journey is well within reach. You’ve done your homework, and now it’s time to trust your gut and embrace the open road (or trail!).
This guide was designed to empower you, to show you that incredible adventures don’t require breaking the bank. Go forth, choose wisely, and get ready to experience the freedom and magic that only a night spent in the wild can offer. Your next epic story is waiting to be written, and with one of these fantastic tents, you’ll have the perfect home base from which to create it. Now, pack up that new tent and let the adventures begin!