Okay, so you’ve finally done it! The spare room is cleared, the weights are ordered, and that dusty treadmill is getting a new lease on life. Your dream home gym is becoming a reality. But before you start pumping iron and crushing personal bests, there’s one crucial element to consider: the floor. That cold, unforgiving concrete slab isn’t exactly motivating, is it? Plus, dropping a dumbbell on bare concrete is a recipe for disaster – both for your equipment and your joints.
That’s where we come in. Choosing the right material is key to creating a safe, comfortable, and functional workout space. We understand the dilemma; navigating the world of rubber tiles, foam mats, and interlocking squares can feel overwhelming. This comprehensive guide will break down the best flooring for home gyms over concrete, offering honest reviews and expert advice to help you make the perfect choice for your specific needs and budget. Let’s get your home gym floored!
Before moving into the review of the best flooring for home gyms over concrete, let’s check out some of the relevant products from Amazon:


Last update on 2026-01-20 / #ad / Affiliate links / Images from Amazon Product Advertising API
So, You’re Ready to Conquer Your Concrete Jungle? (And Get Fit Doing It!)
Alright, so you’re thinking about setting up a home gym! That’s fantastic! You’ve got the vision – maybe it’s lifting heavy, mastering yoga poses, or building endurance. But before you start pumping iron or stretching into downward dog, let’s talk about what’s under your feet. More often than not, home gyms end up in basements or garages – which usually means concrete floors. And while concrete is strong, it’s definitely not the most comfortable or forgiving surface for a workout. In fact, studies have shown that exercising on hard, unforgiving surfaces can contribute to joint pain and increase the risk of injuries.
Now, you might be thinking, “Concrete? What’s the big deal?” Well, think about it. Jumping, running, and even just repetitive weightlifting puts a lot of stress on your body. Concrete offers zero give, meaning all that impact gets absorbed by your knees, ankles, and back. Plus, it’s cold and not exactly inviting. That’s where finding the best flooring for home gyms over concrete comes in. It’s not just about aesthetics; it’s about creating a safe, comfortable, and functional space where you can actually enjoy working out.
Choosing the right flooring is like choosing the right shoes for your workout – it’s crucial for performance and protection. We’re going to walk you through different options, highlighting their pros and cons. From interlocking tiles to rubber rolls and even foam mats, each type offers unique benefits and addresses different needs. Think about the type of workouts you’ll be doing, the weight you’ll be lifting, and your budget. Don’t just rush into it – a little research now will save you a lot of discomfort (and potential injuries) down the road.
So, get ready to transform that concrete slab into your personal fitness sanctuary! We’re here to help you navigate the world of gym flooring and find the perfect solution to elevate your workouts, protect your body, and create a home gym you’ll actually be excited to use. Let’s dive in and find the best flooring for home gyms over concrete that fits your specific needs and goals.
The Best Flooring For Home Gyms Over Concrete
Rubber Tiles
Rubber tiles are a popular choice for home gyms, and for good reason! They offer a fantastic blend of durability, shock absorption, and affordability. Perfect for protecting your concrete subfloor from heavy weights and high-impact exercises. Installation is generally a breeze with interlocking or glue-down options, meaning you can customize the size and layout of your gym. Plus, rubber is naturally slip-resistant, so you can focus on your workout without worrying about sliding around.
The only real downside to rubber tiles is the initial rubbery odor, which can be quite strong, especially in enclosed spaces. It usually dissipates over time with proper ventilation. Also, while durable, they can be susceptible to tearing or denting under extremely heavy or sharp objects. However, for most home gym users, rubber tiles offer an excellent balance of performance and value.
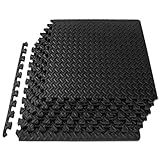
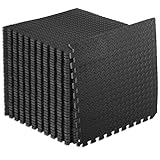
Foam Tiles
Foam tiles, often referred to as EVA foam mats, are the budget-friendly champions of the home gym flooring world. These interlocking tiles provide a cushioned surface that’s comfortable for bodyweight exercises, yoga, and stretching. They’re incredibly easy to install and reconfigure, making them a great option if you plan to move your gym or change its layout frequently. Plus, they come in a variety of colors and patterns, so you can easily personalize your space.
While foam tiles excel in comfort and convenience, they do have some limitations. They’re not the best choice for heavy weightlifting, as they can compress or dent under significant pressure. They’re also more prone to tearing and wear than other options, so they might not be the most durable choice for high-intensity workouts. Despite these limitations, foam tiles are a fantastic starting point for creating a comfortable and affordable home gym.
Rolled Rubber
Rolled rubber is a heavy-duty solution for serious home gym enthusiasts. It comes in long rolls that can cover large areas seamlessly, creating a professional-looking and highly functional workout space. This type of flooring is incredibly durable and can withstand the impact of heavy weights and intense training sessions without showing signs of wear and tear. It provides excellent shock absorption, protecting both your joints and your concrete subfloor.
Installation can be a bit more involved compared to tiles, often requiring adhesive and careful measurements. The initial cost is also higher, but the longevity and performance of rolled rubber make it a worthwhile investment for those who are serious about their training. Like rubber tiles, rolled rubber can have a noticeable odor when first installed, so adequate ventilation is important.
Carpet Tiles
Carpet tiles are an unexpected, but surprisingly viable, option for home gym flooring, especially if you’re aiming for a softer, more comfortable surface. They offer a warm and inviting feel, which can be a welcome change from the typically industrial look of most gym floors. Carpet tiles also help to absorb sound, making them a good choice for multi-story homes or apartments where noise is a concern. Installation is generally straightforward with peel-and-stick or glue-down options.
However, carpet tiles aren’t the most durable option for heavy weightlifting. They can be susceptible to damage from dropped weights or heavy equipment. They’re also more difficult to clean than rubber or foam, as they can absorb sweat and spills. Choose a low-pile, stain-resistant carpet tile specifically designed for high-traffic areas to mitigate these issues and ensure longevity.
PVC Tiles
PVC tiles are a relatively new player in the home gym flooring game, but they’re quickly gaining popularity for their durability and attractive appearance. These interlocking tiles are made from rigid PVC plastic, making them resistant to scratches, dents, and stains. They can withstand heavy weights and high-impact activities without showing signs of wear, making them a great option for serious weightlifters. Plus, they come in a variety of colors and textures, allowing you to create a customized and visually appealing gym space.
While PVC tiles are incredibly durable, they don’t offer the same level of cushioning as rubber or foam. This can be a drawback for exercises that involve a lot of jumping or impact. Installation is generally easy with interlocking systems, but the rigid nature of the tiles can make them more difficult to cut and fit around obstacles. Despite these minor drawbacks, PVC tiles offer a long-lasting and aesthetically pleasing flooring solution for home gyms.
Why Invest in Flooring for Your Home Gym?
Imagine yourself, ready to crush a workout after a long day. You step into your home gym, the familiar scent of iron in the air, and begin your set of heavy squats. Directly onto the unforgiving concrete? Ouch! That hard surface offers zero give, potentially leading to joint pain in your knees, ankles, and back over time. Investing in proper flooring is about investing in your long-term well-being and allowing you to enjoy your fitness journey without discomfort or potential injuries. Think of it as preventative healthcare that allows you to push harder, train longer, and recover faster.
Beyond just cushioning your joints, the right flooring protects your equipment. Dropping a dumbbell or a barbell on bare concrete is a recipe for disaster, likely resulting in cracked concrete and damaged weights. Durable gym flooring acts as a buffer, absorbing the impact and preventing costly repairs or replacements. Picture this: you’re performing a set of deadlifts, and you accidentally lose your grip on the bar. Instead of the sickening crunch of metal on concrete, you hear a reassuring thud as the flooring does its job. That peace of mind alone is worth the investment.
Furthermore, dedicated gym flooring offers superior grip compared to slick concrete, especially when wet from sweat or spilled water. This enhanced traction significantly reduces the risk of slips and falls, allowing you to maintain proper form and focus on your workout. Consider the stability needed during dynamic exercises like burpees or box jumps. Slipping on concrete could lead to a nasty sprain or worse. A textured, slip-resistant surface provides the confidence you need to push your limits safely and effectively.
Ultimately, investing in appropriate flooring transforms your home gym from a bare-bones space into a professional-grade training environment. It’s not just about aesthetics (though it certainly enhances the look), it’s about safety, performance, and longevity. Think of it as an essential component of your overall fitness strategy – a way to protect your body, your equipment, and your peace of mind, allowing you to fully embrace your fitness goals.
Understanding Different Types of Concrete Subfloors
Think of your concrete floor as the foundation for everything that’s about to happen in your gym. Is it a smooth, even surface, or does it have cracks and imperfections? A flawless concrete slab makes your flooring choices a whole lot easier and the installation process smoother. Imagine trying to lay down interlocking tiles on a floor with deep cracks – you’d end up with an uneven surface and potentially damaged tiles.
Not all concrete is created equal! Some concrete floors might have a moisture problem. Before you even think about rolling out your gym flooring, it’s crucial to test for moisture. A simple plastic sheet test can reveal if moisture is rising from the concrete, which could lead to mold or mildew under your new flooring. Nobody wants a gym with that kind of hidden hazard!
Another thing to consider is the age of your concrete. Older concrete can sometimes be brittle or dusty. A thorough cleaning and perhaps a concrete sealer might be necessary before you lay down your gym flooring. Think of it as prepping your canvas before you start painting – a clean and stable base ensures the best results.
Finally, consider whether your concrete floor is level. A significant slope can make exercises like squats or deadlifts feel unstable and unsafe. Self-leveling concrete compounds can be used to correct minor imperfections and create a perfectly flat surface, guaranteeing a safer and more effective workout space.
Prioritizing Key Features in Your Home Gym Flooring
Imagine dropping a heavy dumbbell on your brand-new flooring. Ouch! Impact absorption is key, especially if you plan on lifting weights. Look for flooring options with high density and thickness to protect your concrete subfloor and your joints. Think of it as a built-in shock absorber for your workouts.
Noise reduction is another important feature, especially if you live in an apartment or have family members nearby. The clanging of weights or the thud of a treadmill can be disruptive. Flooring with sound-dampening properties can make your gym more peaceful for everyone. Imagine working out at 6 AM without waking up the entire house!
Durability is essential for withstanding the wear and tear of daily workouts. Look for flooring that is resistant to scratches, dents, and tears. High-traffic areas, like where you place your treadmill or weight rack, will need extra protection. Think of it as an investment that will save you money in the long run by avoiding frequent replacements.
Consider the ease of cleaning and maintenance. Gyms can get sweaty and dirty quickly. Flooring that is easy to wipe down and disinfect will save you time and effort. Look for non-porous materials that resist staining and odor. Imagine spending less time cleaning and more time crushing your fitness goals!
Installation Methods: DIY vs. Professional
So, you’ve picked out your dream gym flooring – now comes the installation. If you’re a DIY enthusiast, interlocking tiles or rolled rubber are often manageable projects. Watch some tutorial videos, gather the necessary tools, and take your time. Imagine the satisfaction of building your own gym from the ground up!
For more complex installations, like poured rubber or custom-cut vinyl, it might be worth hiring a professional. They have the experience and expertise to ensure a flawless finish and avoid costly mistakes. Think of it as investing in peace of mind – knowing the job is done right the first time.
Consider the complexity of your space. If your gym has unusual angles or requires precise cuts, professional installation might be the way to go. Improperly installed flooring can lead to gaps, uneven surfaces, and premature wear. Imagine avoiding the frustration of trying to fit a square peg in a round hole!
Think about the time commitment. DIY projects can take longer than expected, especially if you’re new to home improvement. If you’re short on time or want to get your gym up and running quickly, hiring a professional can be a worthwhile investment. Imagine spending your weekends working out instead of wrestling with flooring!
Maintaining and Caring for Your Home Gym Flooring
Regular cleaning is crucial for keeping your gym flooring in top condition. Sweep or vacuum frequently to remove dust and debris. For deeper cleaning, use a mild detergent and water. Avoid harsh chemicals that can damage the flooring. Imagine the satisfaction of walking into a clean and inviting workout space!
Address spills immediately to prevent staining. Use a clean cloth to blot up the spill and then clean the area with a mild detergent. For stubborn stains, try a specialized flooring cleaner. Think of it as a quick response that will save you from long-term headaches.
Protect your flooring from heavy equipment by using equipment mats or pads. This will help distribute the weight and prevent dents or scratches. Consider placing mats under treadmills, weight benches, and other heavy items. Imagine preventing costly damage with a simple and affordable solution!
Periodically inspect your flooring for signs of wear and tear. Address any issues promptly to prevent them from worsening. Repair any cracks or tears as soon as possible. Think of it as preventative maintenance that will extend the life of your gym flooring and keep your workout space safe.
Your Guide to Choosing the Best Flooring for Home Gyms Over Concrete
Hey there, fitness enthusiast! So, you’re planning to build a home gym over that cold, unforgiving concrete slab, huh? Awesome! Having a dedicated workout space is a game-changer. But before you start pumping iron, let’s talk flooring. Choosing the right flooring is crucial for comfort, safety, and the overall longevity of your equipment. It’s not just about aesthetics; it’s about creating a functional and motivating environment where you can crush your goals.
Choosing the perfect flooring can feel overwhelming with so many options out there. Don’t sweat it! I’m here to be your guide, breaking down the key factors you need to consider to find the best flooring for home gyms over concrete that suits your needs and budget. Let’s dive in!
Impact Absorption: Protecting Your Joints and Equipment
First things first, think about impact. Concrete is, well, concrete. It offers absolutely zero give. That’s a recipe for joint pain, especially if you’re doing high-impact exercises like jumping jacks, burpees, or plyometrics. Imagine repeatedly landing on concrete – your knees, ankles, and back will scream in protest! Good flooring acts as a shock absorber, reducing the stress on your body and allowing you to work out harder and longer without risking injury.
Beyond your own well-being, impact absorption also protects your equipment. Dropping weights directly on concrete can damage both the floor and your expensive dumbbells or barbells. The best flooring for home gyms over concrete will cushion the blow, preventing cracks, dents, and other costly repairs. Look for materials with a good thickness and density to ensure adequate impact absorption.
Durability: Withstanding the Wear and Tear
Let’s be honest, home gyms take a beating. Weights get dropped, shoes scuff, and sweat happens (a lot!). Your flooring needs to be tough enough to withstand this constant wear and tear. It needs to be resistant to scratches, dents, and tears, especially if you plan on incorporating heavy equipment like treadmills or squat racks.
Think about the types of workouts you’ll be doing. Are you mostly into cardio? Or will you be focusing on heavy weightlifting? The more intense your workouts, the more durable your flooring needs to be. Don’t skimp on quality here. Investing in durable flooring upfront will save you money and headaches in the long run by avoiding frequent replacements.
Thickness and Density: Finding the Right Balance
Okay, let’s get a little technical. Thickness and density are key indicators of flooring performance, especially when it comes to impact absorption and durability. Thicker flooring generally provides better cushioning, while denser materials tend to be more resistant to damage. However, there’s a sweet spot to aim for.
Too thin, and you won’t get the necessary impact absorption. Too thick, and the flooring might feel too soft or unstable, especially for exercises that require balance. The ideal thickness and density will depend on your specific workout routine and the weight of your equipment. Generally, for home gyms over concrete, a thickness of at least 3/8 inch is recommended, but consider going thicker if you plan on heavy lifting.
Ease of Installation: DIY or Professional Help?
Unless you’re a seasoned contractor, ease of installation is a major factor to consider. Some flooring options, like interlocking tiles, are designed for DIY installation, making them a quick and easy way to transform your space. Others, like poured rubber, require professional installation, which will add to the overall cost.
Think about your skill level and how much time you’re willing to invest in the installation process. If you’re not comfortable with DIY projects, it’s best to hire a professional to ensure a proper installation. A poorly installed floor can lead to problems down the road, like uneven surfaces or gaps that collect dirt and debris.
Maintenance and Cleaning: Keeping it Fresh
Let’s face it, cleaning is never fun, but it’s a necessary evil in any home gym. Your flooring will inevitably get covered in sweat, dust, and who knows what else. Choose a material that’s easy to clean and maintain to keep your gym looking and smelling fresh.
Look for flooring that’s water-resistant and can be easily wiped down with a damp cloth or mop. Avoid materials that are porous or have intricate textures, as these can trap dirt and bacteria. Regular cleaning will not only keep your gym looking its best but also prevent the growth of mold and mildew, which can be harmful to your health.
Cost: Balancing Quality and Budget
Ah, the dreaded budget. Flooring can be a significant investment, so it’s important to set a realistic budget and stick to it. Prices vary widely depending on the material, thickness, and quality. It’s tempting to go for the cheapest option, but remember that you often get what you pay for.
Consider the long-term cost of ownership. Cheaper flooring might require more frequent repairs or replacements, ultimately costing you more in the long run. Invest in high-quality flooring that will last for years and provide the performance you need. Look for sales, discounts, and bulk buying options to save money without compromising on quality. Remember, finding the best flooring for home gyms over concrete is about finding the best value within your budget.
Aesthetics: Creating a Motivating Space
Finally, don’t underestimate the importance of aesthetics. Your home gym should be a space that motivates you to work out. Choose flooring that you find visually appealing and that complements the overall design of your home.
Consider the color, texture, and pattern of the flooring. Darker colors tend to hide dirt and scuff marks better, while lighter colors can brighten up a space. Think about the overall vibe you’re trying to create. Do you want a sleek and modern look? Or a more rugged and industrial feel? The right flooring can set the tone for your entire workout experience.
FAQs
What kind of flooring is best to protect my concrete subfloor?
Great question! Protecting your concrete subfloor is crucial, especially in a home gym. You really want something that can absorb impact and prevent cracks or chips. Durable rubber flooring, like rubber tiles or rolls, is a fantastic option. They are designed to withstand heavy weights and high-impact activities, creating a protective layer between your equipment and the concrete.
Another good choice is interlocking foam tiles, also known as EVA foam. While not as heavy-duty as rubber, they offer excellent cushioning and are super easy to install and replace. The right choice really depends on how intense your workouts will be, but both will give you a good level of protection.
How thick should my home gym flooring be?
That’s a smart thing to consider! The ideal thickness depends on the types of exercises you’ll be doing and the weight of your equipment. For general workouts with lighter weights and bodyweight exercises, a thickness of around 3/8 inch to 1/2 inch (9mm to 12mm) might be sufficient. This will provide adequate cushioning and protection for both you and your floor.
However, if you’re planning on doing heavy weightlifting or using equipment like squat racks, you’ll definitely want to go thicker, aiming for at least 3/4 inch (19mm) or even thicker. This will ensure that your flooring can handle the impact of dropped weights without damaging the concrete underneath. Think about it as an investment to avoid expensive repairs down the line!
Are rubber tiles or rubber rolls better for a home gym?
That’s a common dilemma! Both rubber tiles and rubber rolls have their advantages, and the best choice for you depends on your specific needs and preferences. Rubber tiles are generally easier to install, especially if you’re working in a smaller space or have an irregular room shape. They also allow for easier replacement of damaged sections since you’re only swapping out one tile.
Rubber rolls, on the other hand, provide a more seamless and uniform surface, which can be aesthetically pleasing and reduce the risk of tripping. They’re a good option for larger gym areas where you want to minimize seams. Think about the size and layout of your gym, as well as your personal DIY skills, when making your decision. Either choice will provide a solid base for your workout routine!
Are foam tiles durable enough for a home gym?
Foam tiles definitely have their place in a home gym, especially for exercises that don’t involve extremely heavy weights. They’re great for activities like yoga, Pilates, or bodyweight training because of the cushioning. Plus, they are usually the most budget-friendly option.
However, keep in mind that foam tiles aren’t as durable as rubber flooring when it comes to withstanding heavy equipment or dropped weights. Over time, they can compress or tear if subjected to excessive pressure. If you plan on lifting significant weight, you might want to consider rubber flooring or reserve the foam tiles for a specific area dedicated to lighter activities. Think of it as building zones in your gym!
How easy is it to install home gym flooring myself?
Good news! Installing home gym flooring is usually a pretty straightforward DIY project. Interlocking foam or rubber tiles are particularly easy to install, as they simply snap together like puzzle pieces. This can save you money on professional installation costs, and it’s actually quite satisfying to see the transformation of your space.
Rubber rolls might require a bit more effort, as they may need to be glued down to the concrete subfloor for a secure fit. However, even this can be manageable with the right tools and instructions. Just be sure to thoroughly clean the concrete surface beforehand and follow the manufacturer’s guidelines for the adhesive. YouTube is your friend here!
How do I clean and maintain my home gym flooring?
Keeping your home gym flooring clean is important for both hygiene and longevity. Luckily, it’s usually a simple process. For rubber flooring, you can typically use a mild soap and water solution to wipe down the surface. Avoid harsh chemicals or abrasive cleaners, as these can damage the material.
For foam tiles, regular vacuuming is a good way to remove dust and debris. You can also wipe them down with a damp cloth and mild detergent. Be sure to let the flooring dry completely after cleaning to prevent mold or mildew growth. A little bit of regular maintenance goes a long way in keeping your gym looking its best.
Is there anything I need to do to prep my concrete floor before installing the gym flooring?
Absolutely! Proper preparation is key to a successful and long-lasting flooring installation. Start by thoroughly cleaning the concrete surface to remove any dirt, dust, or debris. A good sweep and vacuum will do the trick, or you could even use a concrete floor cleaner for a deeper clean.
Next, inspect the concrete for any cracks or imperfections. Fill in any cracks with a concrete patching compound and allow it to dry completely before proceeding. You want a smooth and even surface for your new flooring to adhere to or sit on. Taking these steps will ensure that your gym flooring looks great and performs well for years to come!
Final Words
Alright, feeling ready to transform that concrete slab into your dream workout space? You’ve armed yourself with the knowledge to choose the best flooring for home gyms over concrete, considering everything from cushioning to budget. Picture yourself crushing those personal bests, knowing your foundation is solid and supportive. No more excuses – just a dedicated space where you can focus, push yourself, and achieve those fitness goals you’ve been dreaming of.
Now it’s time to take action! Don’t let decision paralysis hold you back. Review your notes, compare your favorite options, and trust your gut. Remember, this is an investment in your health, your well-being, and your ability to live a stronger, more energetic life. Get that flooring ordered, and get ready to sweat!