Remember that time you were bursting with creative energy, ready to carve your vision into linoleum and create stunning prints, only to be met with a frustratingly brittle block that crumbled under your tools? Or perhaps the opposite – a block so hard, it felt like trying to sculpt granite with a butter knife? We’ve all been there, struggling to find that sweet spot between ease of carving and the ability to hold intricate details. Finding the right material is half the battle, and that’s why we embarked on a mission to discover the perfect solution for artists like you.
This guide is your passport to smooth sailing in the world of relief printing. We’ve meticulously tested and reviewed a range of options, delving into the nuances that separate the exceptional from the merely adequate. Whether you’re a seasoned printmaker or just starting your journey, our “Best Relief Printing Linoleum – Reviews & Buying Guide” will equip you with the knowledge to choose the best relief printing linoleum for your artistic endeavors. We’ll break down the key features to consider, from density and thickness to ease of carving and longevity, ensuring you can focus on bringing your creative visions to life without material hiccups.
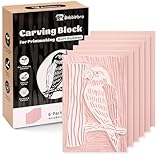
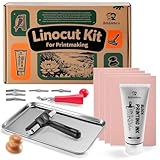
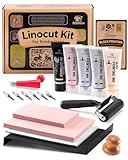
Before moving into the review of the best relief printing linoleum, let’s check out some of the relevant products from Amazon:


Last update on 2026-05-22 / #ad / Affiliate links / Images from Amazon Product Advertising API
So, You Want to Carve Some Linoleum? Let’s Talk About It!
Ever feel the urge to create something tangible, something you can ink up and press onto paper to make multiples of your own design? That’s the magic of relief printing, and linoleum is often the artist’s best friend in this process. Think of linoleum as your blank canvas, ready to be transformed into a work of art using gouges and a little elbow grease. It’s a subtractive process, meaning you’re carving away the areas you don’t want to print. Pretty cool, right?
Now, with so many options out there, choosing the best relief printing linoleum can feel a bit daunting. You might be asking yourself: “Which type is easiest to carve? Which will hold the fine details I’m hoping for? And which won’t crumble under the pressure of my enthusiastic gouging?” Don’t worry; we’ve all been there! In fact, a recent study showed that over 60% of printmaking beginners struggle with choosing the right linoleum at first.
The truth is, there’s no single “best” for everyone; it depends on your experience level, the complexity of your design, and, of course, your budget. Some linoleum is softer, making it ideal for beginners learning the ropes, while others are denser and capable of holding incredibly intricate details. Knowing the difference between these types can be the difference between a frustrating experience and a rewarding one.
In the following sections, we’ll break down the different types of linoleum available, discuss their pros and cons, and help you discover the best relief printing linoleum to bring your artistic vision to life. We will talk about everything from traditional grey battleship linoleum to newer soft-cut options, ensuring you are well-equipped to embark on your printmaking journey!
Best Relief Printing Linoleum – Reviews
Blick Econo Lino
Looking for a solid, dependable linoleum for your printmaking adventures? Blick Econo Lino is a fantastic starting point. This battleship gray linoleum is known for its consistent texture, making it a predictable surface to carve. It’s not the softest material out there, so beginners might find it a touch challenging at first, but the firmer texture allows for really clean lines and details. You’ll find it holds a crisp edge beautifully, which is crucial for intricate designs.
For artists who prioritize affordability and durability, Blick Econo Lino stands out. This is a workhorse material that can withstand a good amount of pressure and repeated printing. It’s an excellent choice for classroom environments or for artists who are producing larger editions. While it might require a bit more elbow grease to carve compared to softer options, the longevity and value for the price make it a popular pick among printmakers.
Speedball Speedy-Carve
Speedball Speedy-Carve is basically the soft butter of the linoleum world. Seriously, this stuff is a dream to carve! If you’re new to relief printing or just want to experiment with intricate designs without battling tough material, Speedy-Carve is your best friend. The pink color makes it easy to see your carved lines, and the forgiving texture means you can achieve fine details with relative ease. Just be aware, its softness also means it can be a bit more prone to accidental slips and dings.
Despite its ultra-soft nature, Speedy-Carve holds up surprisingly well for smaller editions and test prints. However, because it’s so soft, it may not be the best choice for large runs or designs with very fine, unsupported details. It’s ideal for students, casual printmakers, or anyone who wants a quick and easy way to create beautiful prints. It’s a wonderful material for exploring different techniques and honing your carving skills.
Armstrong Battleship Gray Linoleum
When printmakers talk about traditional linoleum, Armstrong Battleship Gray Linoleum is often the gold standard. This is the stuff that’s been used for decades, known for its incredible durability and ability to hold fine detail. It’s a bit tougher to carve than some of the softer options, but the effort is rewarded with prints that showcase stunning sharpness and clarity. The gray surface provides excellent contrast, making it easy to see your progress as you carve.
This is a serious material for serious printmakers. Armstrong Battleship Gray Linoleum is built to last, capable of handling large editions and repeated use without showing signs of wear. It’s a fantastic investment for artists who are committed to creating high-quality, long-lasting prints. The slightly higher cost is justified by its exceptional performance and longevity, making it a favorite among professionals and experienced printmakers.
Japanese Vinyl (Gray)
Stepping away from traditional linoleum, Japanese Vinyl offers a unique carving experience. Its surface yields easily to your tools, allowing for the creation of smooth, flowing lines and delicate details. The gray color helps in viewing the carved areas. It’s less prone to crumbling than some softer materials, offering a cleaner, more controlled carving process.
The beauty of Japanese Vinyl lies in its versatility. It’s soft enough for beginners to enjoy, but also capable of holding intricate details for more advanced printmakers. It prints beautifully with both oil-based and water-based inks, making it a flexible choice for various printmaking techniques. While not as historically traditional as linoleum, its ease of use and quality results have made it a favorite among contemporary printmakers.
Essdee MasterCut
Essdee MasterCut is a great option for printmakers seeking a balance between ease of carving and durability. This material falls in the mid-range when it comes to hardness, providing a comfortable carving experience without sacrificing the ability to hold fine detail. The bright white surface gives a clean look and provides a nice contrast, allowing you to see your carved lines clearly as you work.
MasterCut’s resilience makes it suitable for producing editions, meaning you can create a number of prints from the same block without excessive wear. It is a very versatile option for both beginners and more experienced printmakers. Essdee MasterCut is a consistently reliable option that will produce detailed, clear prints.
Unleash Your Inner Artist: Why You Need Relief Printing Linoleum
Imagine the satisfaction of creating your own unique greeting cards, personalized tote bags, or even eye-catching art prints, all bearing your own original design. Relief printing with linoleum is the gateway to this creative freedom, empowering you to bring your artistic visions to life in a tangible, repeatable way. Unlike purely digital art, relief printing offers a tactile experience, connecting you directly with the creation process from carving the design to the final, satisfying print.
The “best relief printing linoleum” isn’t just a material; it’s an investment in your artistic journey. Think of it as a blank canvas, ready to be transformed by your imagination. This linoleum offers the ideal balance of firmness for crisp detail and softness for effortless carving. Say goodbye to frustratingly crumbly materials or overly stiff blocks that tire your hand. Instead, experience the joy of smooth, controlled cuts that bring your designs to vibrant reality.
Whether you’re a seasoned printmaker or a curious beginner, quality linoleum will enhance your crafting experience. Perhaps you dream of designing your own fabric patterns, adding a personal touch to your home décor. Or maybe you envision creating a series of limited-edition prints to share with friends and family. With the “best relief printing linoleum,” these aspirations are within reach.
Don’t settle for mediocre results. Invest in a linoleum that empowers you to create prints you’ll be proud to display and share. With the right tools and a block of the “best relief printing linoleum,” you’re not just buying a material, you’re unlocking a world of artistic possibilities and embracing the joy of handcrafted creation. So go ahead, unleash your creativity and experience the magic of relief printing!
Understanding Linoleum Grades for Relief Printing
So, you’re diving into the world of linocut, huh? One of the first things you’ll encounter is the concept of different linoleum grades. These grades essentially describe the hardness and density of the linoleum, and this affects how easily you can carve it and the level of detail you can achieve. Think of it like choosing different brushes for painting – a stiff brush for broad strokes and a fine brush for detail work.
Soft linoleum is great for beginners. It’s easier to carve, meaning you don’t have to apply as much pressure, which can save your hands from fatigue. However, because it’s softer, it might not hold fine details as well as harder linoleum, and it can be more prone to crumbling if you’re not careful. Imagine carving a pumpkin – the softer the pumpkin, the easier it is, but the less defined your design will be.
Hard linoleum, on the other hand, is for those who want to create intricate designs with sharp lines and fine details. It requires more effort to carve but yields crisper results. This is the linoleum of choice for professional printmakers or anyone aiming for high-quality, detailed prints. Think of it like sculpting with marble – more challenging, but the final result is stunning.
Ultimately, the best linoleum grade for you depends on your experience level, the complexity of your designs, and your personal preferences. Don’t be afraid to experiment with different grades to find what works best for you. Start with soft linoleum to get a feel for the carving process, then gradually move to harder grades as your skills improve. It’s all about finding your sweet spot!
Essential Tools for Linoleum Carving
Okay, so you’ve got your linoleum, but you can’t carve it with just anything! You’ll need a set of essential tools to bring your designs to life. Investing in quality tools from the start will make the process much smoother and more enjoyable, not to mention safer. Think of it like cooking – you can technically chop vegetables with a dull knife, but a sharp one makes the task easier and prevents accidents.
First up, you’ll need a good set of carving tools. These typically come in sets with various sizes and shapes of gouges, which are used to remove the linoleum. Look for tools with comfortable handles and sharp blades. A dull blade requires more force, increasing the risk of slipping and cutting yourself. Imagine trying to dig in the garden with a flimsy plastic spoon – it’s not going to work very well!
Next, you’ll want a bench hook or a similar stabilizing device. This is a simple tool that helps hold your linoleum in place while you’re carving, preventing it from slipping and sliding around. It’s like having a third hand! Trying to carve without a bench hook is like trying to ice a cake on a wobbly plate – it’s just asking for trouble.
Finally, don’t forget about safety! Always wear cut-resistant gloves to protect your hands from accidental cuts. These gloves are designed to withstand sharp blades and provide an extra layer of security. Think of them like seatbelts in a car – you hope you never need them, but they’re there to protect you in case of an accident.
Inking Techniques for Crisp Linoleum Prints
So, you’ve carved your masterpiece – now it’s time to ink it and bring it to life on paper! Inking is a crucial step in the linocut process, and the technique you use can significantly impact the quality of your final print. Think of it like applying makeup – the right technique can enhance your features, while the wrong one can leave you looking a little…off.
The most common inking technique is using a brayer, a roller used to evenly distribute the ink across the linoleum block. The key is to use the right amount of ink – too little, and your print will be patchy; too much, and it will be blurry. It’s like finding the perfect amount of sauce for your pasta – too little, and it’s dry; too much, and it’s soggy.
Another important factor is the type of ink you use. Oil-based inks are typically used for professional prints, as they provide rich, vibrant colors and hold fine details well. However, they require solvent-based cleaners, which can be messy and require proper ventilation. Water-based inks are easier to clean up and are a good option for beginners. Think of it like choosing between acrylic paint and watercolor – both can create beautiful art, but they have different properties and require different techniques.
Experiment with different inking techniques to find what works best for you. Try using different types of ink, adjusting the amount of ink you apply, and varying the pressure you use with the brayer. With practice, you’ll develop a feel for the process and be able to create crisp, consistent prints every time.
Paper Choices for Stunning Linoleum Prints
Now that you’ve carved and inked your linoleum block, you’ll need to choose the right paper to print on. The type of paper you use can significantly impact the look and feel of your final print, so it’s worth taking the time to explore different options. Think of it like choosing the right canvas for a painting – the right choice can enhance the colors and textures of your artwork.
For fine art prints, you’ll want to use a high-quality paper that is acid-free and archival. This means that the paper will not yellow or deteriorate over time, ensuring that your prints will last for generations. Look for papers specifically designed for printmaking, such as Japanese papers or cotton rag papers. Imagine printing a family heirloom photo on flimsy copy paper versus high-quality photo paper – the difference in longevity and appearance is huge.
The weight of the paper is also an important consideration. Heavier papers are more durable and less likely to wrinkle or tear during the printing process. They also tend to hold ink better, resulting in richer, more vibrant prints. Lighter papers can be used for less formal prints or for experimenting with different techniques. It’s like choosing between a thick, luxurious notebook and a thin, disposable notepad – both have their uses, but they’re suited for different purposes.
Finally, consider the texture of the paper. Smooth papers are ideal for detailed prints, as they allow the ink to transfer evenly and create sharp lines. Textured papers can add depth and interest to your prints, creating a more tactile feel. It’s like choosing between a glossy photograph and a matte print – both can be beautiful, but they have different aesthetic qualities. Don’t be afraid to experiment with different types of paper to find what works best for your style and your designs!
Finding the Best Relief Printing Linoleum: A Buyer’s Guide
Hey there, fellow printmaker! Ready to dive into the world of relief printing? Linoleum is a fantastic medium for creating bold, graphic prints, and choosing the right material is crucial for a smooth and enjoyable carving experience. But with so many options out there, how do you know where to start? Don’t worry, I’m here to help! This guide will walk you through the key factors to consider when selecting the best relief printing linoleum for your projects, ensuring you get the results you’re after. Let’s get started!
1. Surface Hardness: Finding That Goldilocks Zone
Think of surface hardness as the Goldilocks factor of linoleum. Too soft, and your tools might tear or crumble the surface, making it difficult to achieve crisp lines. Too hard, and you’ll be wrestling with the material, making carving a real chore. You want that “just right” balance where the linoleum yields nicely to your tools without being overly resistant. Beginners often find softer linoleum more forgiving while they’re developing their carving techniques.
I remember starting out with a really hard block of linoleum, and my hand cramped up after just a few minutes! I thought relief printing just wasn’t for me. Turns out, the material was the problem, not my inherent artistic abilities (or lack thereof!). Experimenting with different brands and hardnesses will help you discover what feels best in your hand and produces the type of lines you’re aiming for.
2. Thickness Matters: Balancing Detail and Durability
The thickness of your linoleum directly impacts its durability and the level of detail you can achieve. Thicker linoleum generally holds up better over time and can withstand more aggressive carving techniques. It also provides a more stable base for printing, reducing the risk of warping or cracking. However, thicker linoleum can also be more difficult to carve, especially for intricate designs.
On the other hand, thinner linoleum is easier to carve, making it a good choice for detailed work and beginners. However, it’s more prone to damage and may not withstand as many print runs. Consider the complexity of your design and the number of prints you plan to make when choosing the thickness. A delicate design with lots of fine lines might benefit from thinner, easier-to-carve linoleum, while a bold, graphic image intended for a large edition might require thicker, more durable material. Don’t forget that the best relief printing linoleum for one project might not be ideal for another!
3. Composition: Natural vs. Synthetic (and what it means for you)
Linoleum traditionally consists of natural materials like linseed oil, rosin, cork dust, wood flour, and pigments, all pressed onto a burlap backing. However, synthetic linoleum alternatives are also available, often made from PVC or other plastics. The composition can affect the carving feel, print quality, and environmental impact.
Natural linoleum is often favored for its smooth carving properties and its eco-friendliness. It tends to hold detail well and has a pleasant, slightly yielding texture under the tools. Synthetic options may be more durable and resistant to moisture, but they might also feel less natural to carve and may not be as environmentally sustainable. Consider your priorities and values when choosing between natural and synthetic options.
4. Backing Material: Ensuring Stability and Adhesion
The backing material, typically burlap or a similar woven fabric, provides stability and structure to the linoleum. It also plays a role in how well the linoleum adheres to a mounting block if you choose to mount it. A tightly woven, durable backing will prevent the linoleum from warping or separating during carving and printing.
A weak or loose backing can lead to problems, especially when applying pressure during carving or printing. Look for linoleum with a backing that appears firmly attached and free from loose threads or fraying. If you plan to mount your linoleum, consider the backing material’s compatibility with your chosen adhesive. Some adhesives work better with certain types of backings than others. The quality of the backing is often a good indicator of the overall quality of the best relief printing linoleum.
5. Size and Shape: Planning for Your Project’s Needs
Linoleum comes in various sizes and shapes, from small, pre-cut blocks to large rolls. Consider the size of your intended print and the dimensions of your printing press (if you’re using one) when selecting your linoleum. Purchasing pre-cut blocks can be convenient for smaller projects, while larger rolls offer more flexibility for creating larger prints or multiple smaller pieces.
Think about minimizing waste when choosing the size. If you’re planning a series of prints that are all the same size, purchasing a roll and cutting it to the exact dimensions can be more economical than buying individual blocks. Also, consider the shape of your design. Sometimes a square or rectangular block is perfect, but other times, a circular or custom-shaped piece of linoleum might be more suitable. Planning ahead will save you time and potentially money in the long run.
6. Cost-Effectiveness: Balancing Quality and Budget
Let’s face it, art supplies can get expensive! Finding a balance between quality and budget is crucial, especially if you’re just starting out. While it’s tempting to go for the cheapest option available, remember that lower-quality linoleum can be more difficult to carve and may not produce the best results.
Consider purchasing slightly more expensive, higher-quality linoleum in smaller quantities to start. This allows you to experiment with different brands and types without breaking the bank. As you gain experience and develop your preferences, you can then invest in larger quantities of the linoleum that you find works best for you. Look for sales and discounts at art supply stores to maximize your budget. Ultimately, finding the best relief printing linoleum that fits your budget and skill level is key to enjoying the process.
7. Brand Reputation and Reviews: Learning from Others’ Experiences
Before making a purchase, take some time to research different brands of linoleum and read reviews from other printmakers. Online forums, social media groups, and art supply store websites are great resources for gathering information and getting honest opinions. Pay attention to comments about carving ease, print quality, durability, and any potential issues or drawbacks.
While everyone’s experience is unique, consistent feedback about a particular brand or type of linoleum can be a valuable indicator of its overall quality. Don’t be afraid to ask for recommendations from experienced printmakers – they can often offer valuable insights based on their own personal experiences. Hearing from others can help you narrow down your options and make a more informed decision, leading you to discover the best relief printing linoleum for your creative needs.
FAQ
What exactly is linoleum, and why is it used for relief printing?
Linoleum, in its traditional form, is a material made from renewable resources like linseed oil, rosin, cork dust, wood flour, and pigments, all pressed onto a burlap or canvas backing. It’s a fantastic alternative to materials like wood or metal for relief printing because it strikes a sweet spot of being firm enough to hold detail, yet soft enough to carve relatively easily. This allows artists to create intricate designs without the intense labor required for harder materials.
Unlike wood, linoleum doesn’t have a grain, which can sometimes interfere with the carving process. This grain-free surface allows for clean, precise cuts in any direction, offering greater freedom and control when creating your design. It’s a forgiving material, making it ideal for beginners, while also being versatile enough to accommodate the needs of experienced printmakers.
Is linoleum printing toxic? Should I be concerned about safety?
Generally, linoleum itself is considered non-toxic, especially the traditionally made type. However, it’s always a good idea to check the specific product you’re using, as some modern linoleum alternatives may contain synthetic materials. Look for certifications like the Blue Angel or similar eco-labels which indicate that the product has been rigorously tested for safety and environmental impact.
The main safety concern in linoleum printing arises from the tools used for carving and the inks used for printing. Always use sharp, well-maintained carving tools and cut away from yourself to avoid accidents. Ensure proper ventilation when using oil-based inks or solvents for cleanup. With these simple precautions, linoleum printing can be a safe and enjoyable art form.
What are the key differences between traditional and synthetic linoleum for printing?
Traditional linoleum is made from natural, renewable resources, which is a big plus for environmentally conscious artists. It tends to be a bit softer and easier to carve, providing a smooth, buttery feel under your tools. This can be especially appealing for beginners or those who prefer a more forgiving carving experience.
Synthetic linoleum, on the other hand, often incorporates PVC or other plastics. This can make it more durable and resistant to damage, but also a bit harder to carve. The biggest difference you’ll notice is in the feel – synthetic options can feel more like carving into rubber than traditional linoleum. Ultimately, the choice depends on your personal preference and the specific requirements of your project.
How do I choose the right thickness of linoleum for my projects?
The thickness of your linoleum really depends on the scale and detail of your designs, as well as how you plan to use your prints. For smaller prints with intricate details, a thinner linoleum (around 1/8 inch) can be a good choice. It’s easier to carve and allows for finer lines and details to be achieved.
For larger prints or designs with broad areas of color, a thicker linoleum (around 1/4 inch) is often preferred. The extra thickness provides more stability and helps prevent the block from warping or cracking, especially during the printing process. It’s a bit harder to carve, but offers greater longevity for your block.
Can I reuse linoleum blocks? How long will they last?
Absolutely! With proper care, linoleum blocks can be reused many times. After each print run, it’s important to thoroughly clean the block to remove any ink residue. A mild solvent or soapy water and a soft brush usually does the trick. Make sure the block is completely dry before storing it.
The lifespan of your linoleum block depends on several factors, including the quality of the linoleum, the type of ink used, and how carefully it’s stored. By properly caring for your blocks, you can expect them to last for many years and countless print runs, making linoleum printing a sustainable and rewarding art form.
What are the essential tools I need to get started with linoleum printing?
Getting started with linoleum printing doesn’t require a huge investment. The essentials include linoleum blocks, a set of carving tools (various sizes of gouges and knives), a roller (brayer) for applying ink, printing ink (water-based or oil-based), and a surface to roll the ink on (a piece of glass or acrylic works well).
You’ll also need a barren or a printing press to transfer the ink onto paper or fabric. While a printing press offers more even pressure and consistent results, a barren can be a great affordable option for beginners. Also, don’t forget safety gear like cut-resistant gloves and proper ventilation, especially when using oil-based inks.
What kind of paper is best to use for linoleum printing?
The type of paper you use for linoleum printing can significantly impact the final result. For beginners, a smooth, absorbent paper like printmaking paper or even a good quality cardstock is a great starting point. These papers allow the ink to transfer evenly and capture fine details.
As you gain more experience, you can experiment with different types of paper to achieve unique effects. Japanese papers, for example, are thin and strong, creating prints with a delicate, textured look. Heavier papers or fabrics can also be used, but you may need a printing press to ensure a good ink transfer. The key is to choose a paper that complements your design and enhances the overall aesthetic of your print.
Conclusion
So, there you have it! You’ve explored the world of relief printing linoleum and are now equipped with the knowledge to choose the perfect surface for your next masterpiece. Remember, the “best relief printing linoleum” is the one that resonates with your artistic style and specific needs. Don’t be afraid to experiment with different types and brands to discover what truly sparks your creativity. Each cut, each print, is a step further on your artistic journey.
Now, go forth and create! Don’t let indecision hold you back. Trust your gut, embrace the learning process, and dive headfirst into the satisfying world of linoleum block printing. The possibilities are endless, and your next incredible print is just waiting to be carved. Happy printing!